Dear Jane: TR-10 – Precious Gems

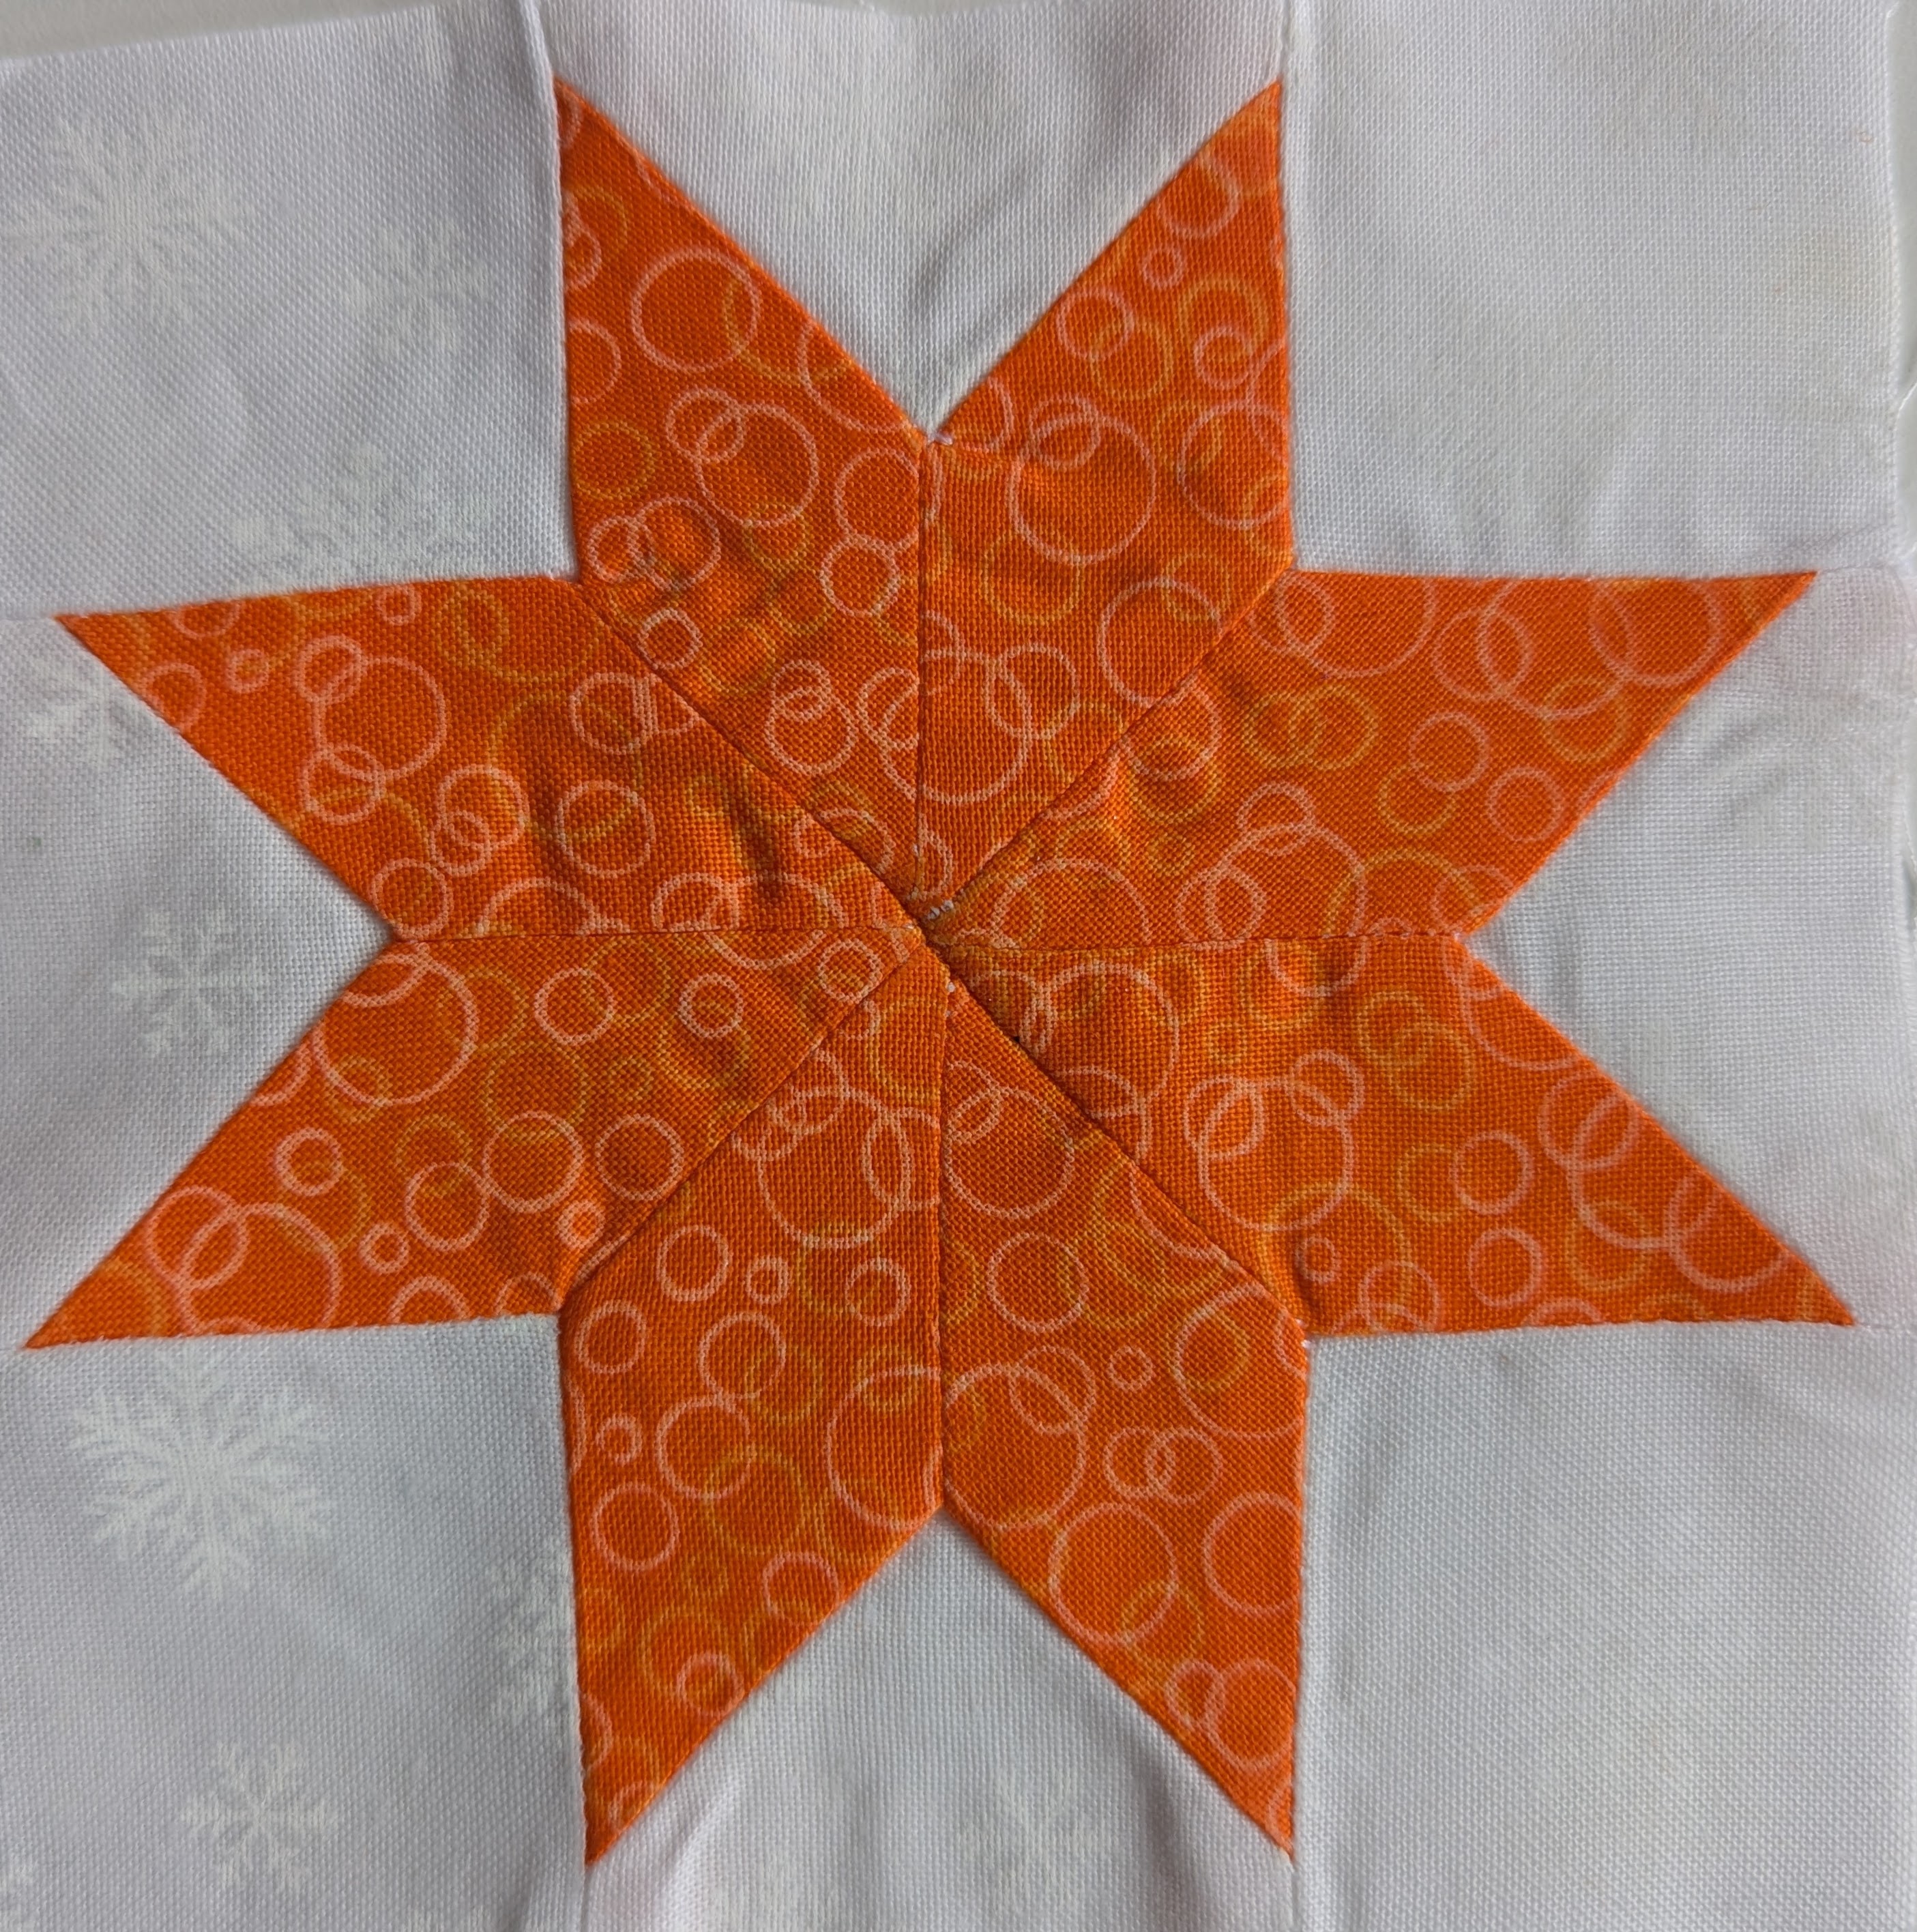
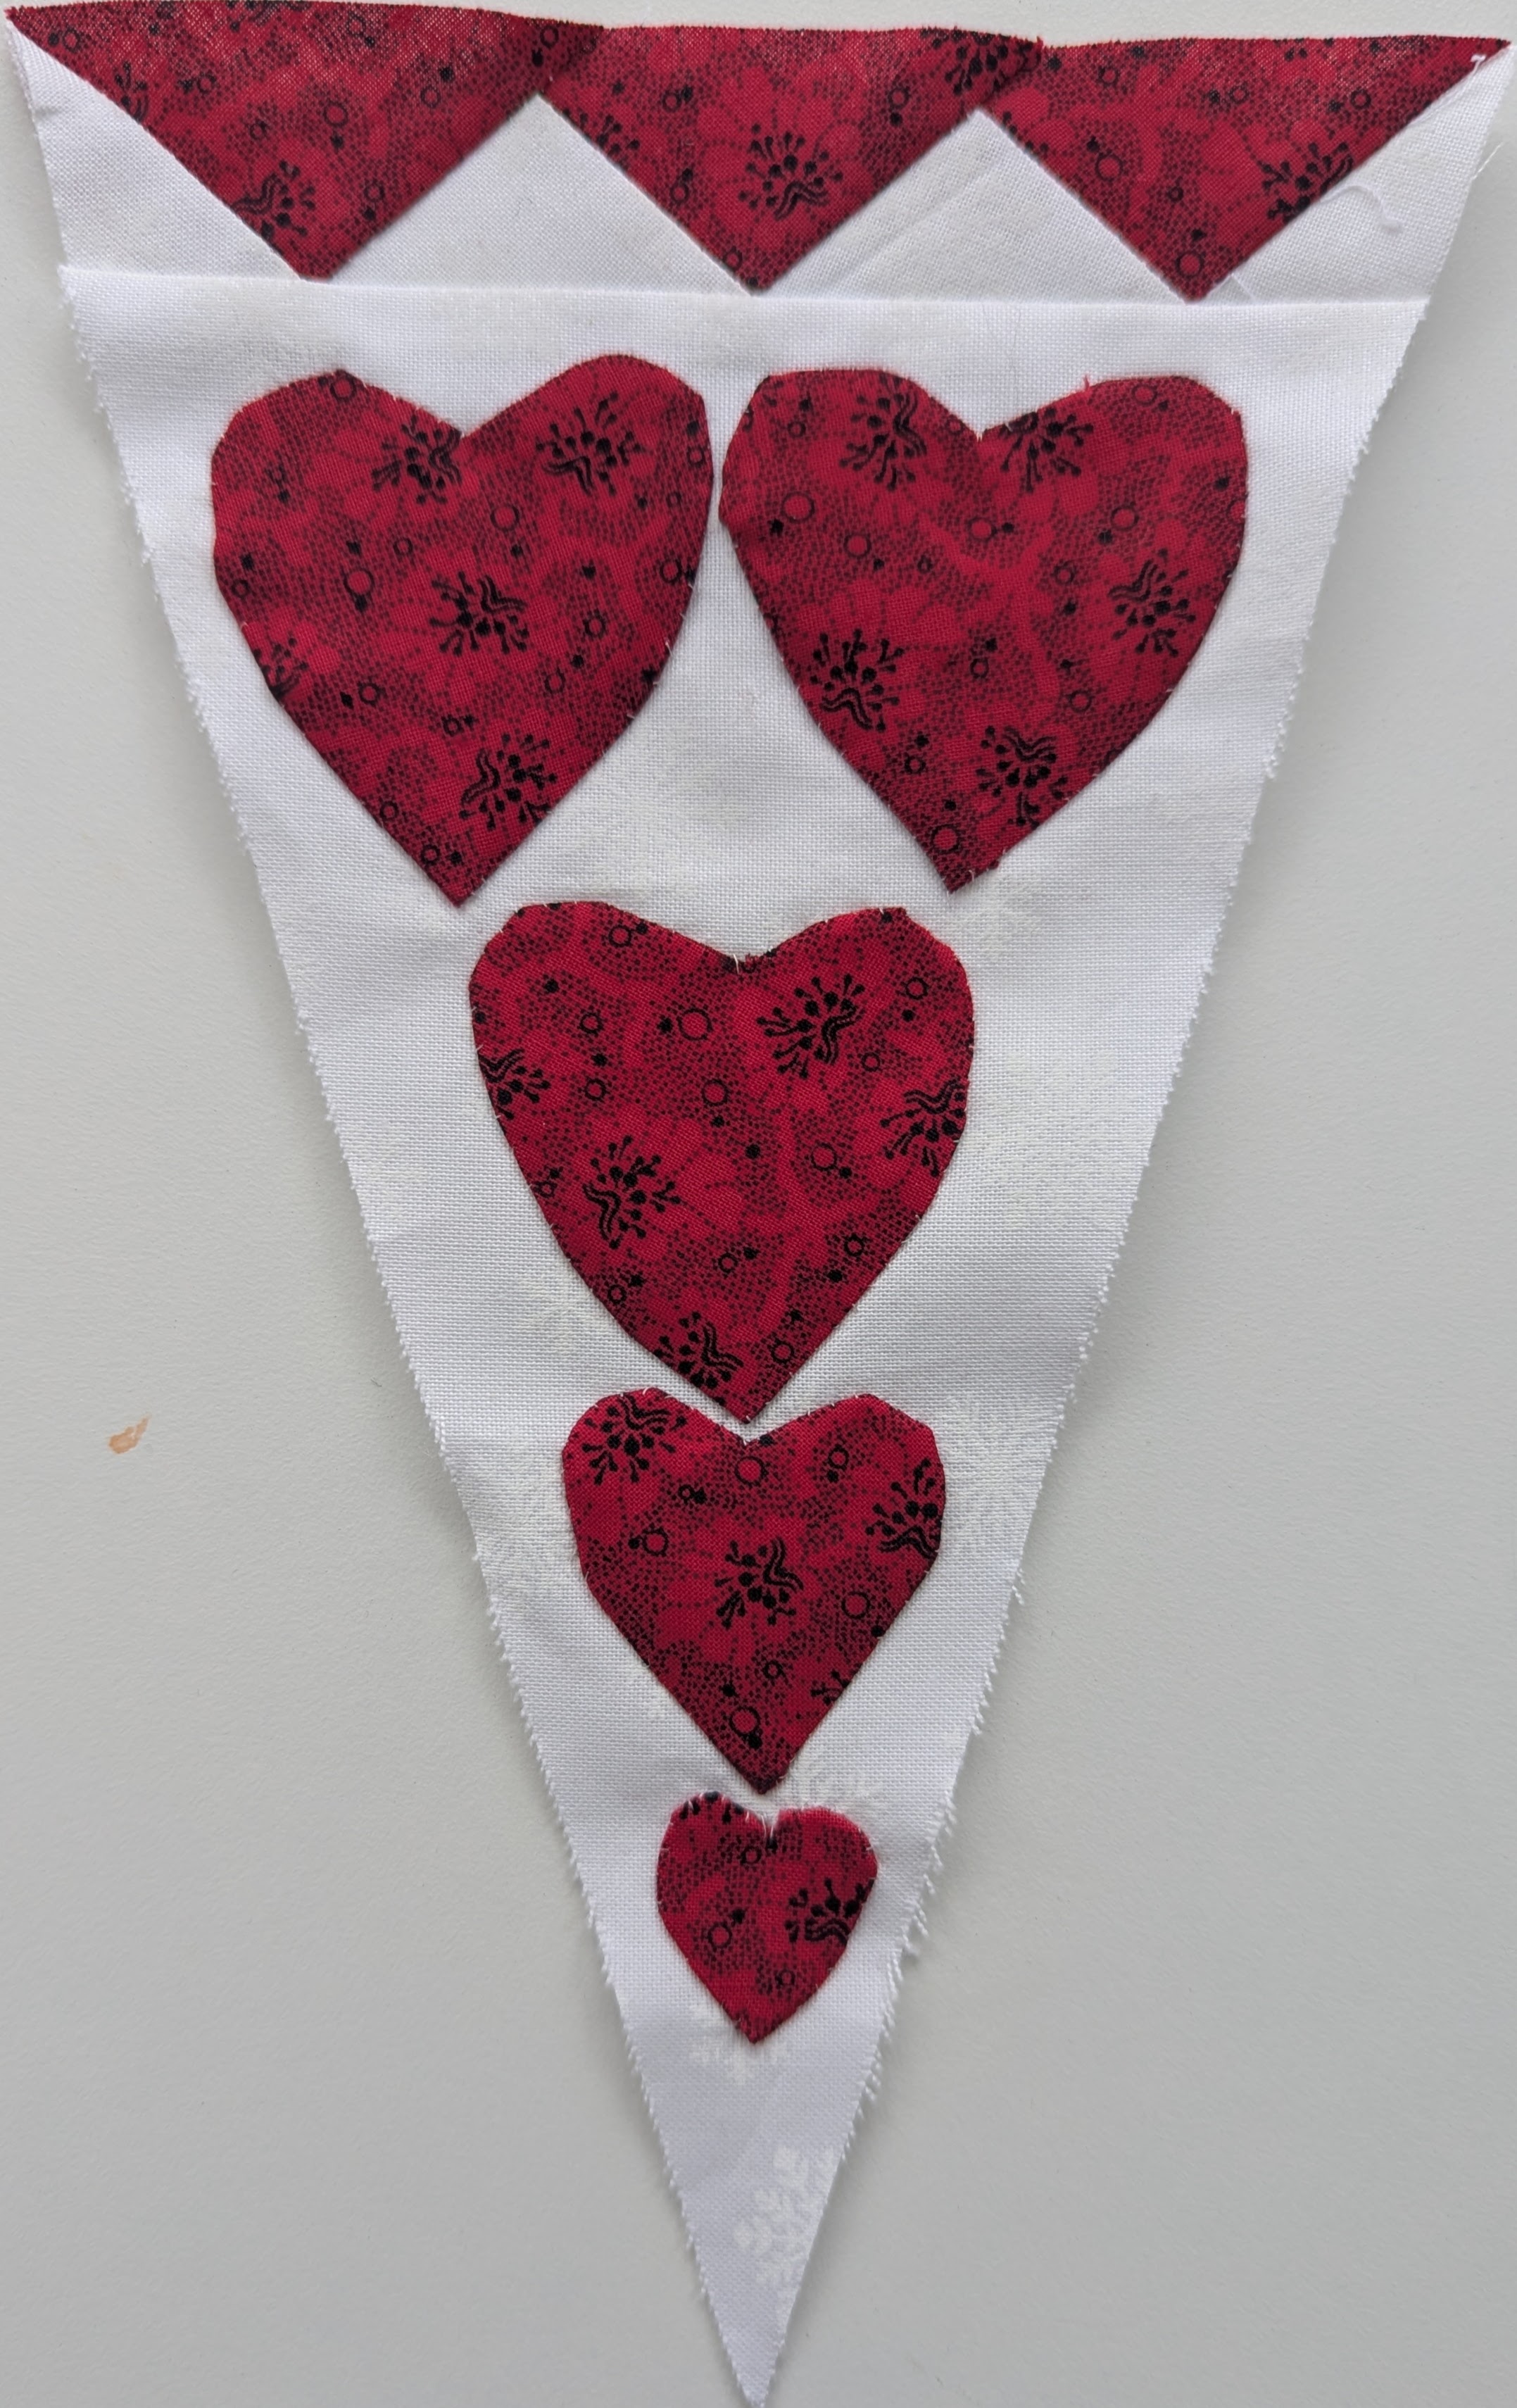
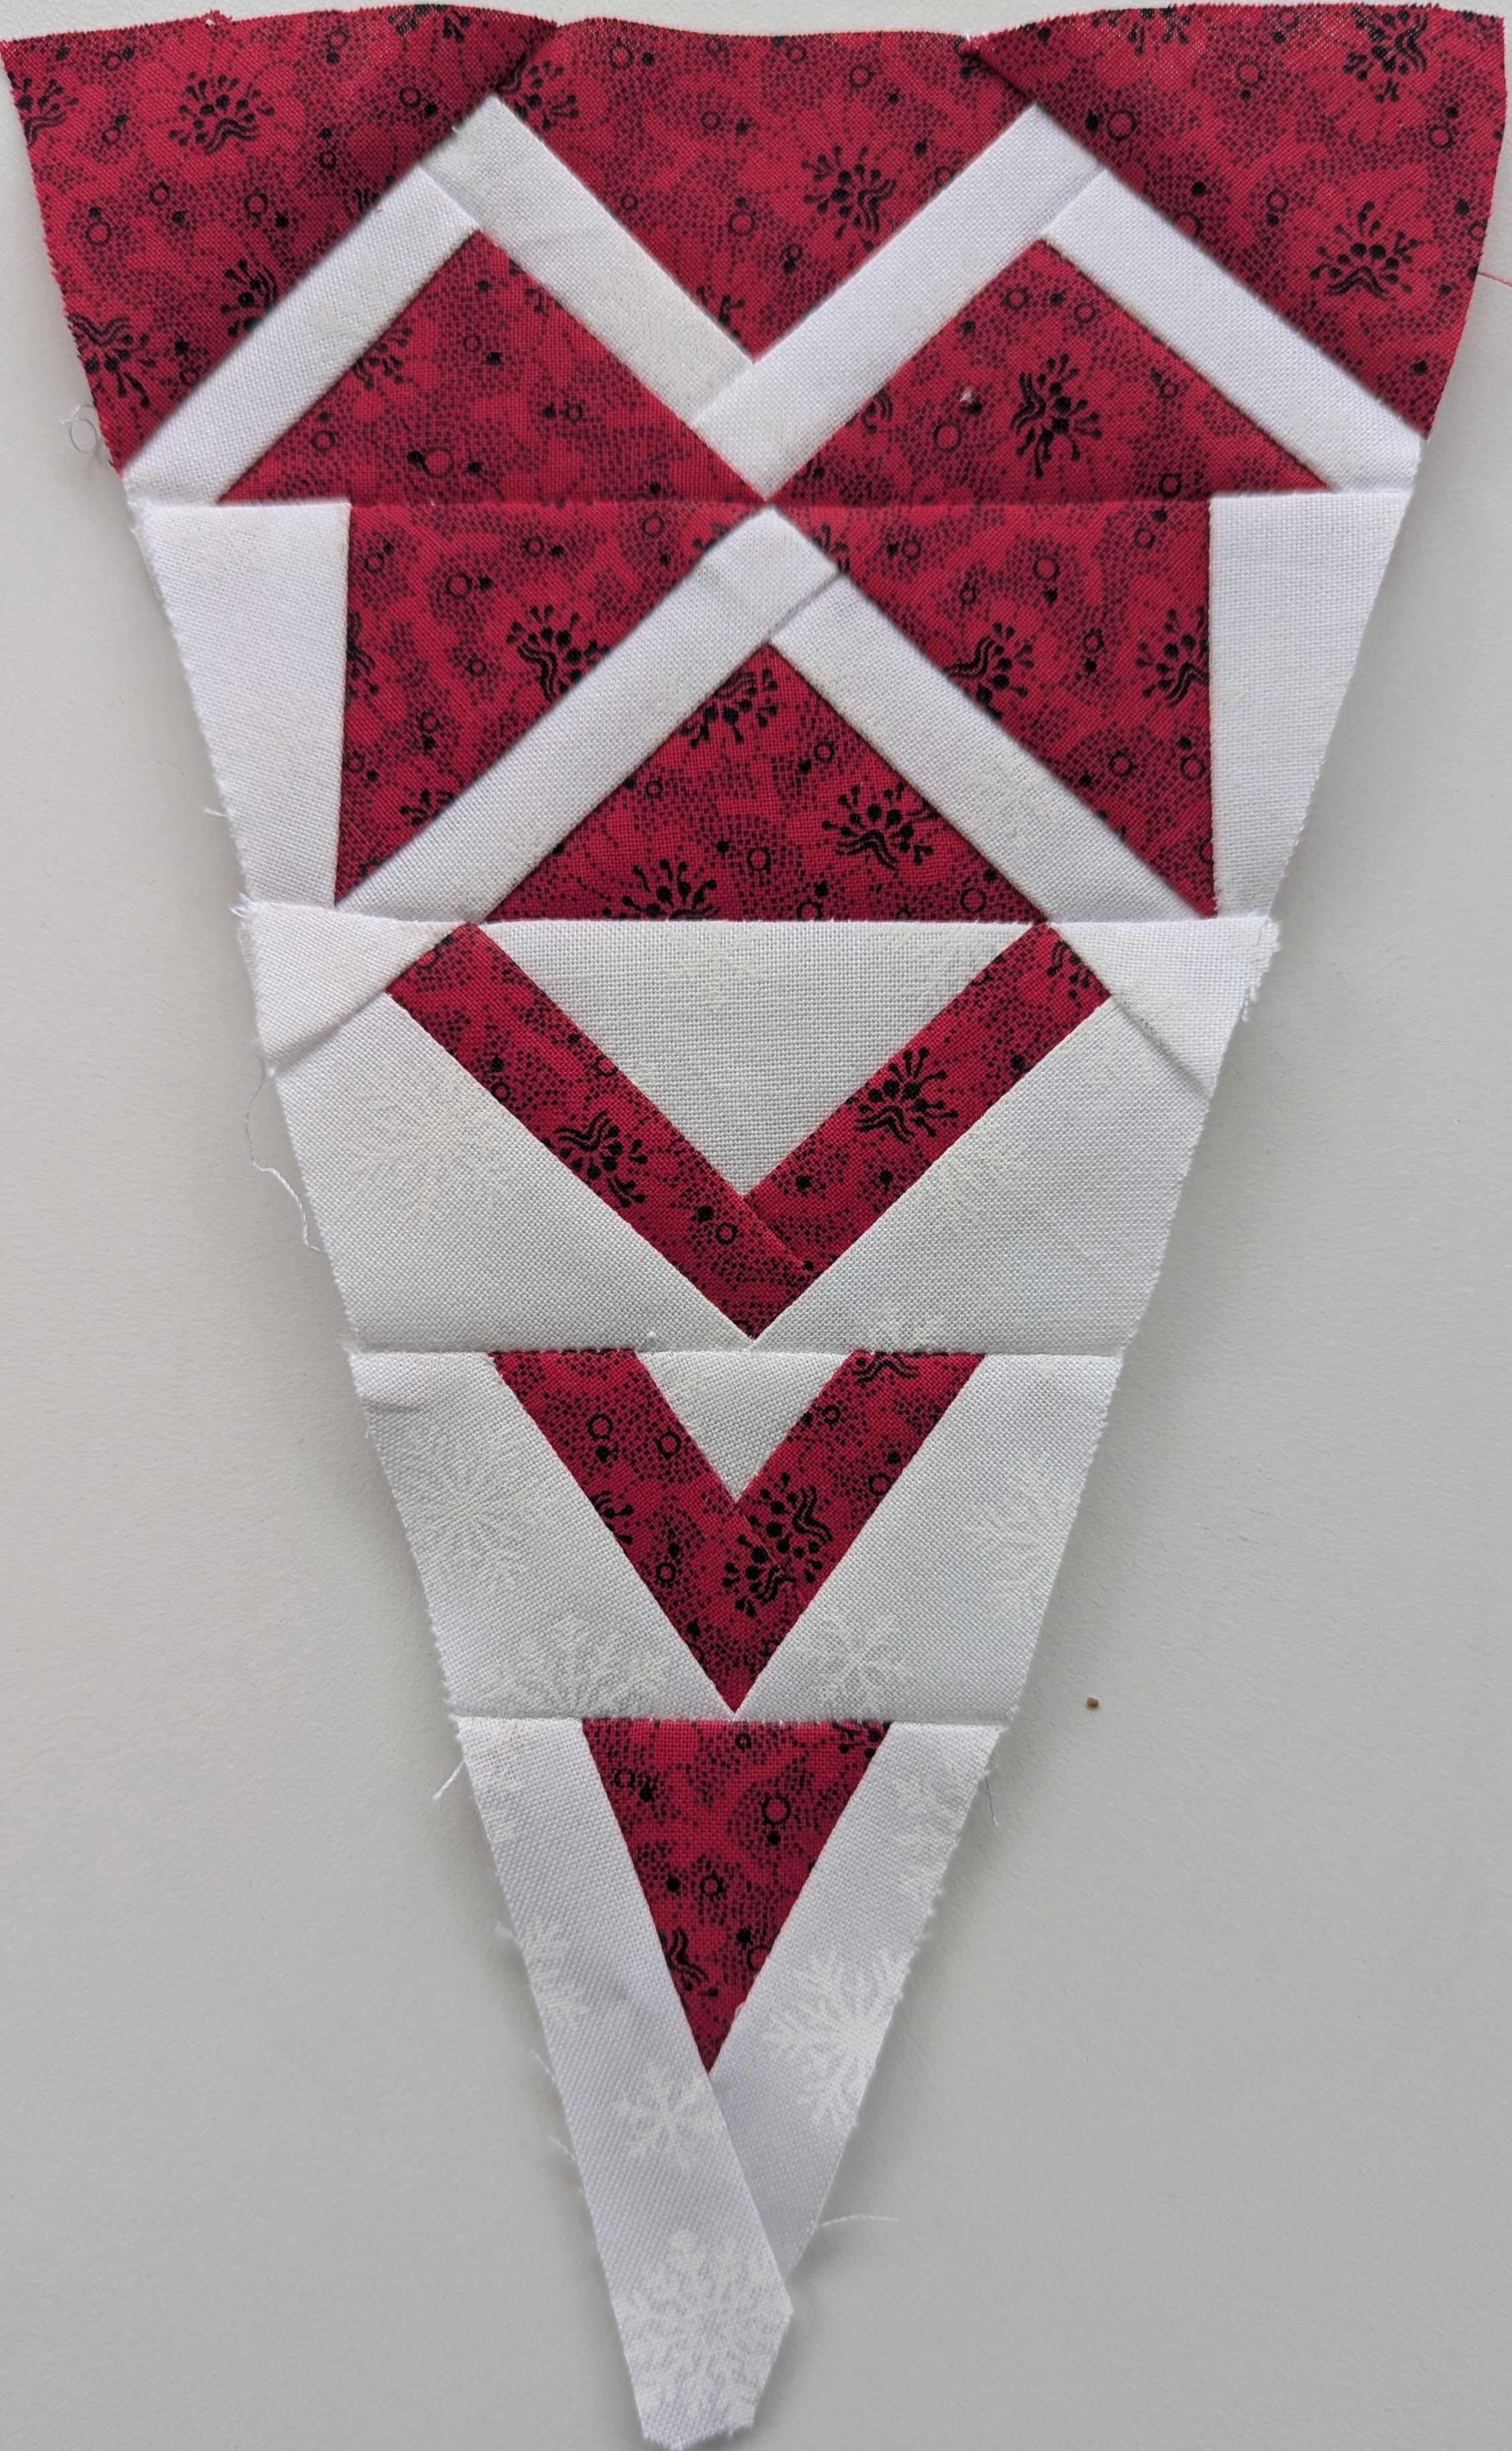
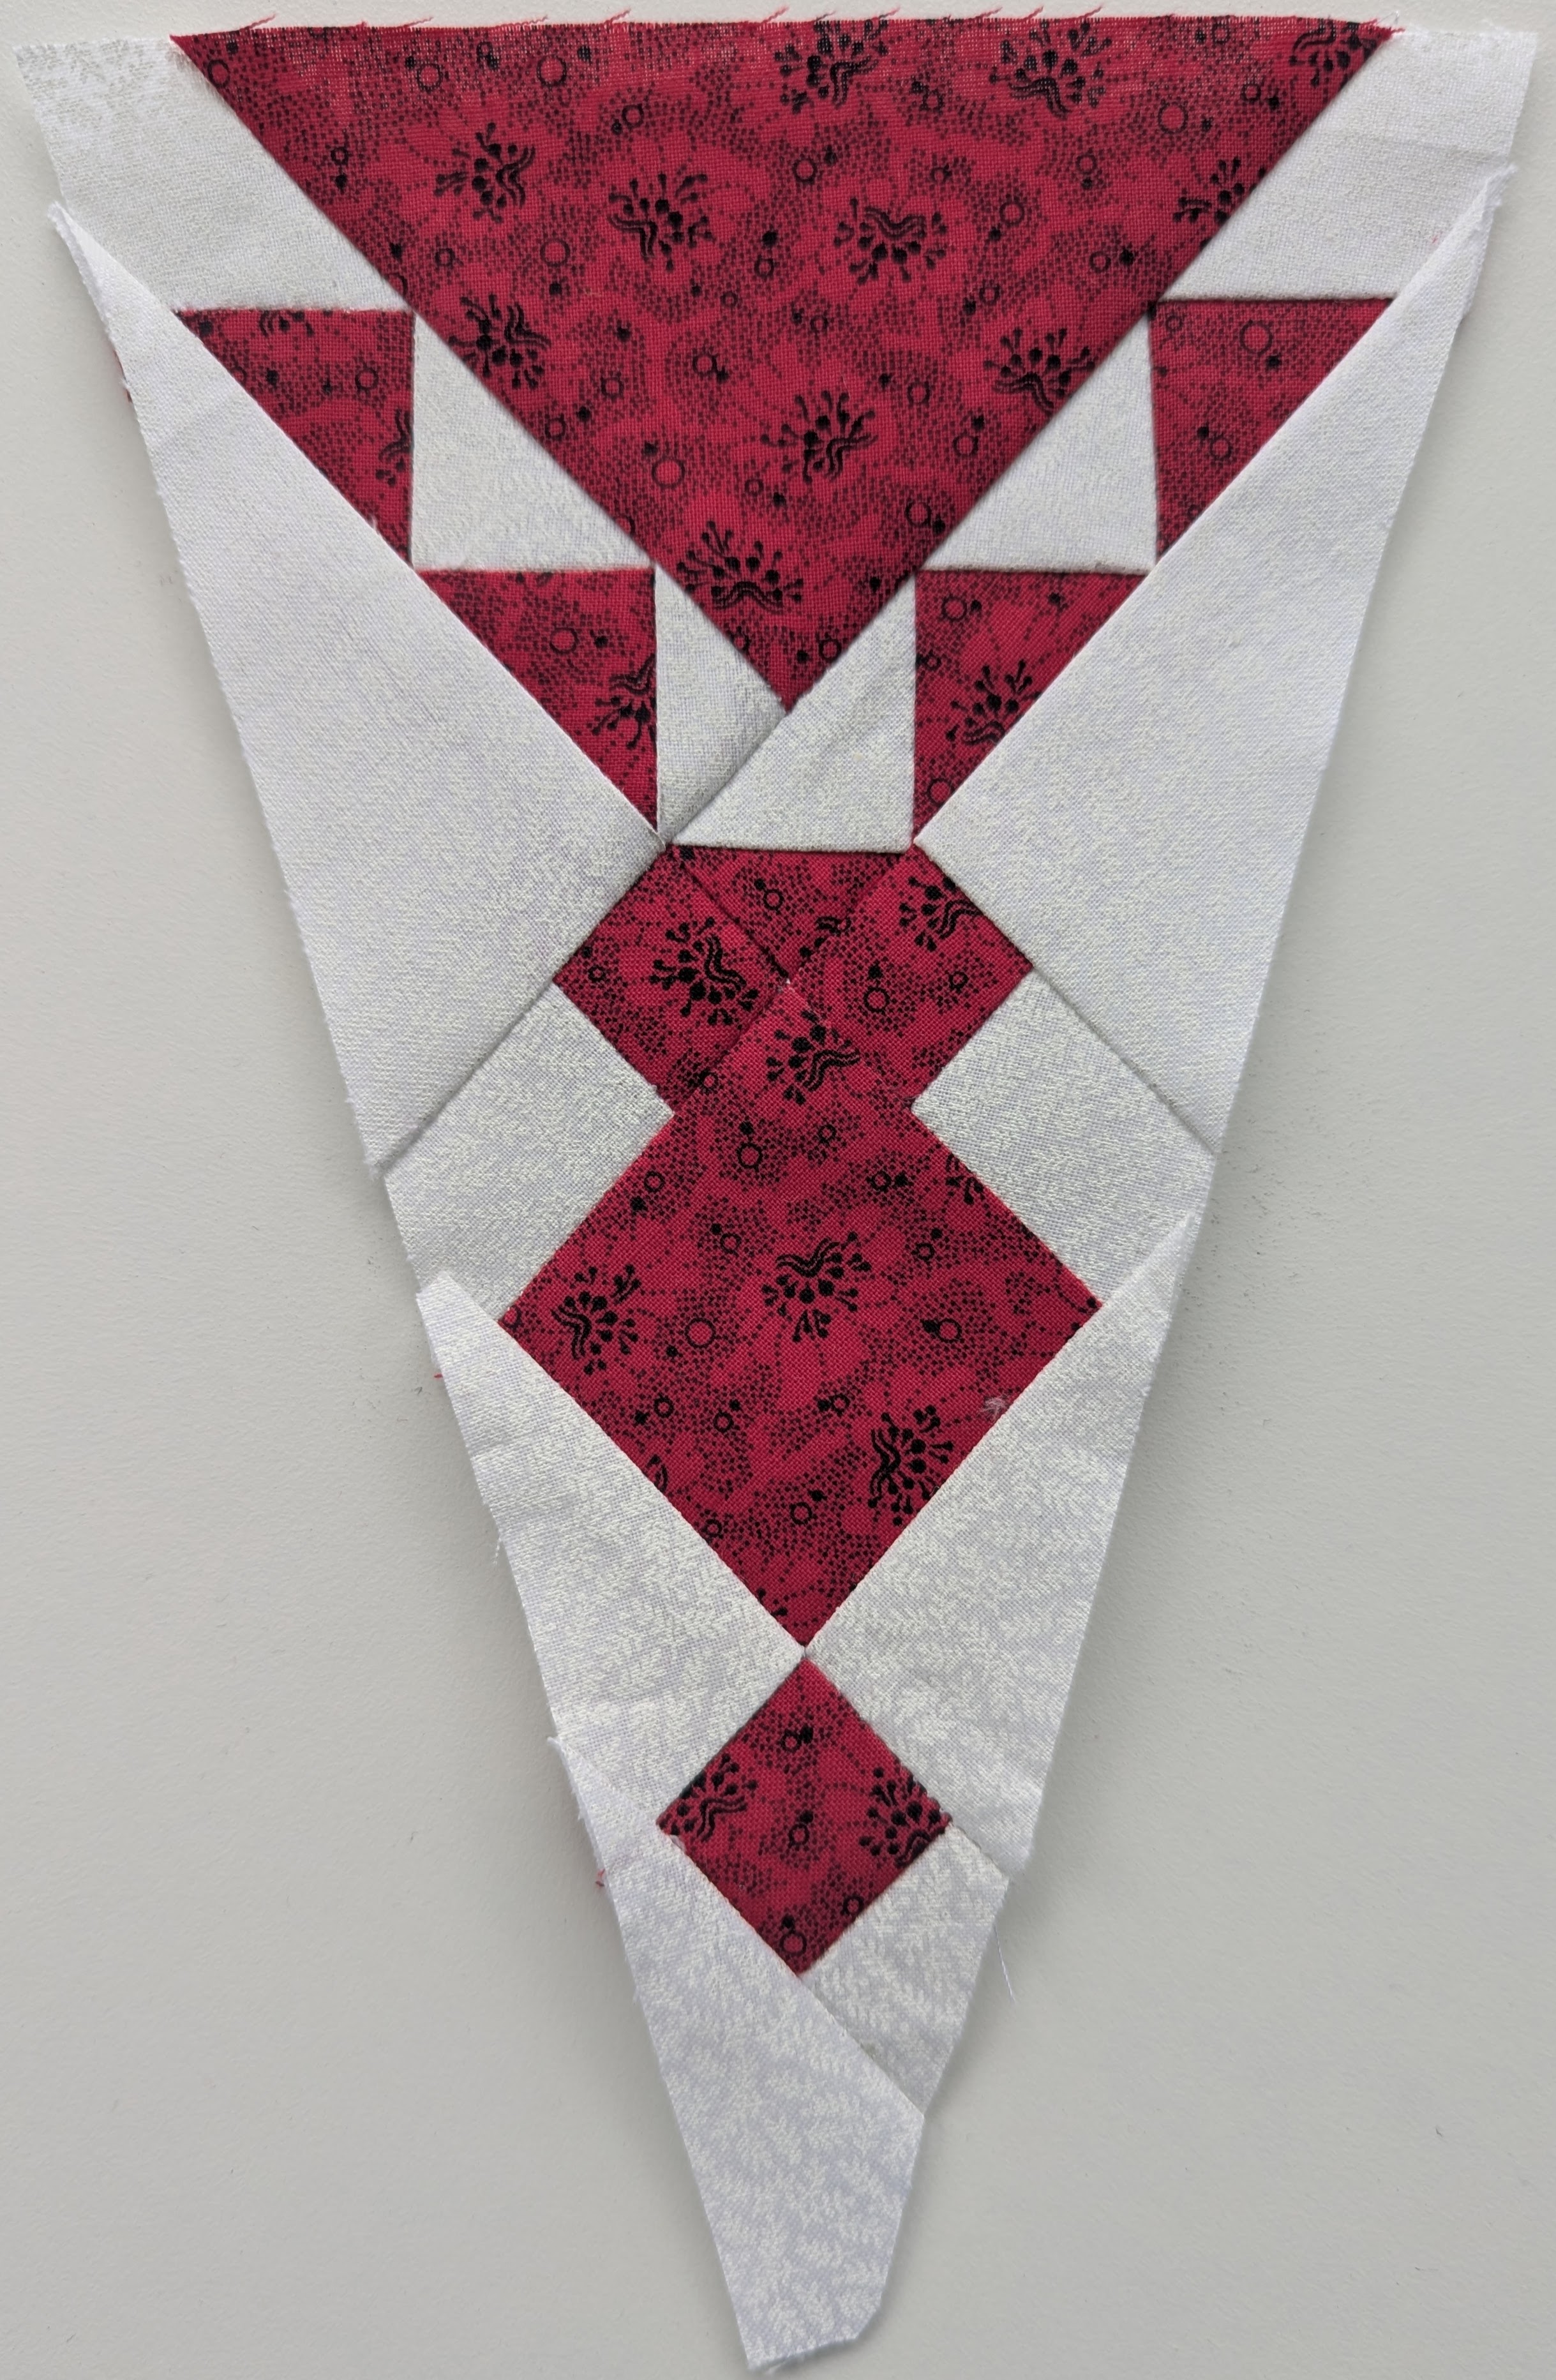
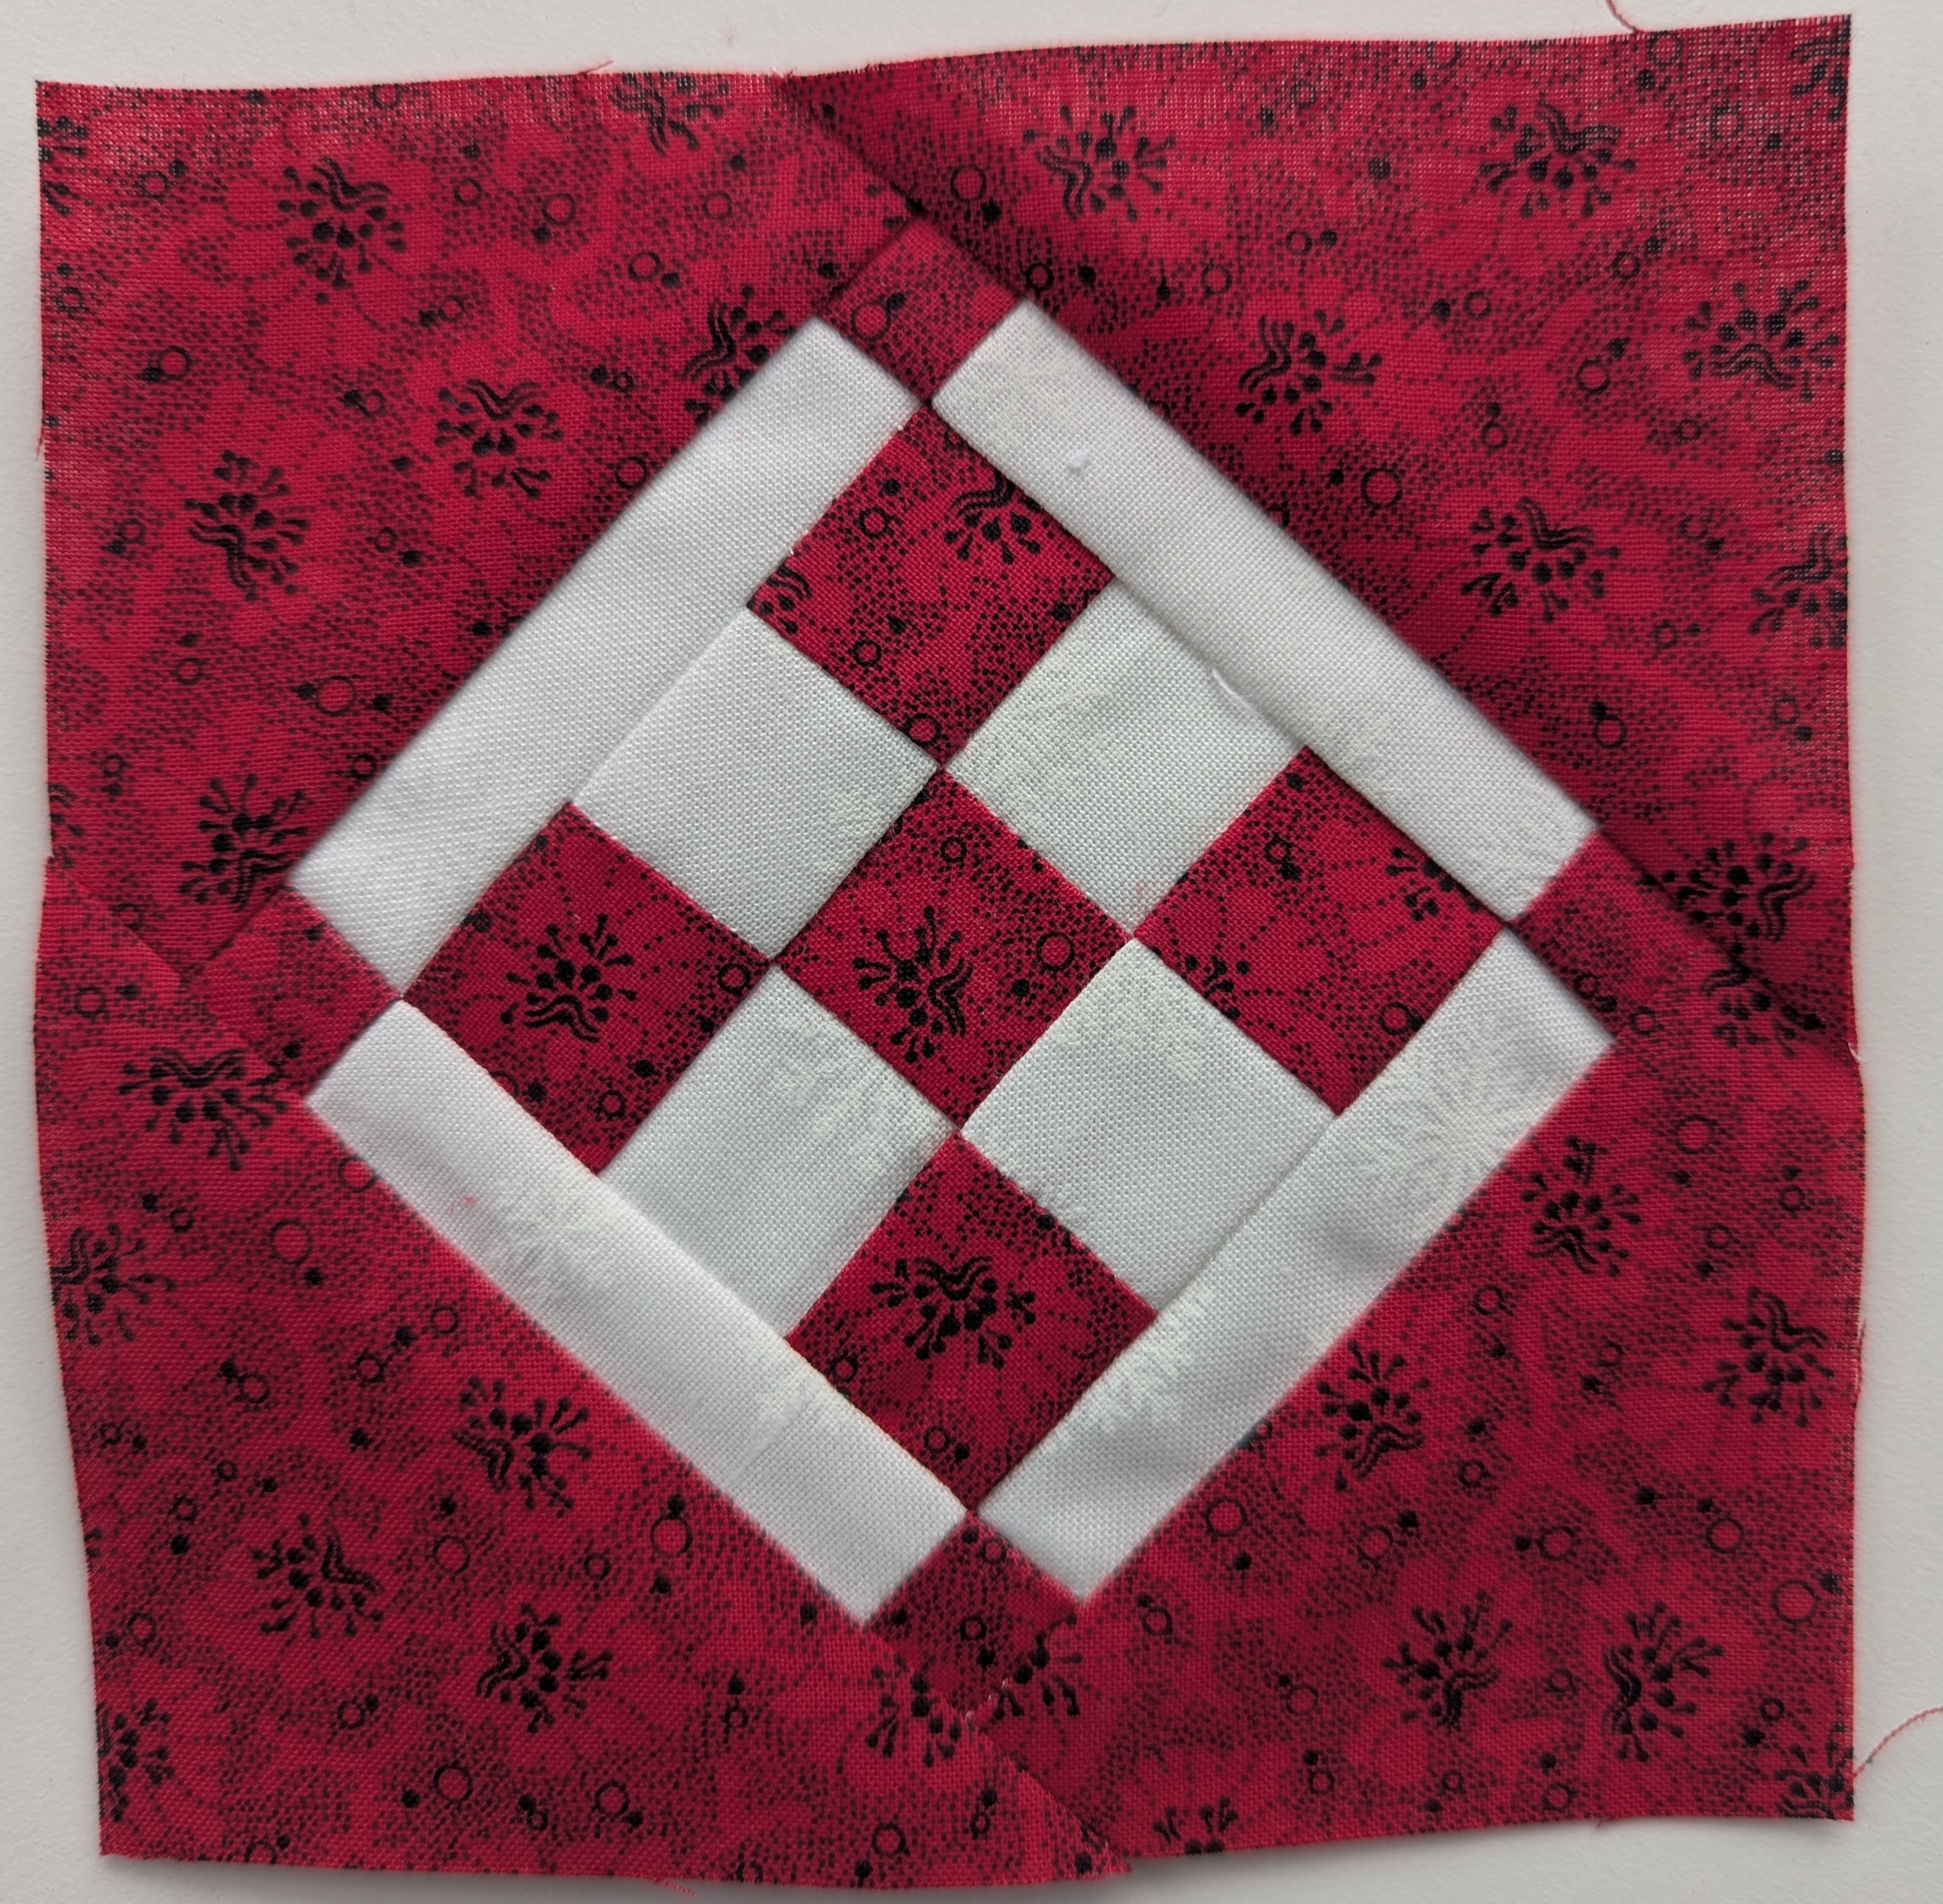
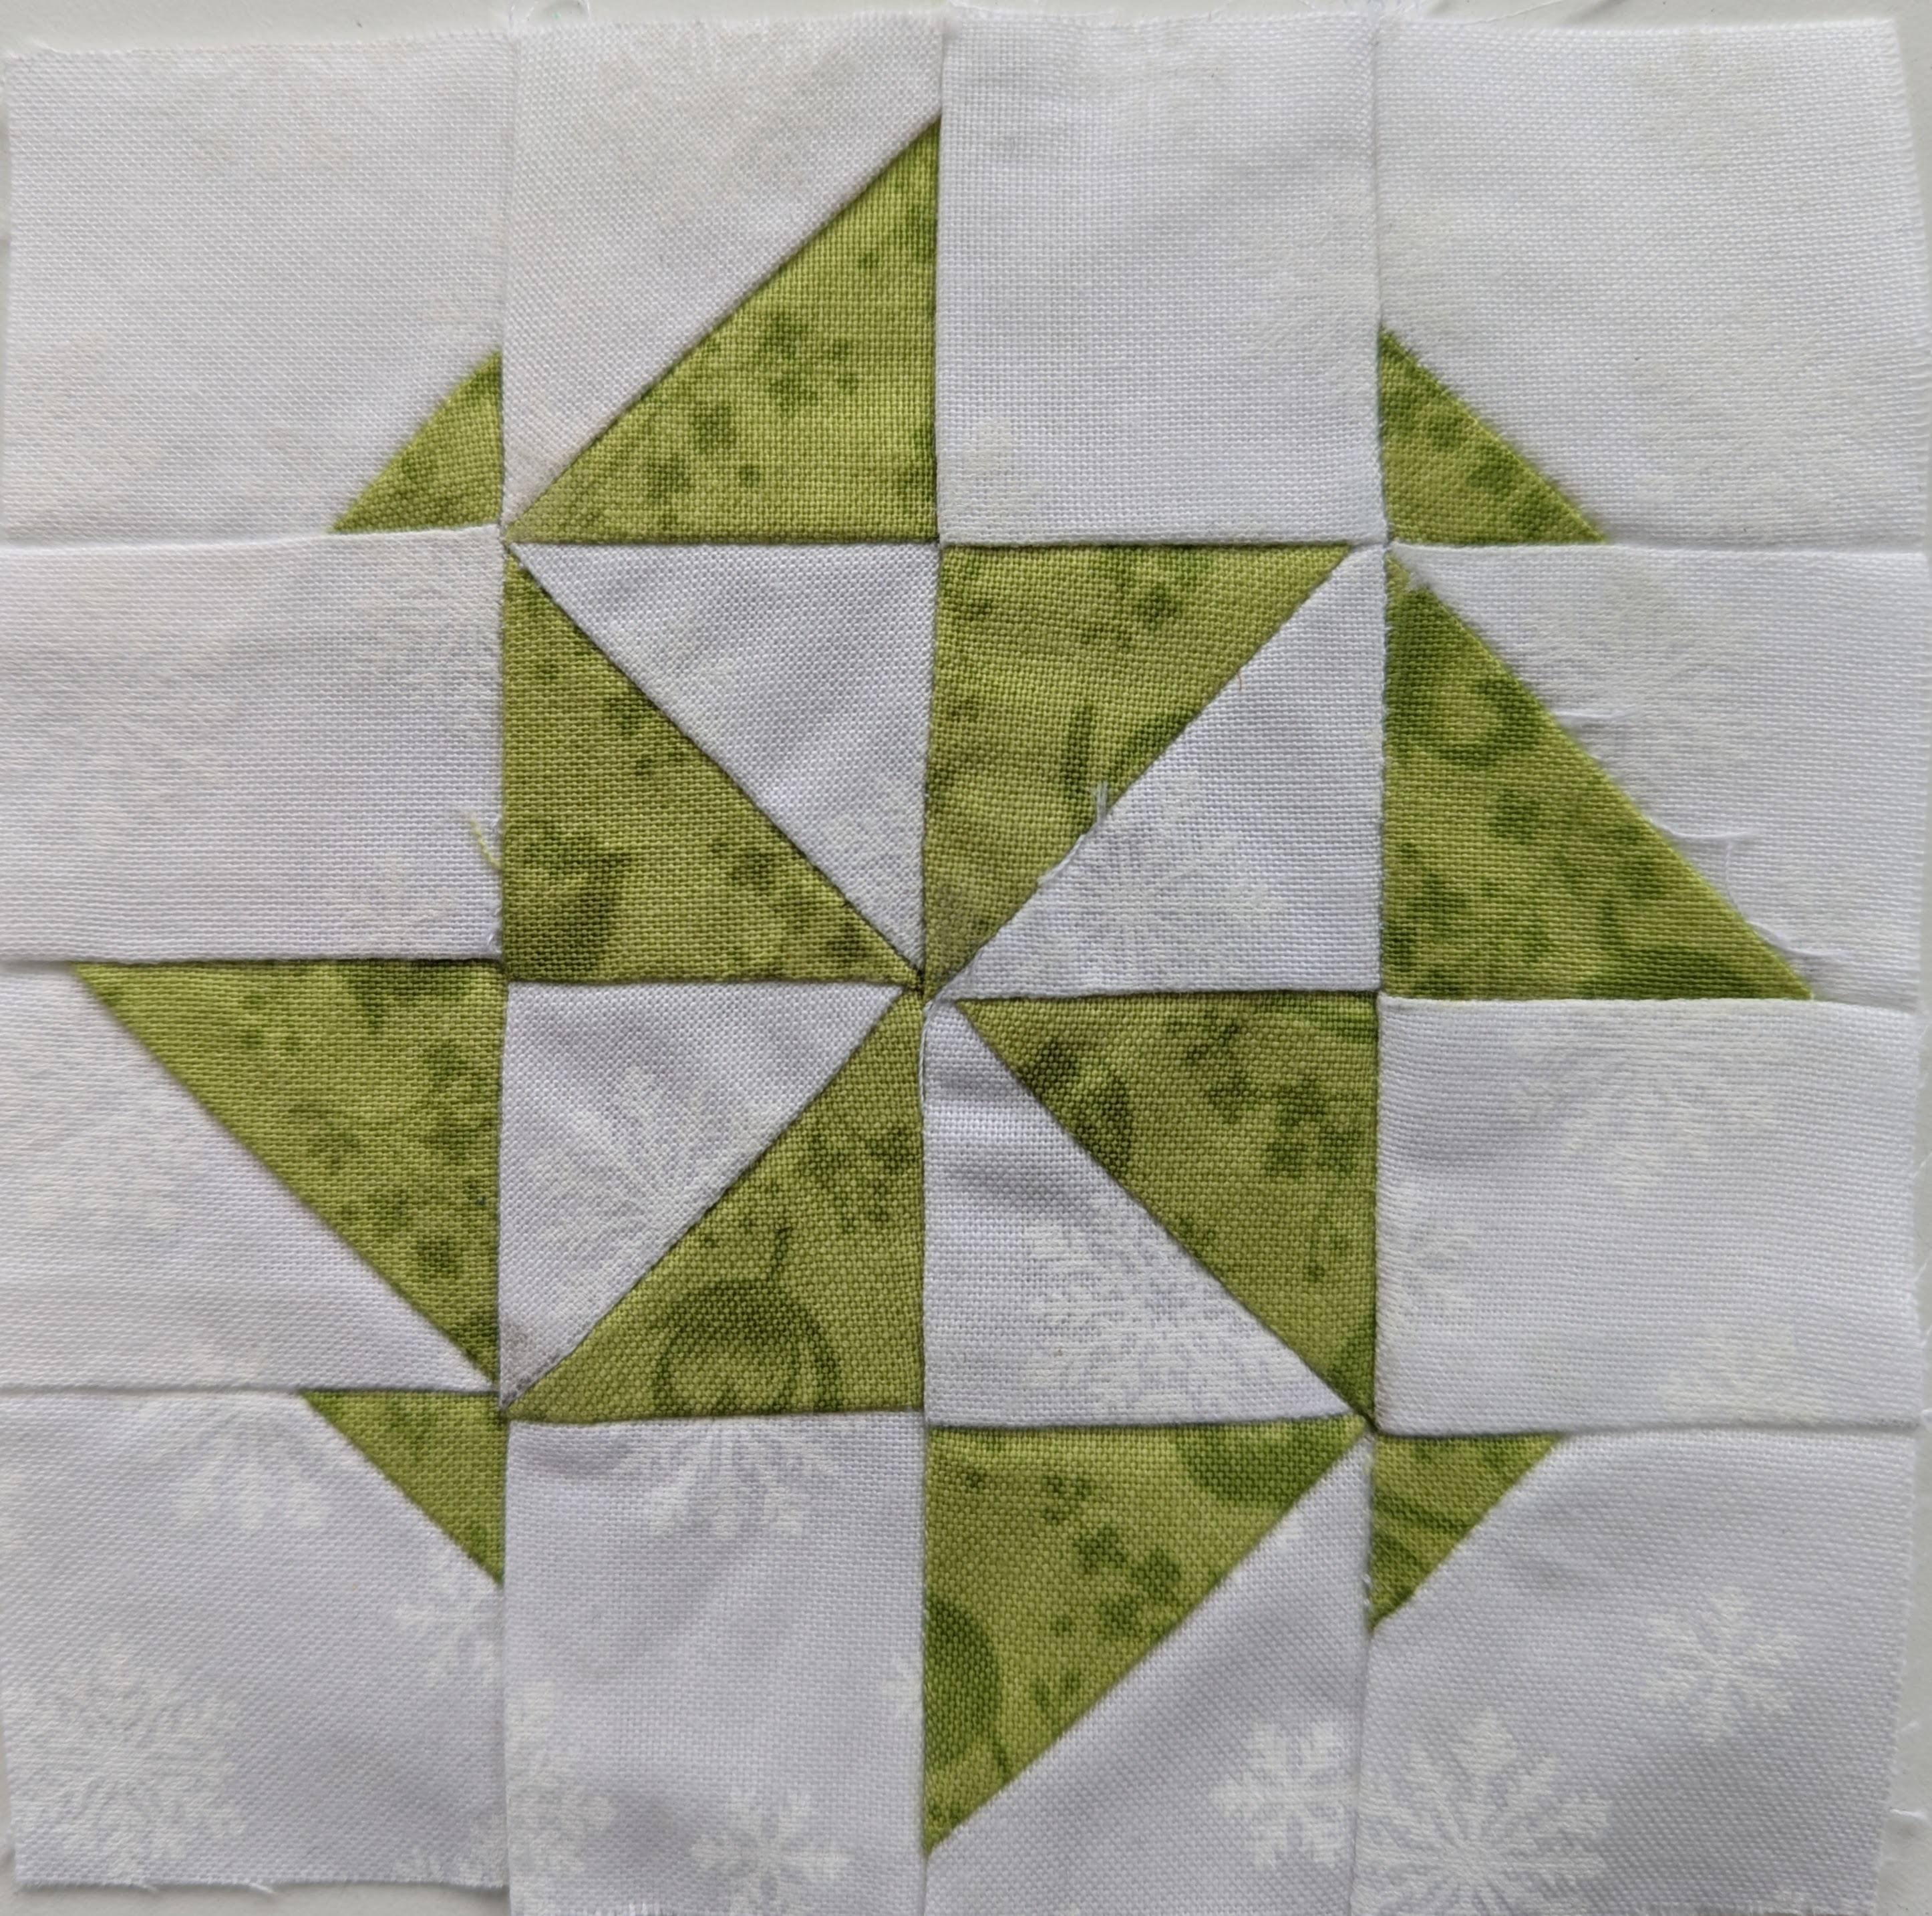
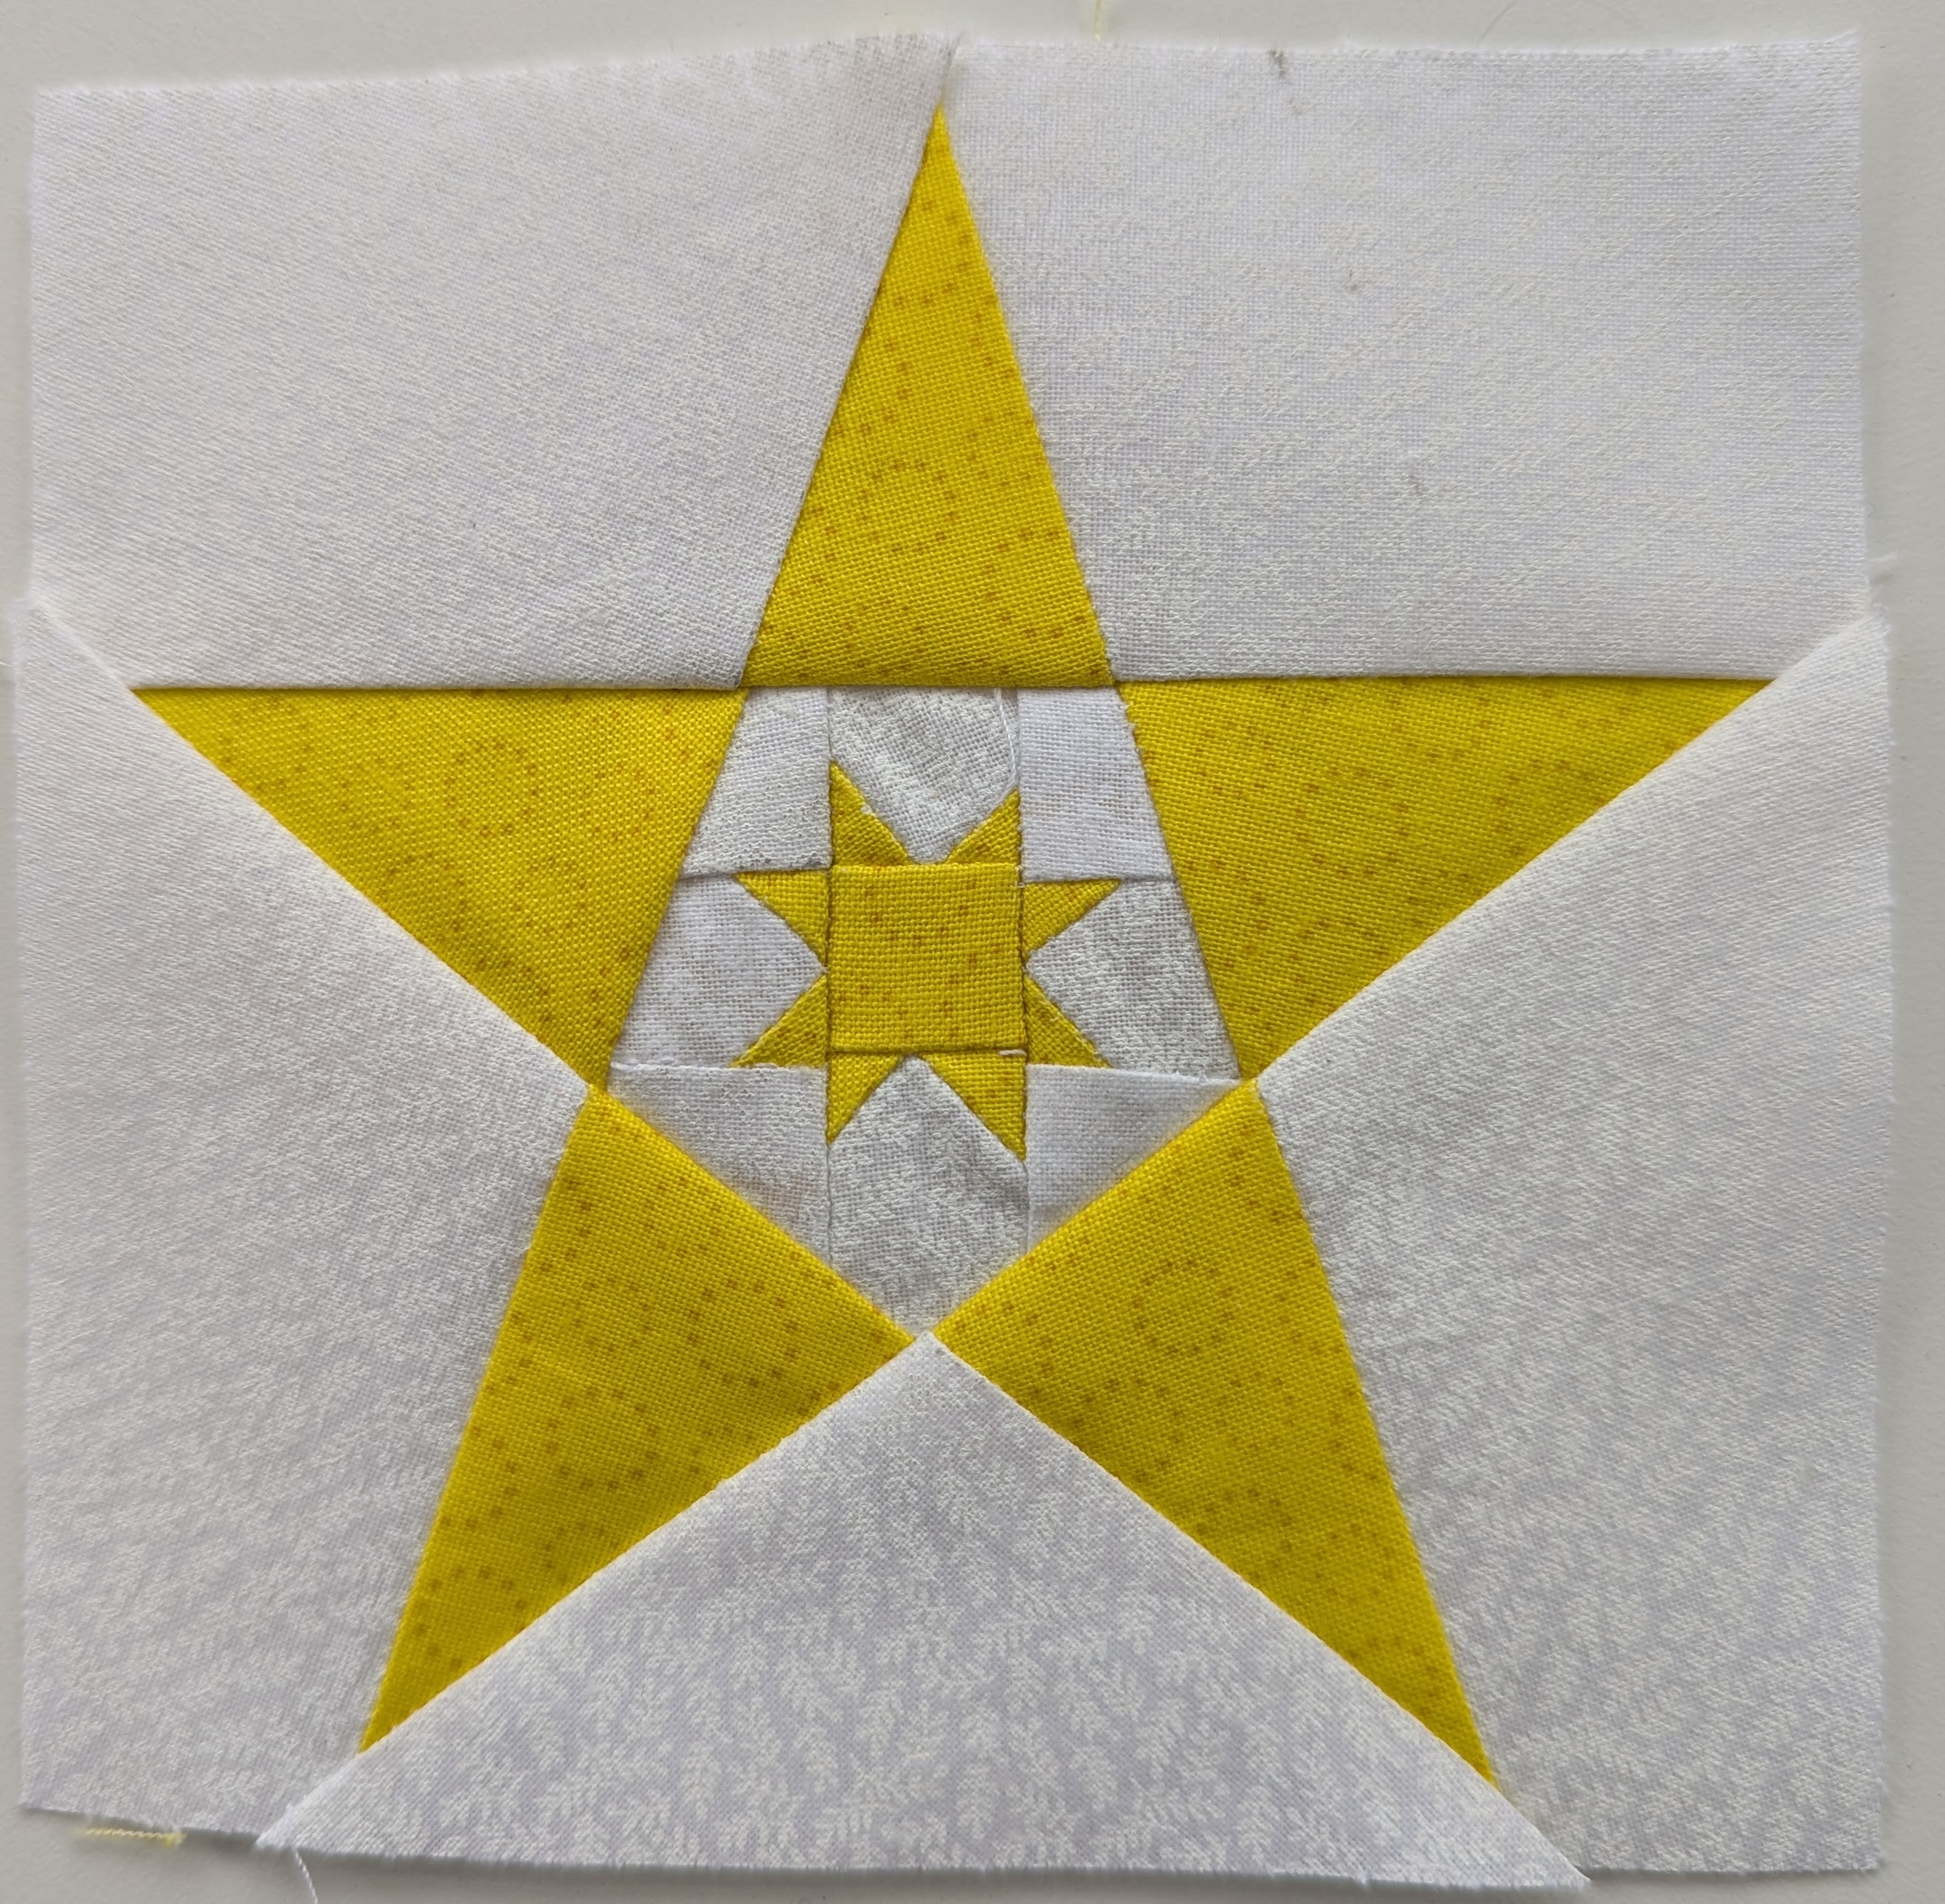
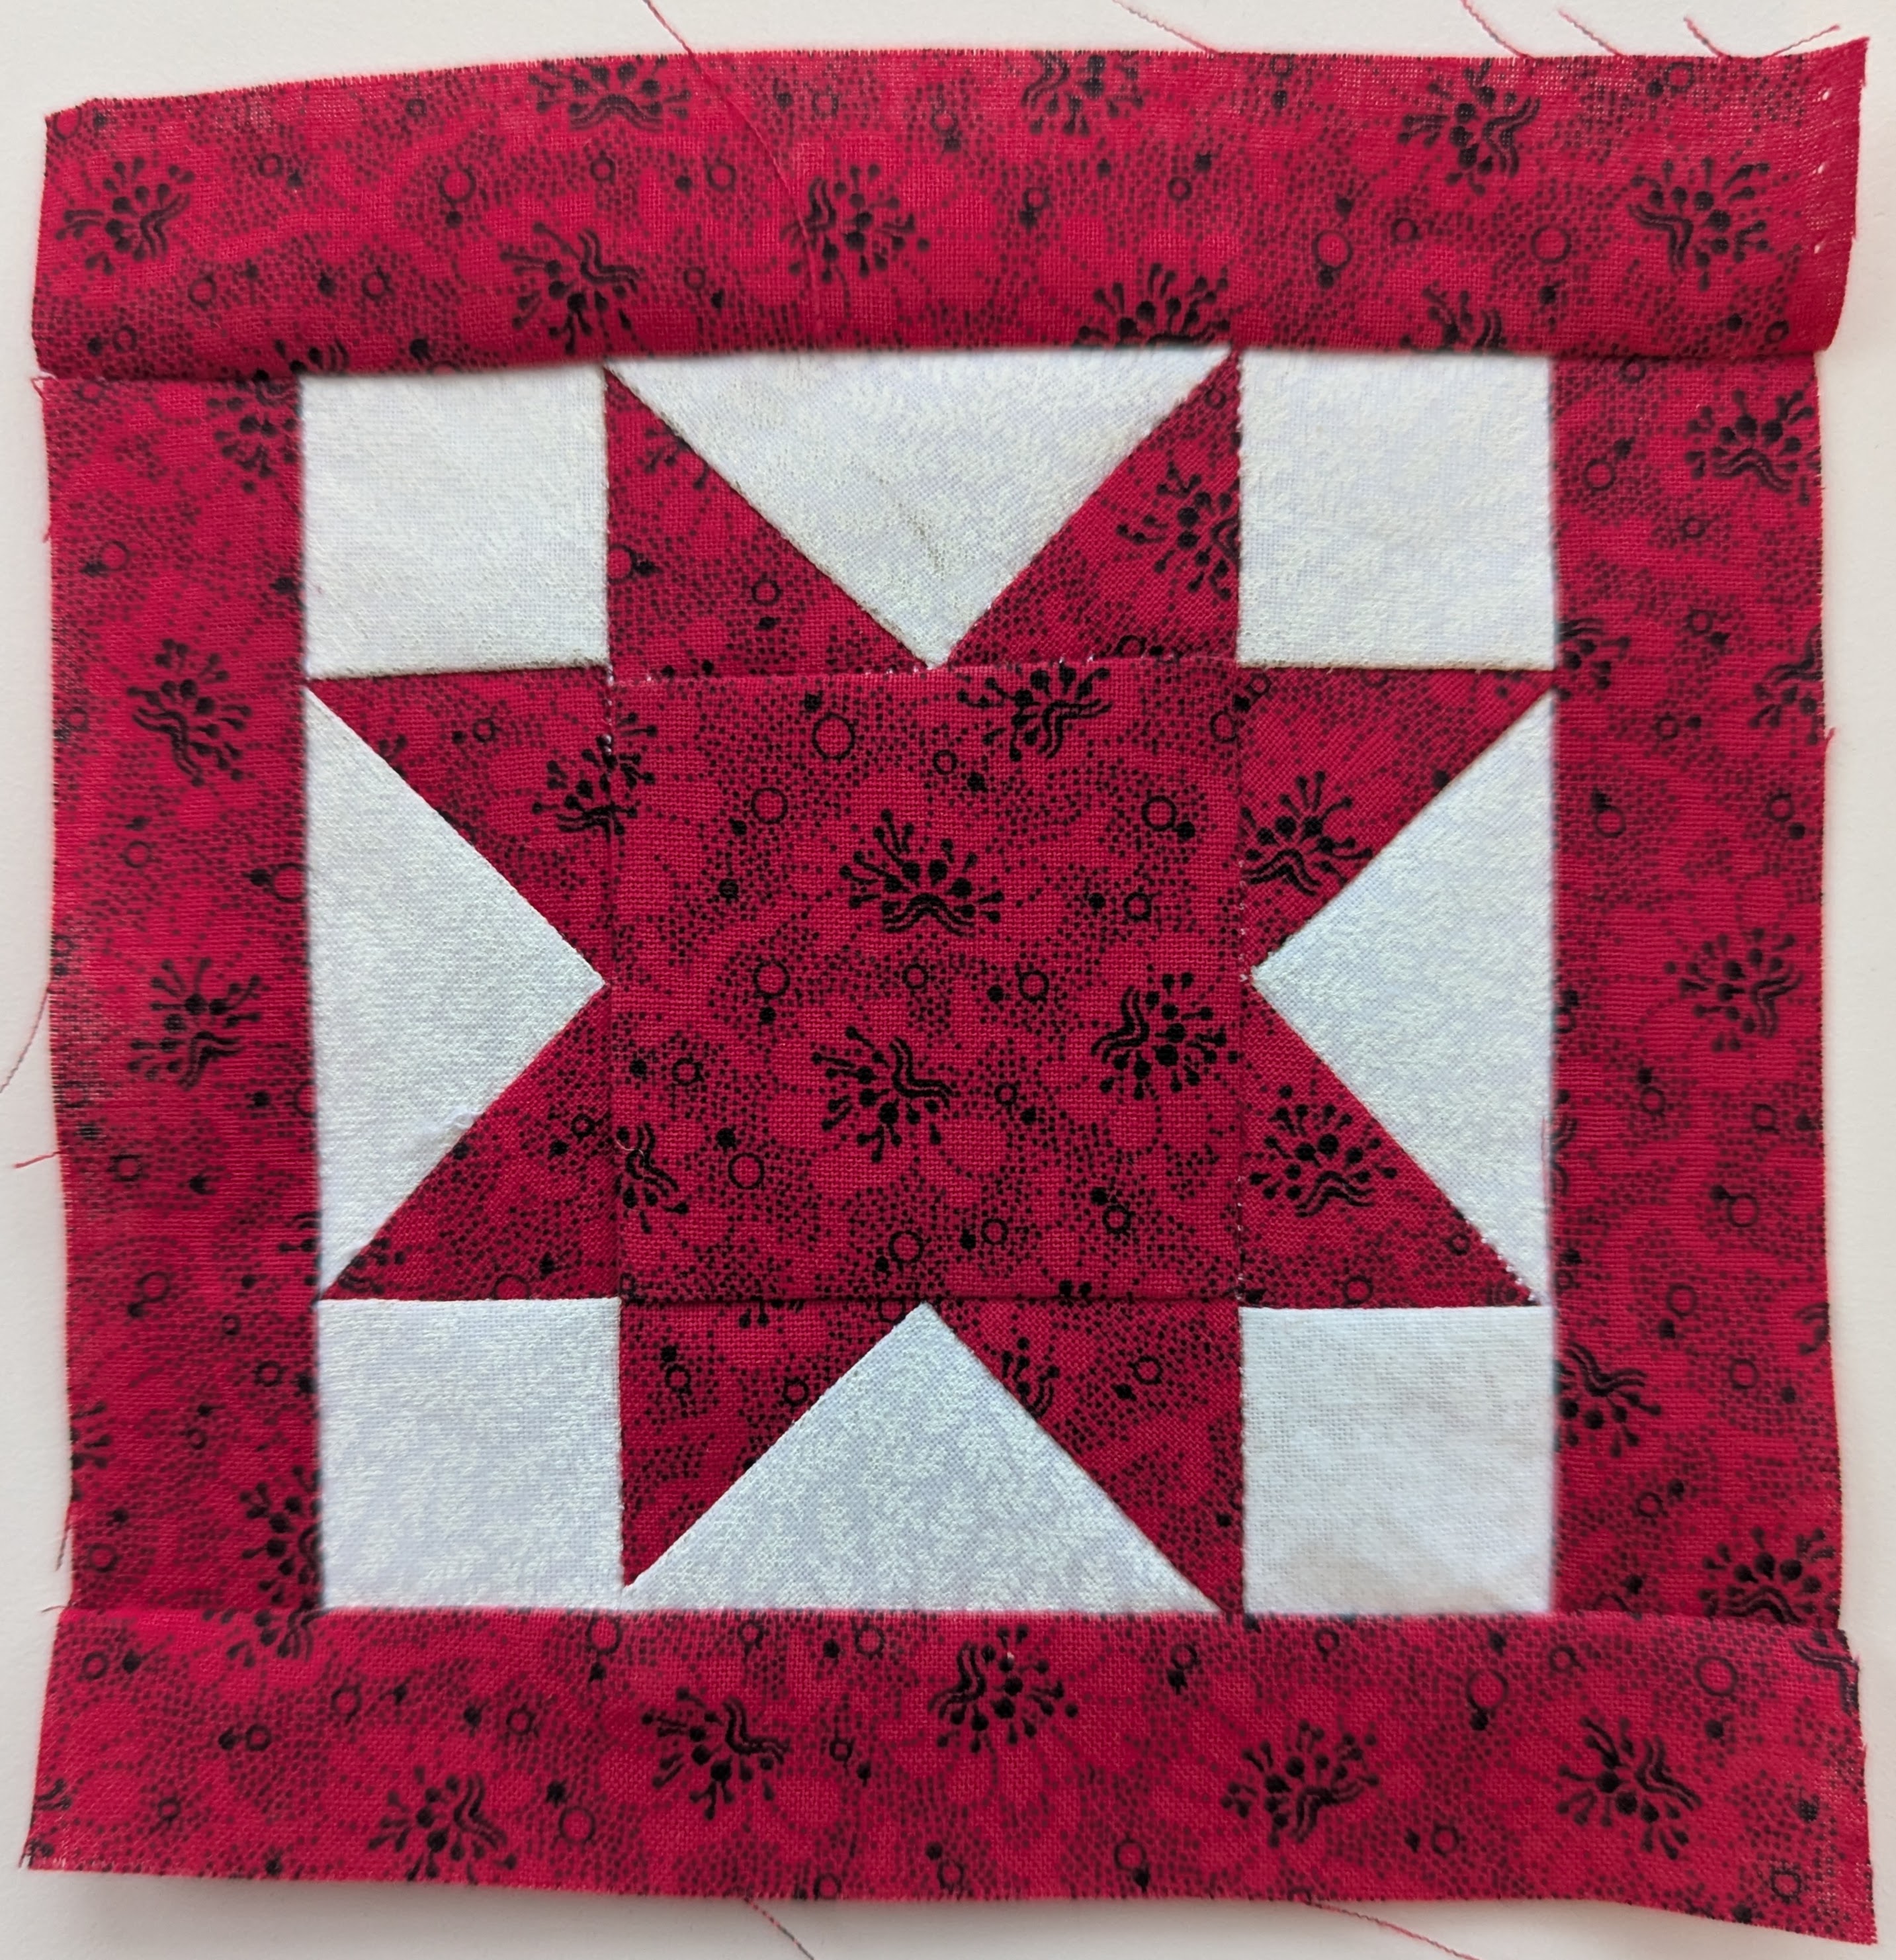
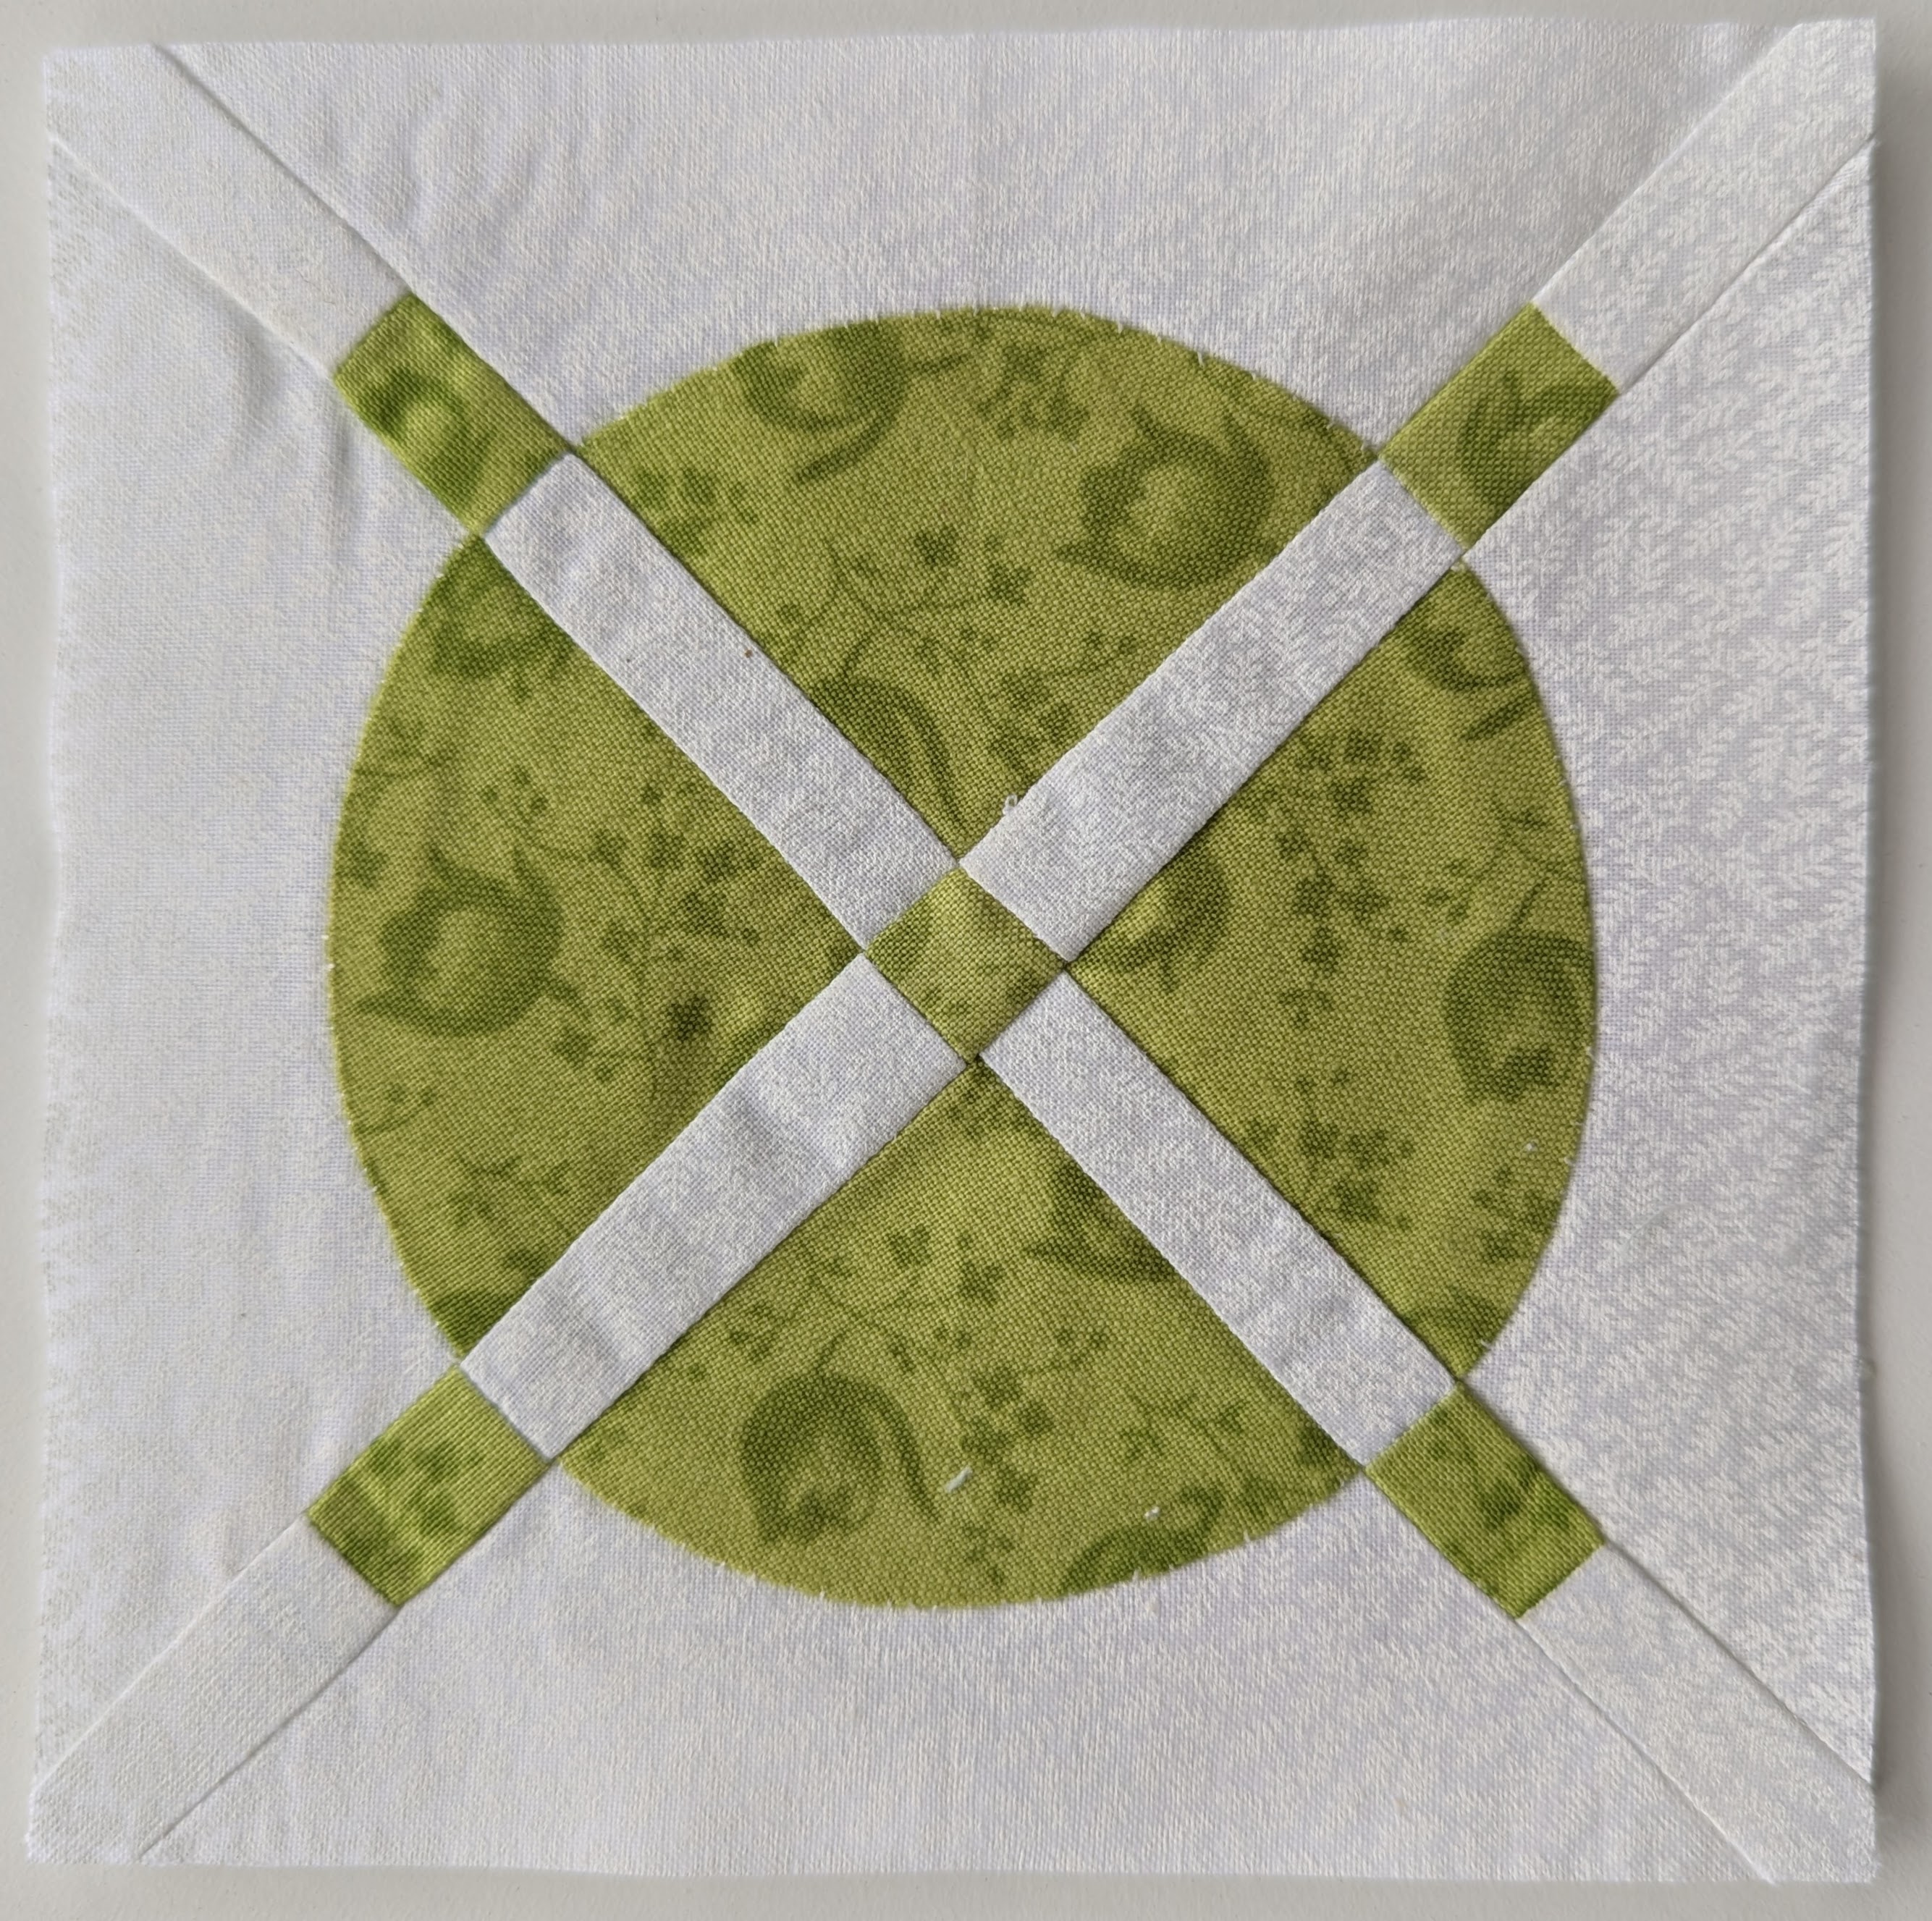
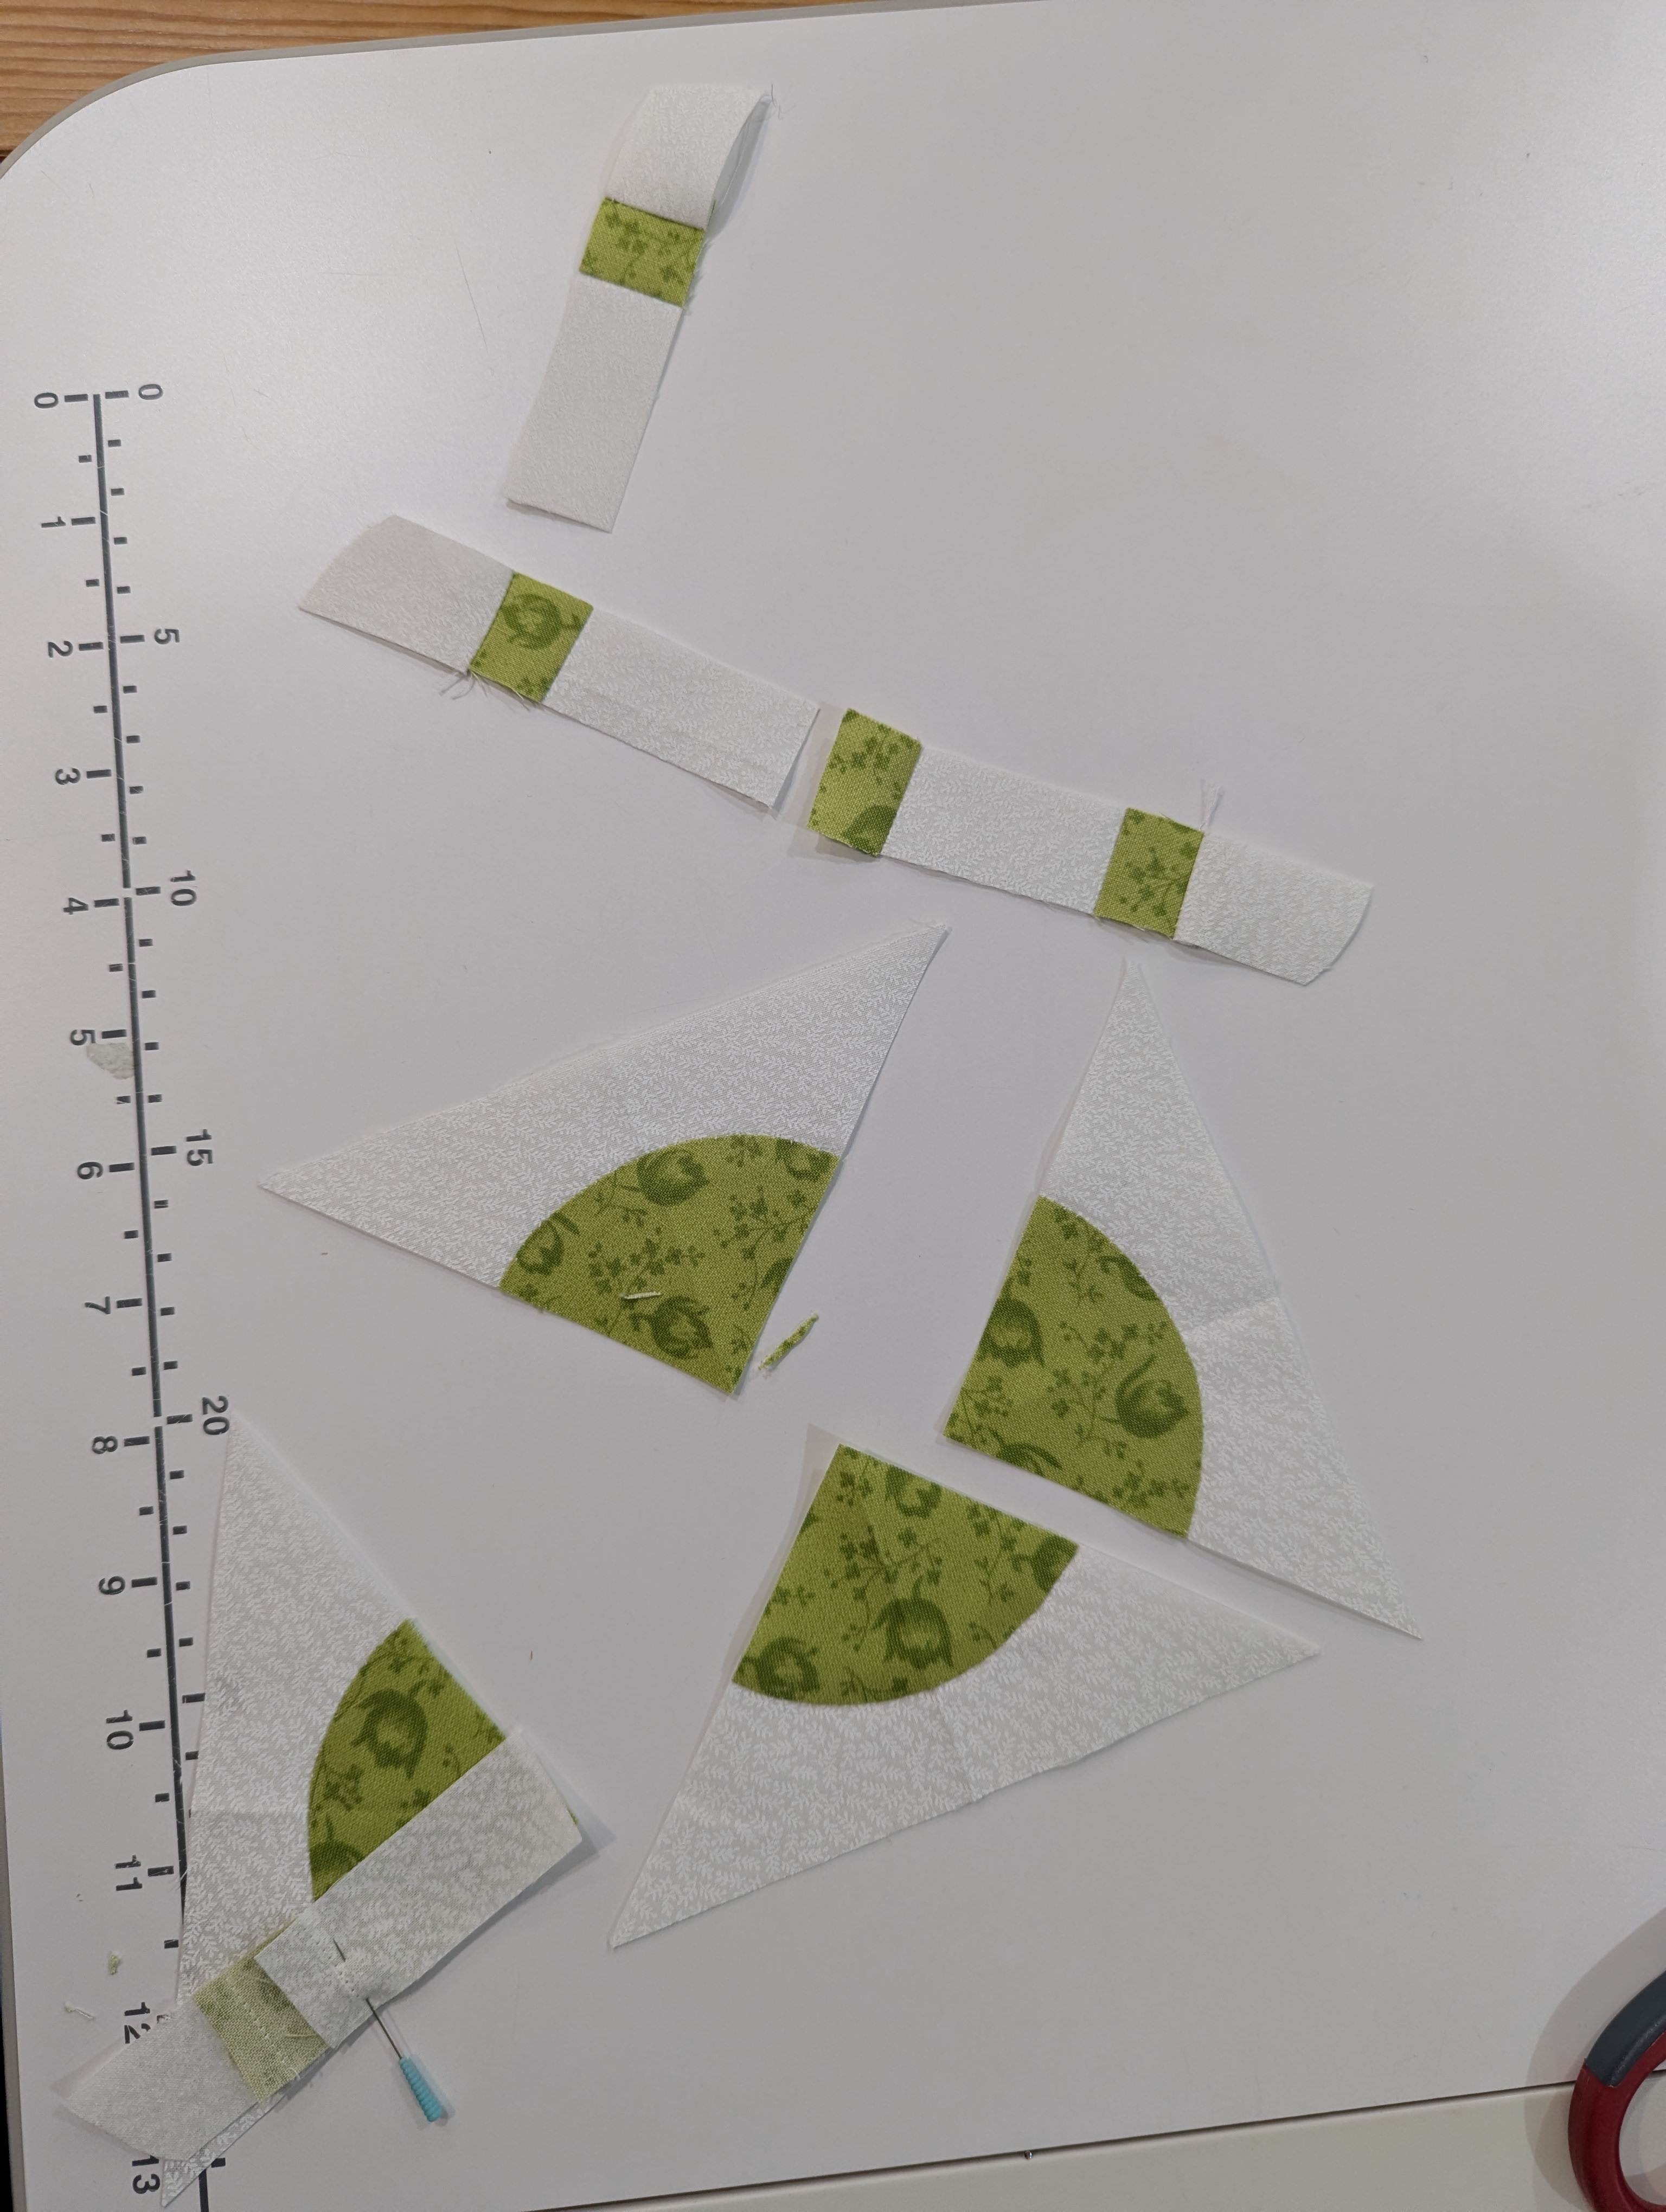
I can certainly see the ‘gems” in this border block. They sit well on point, on the white background.

Successes:

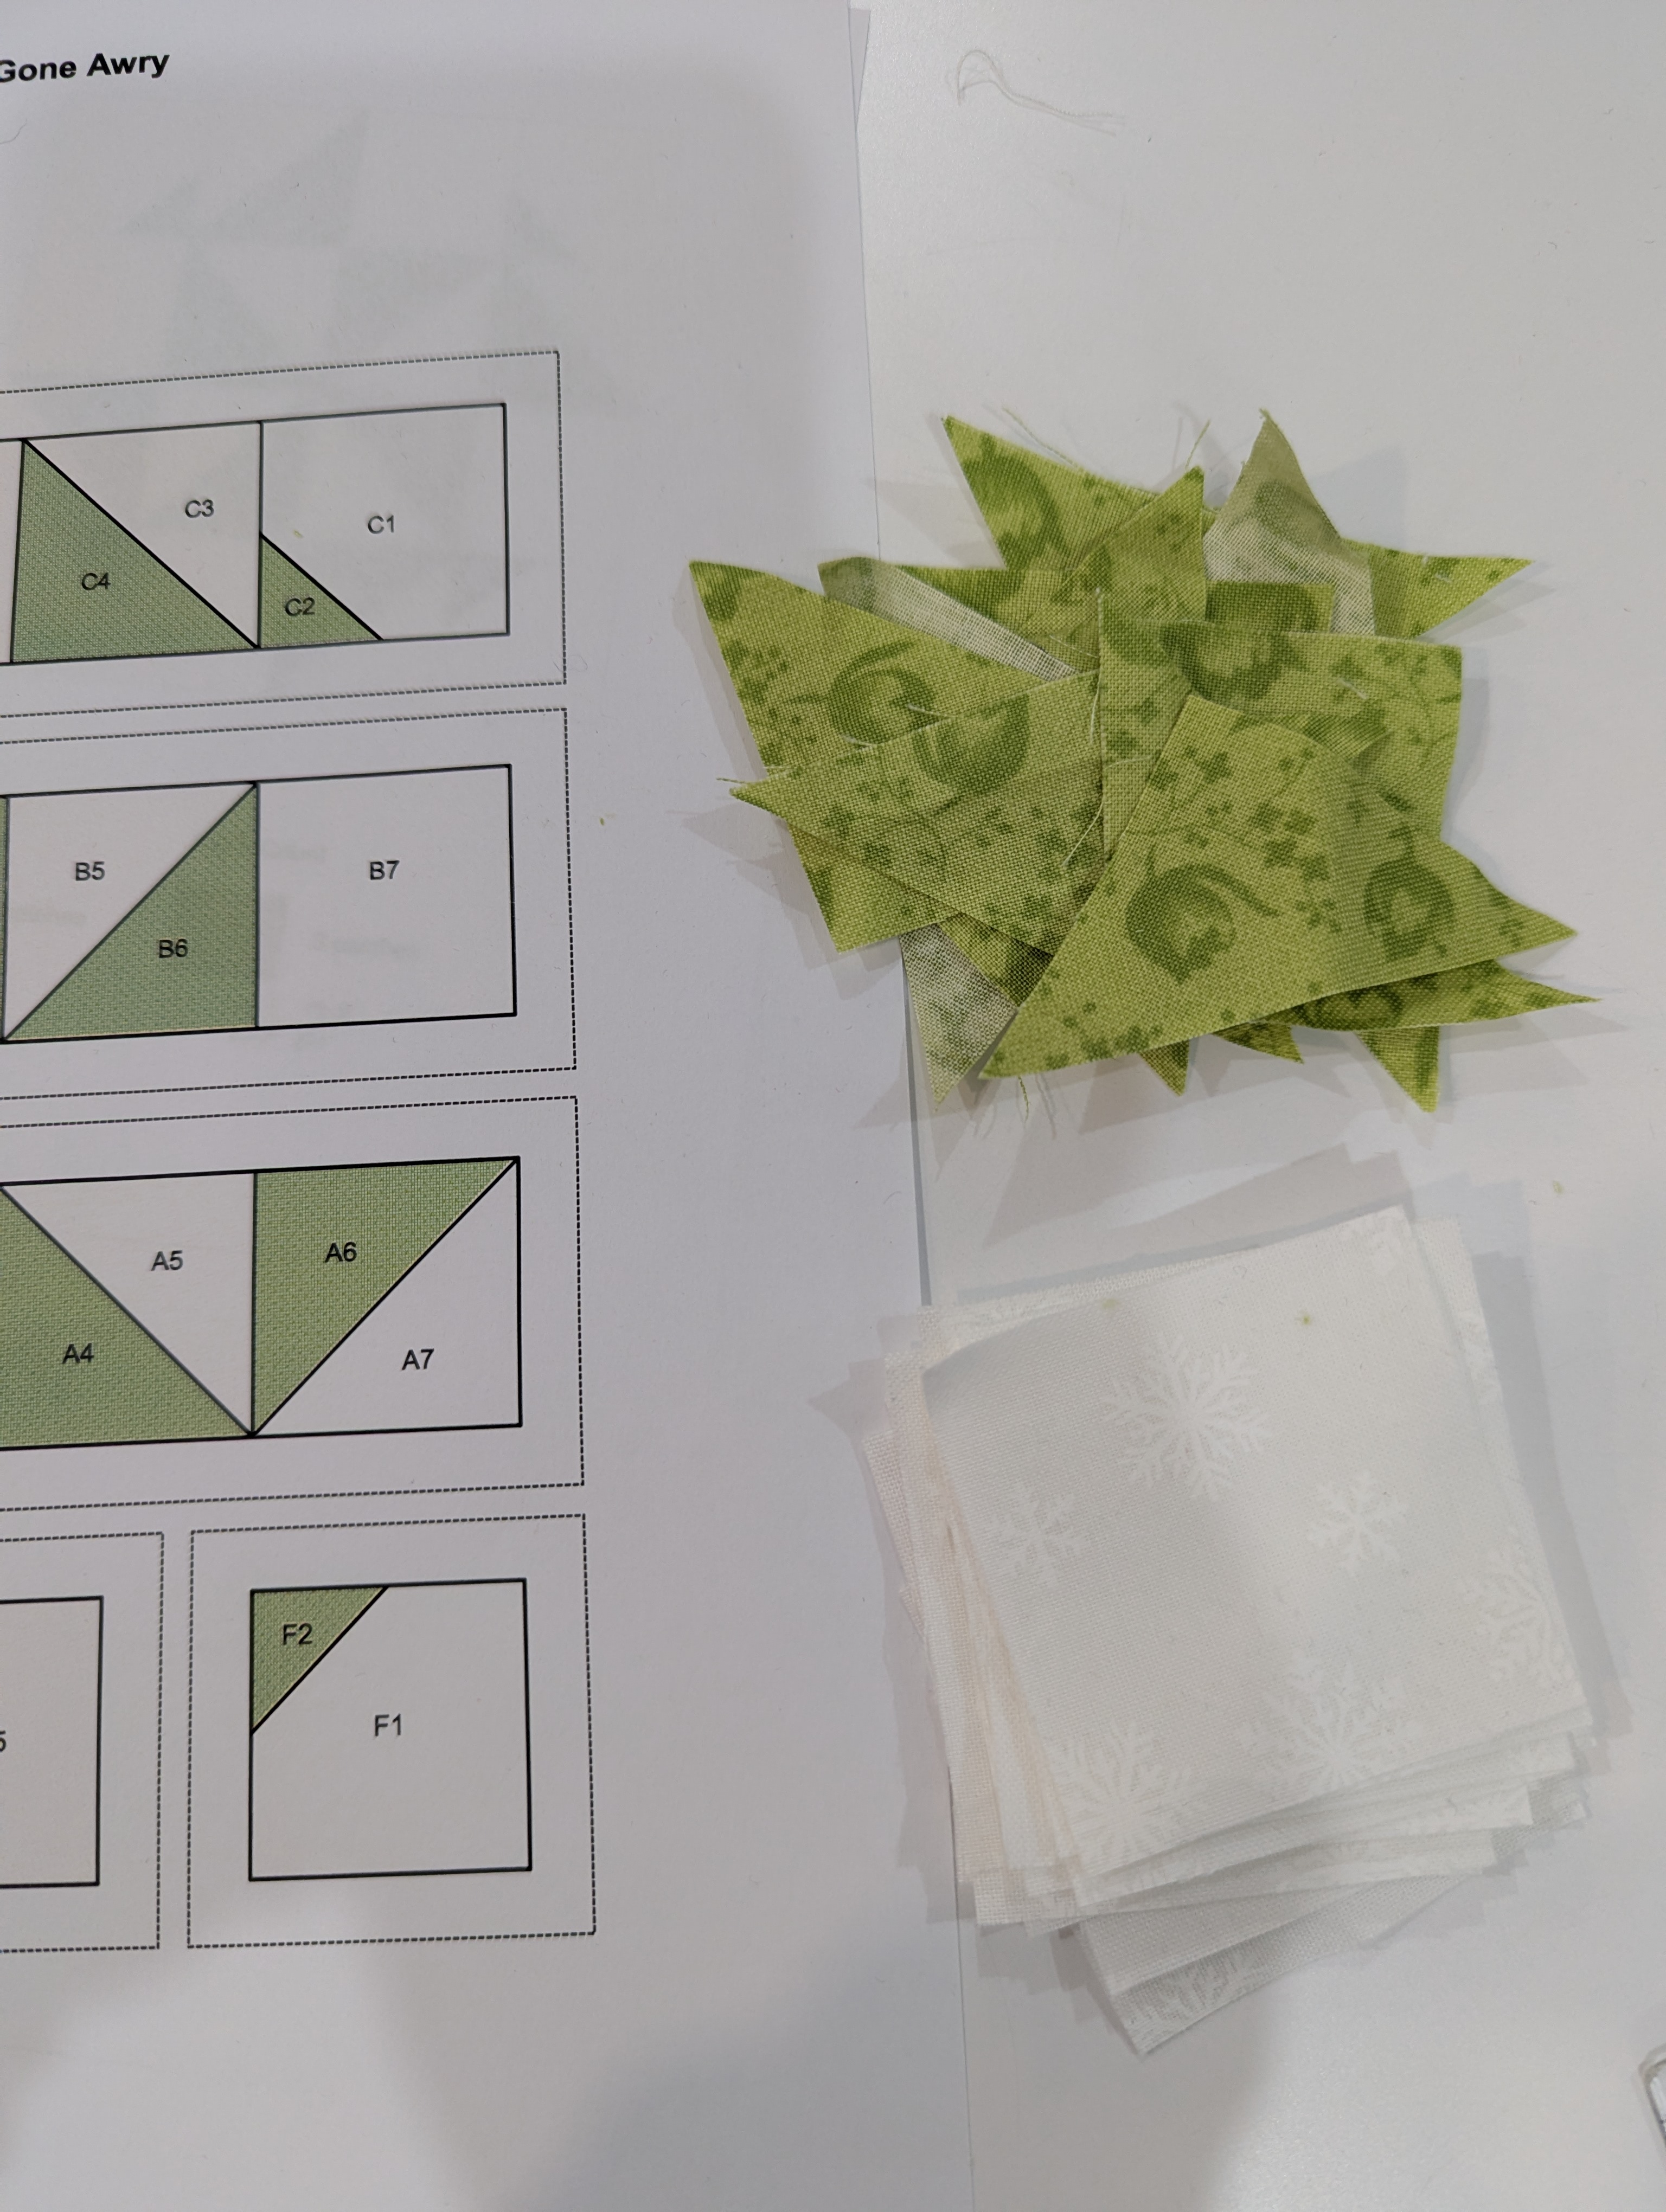
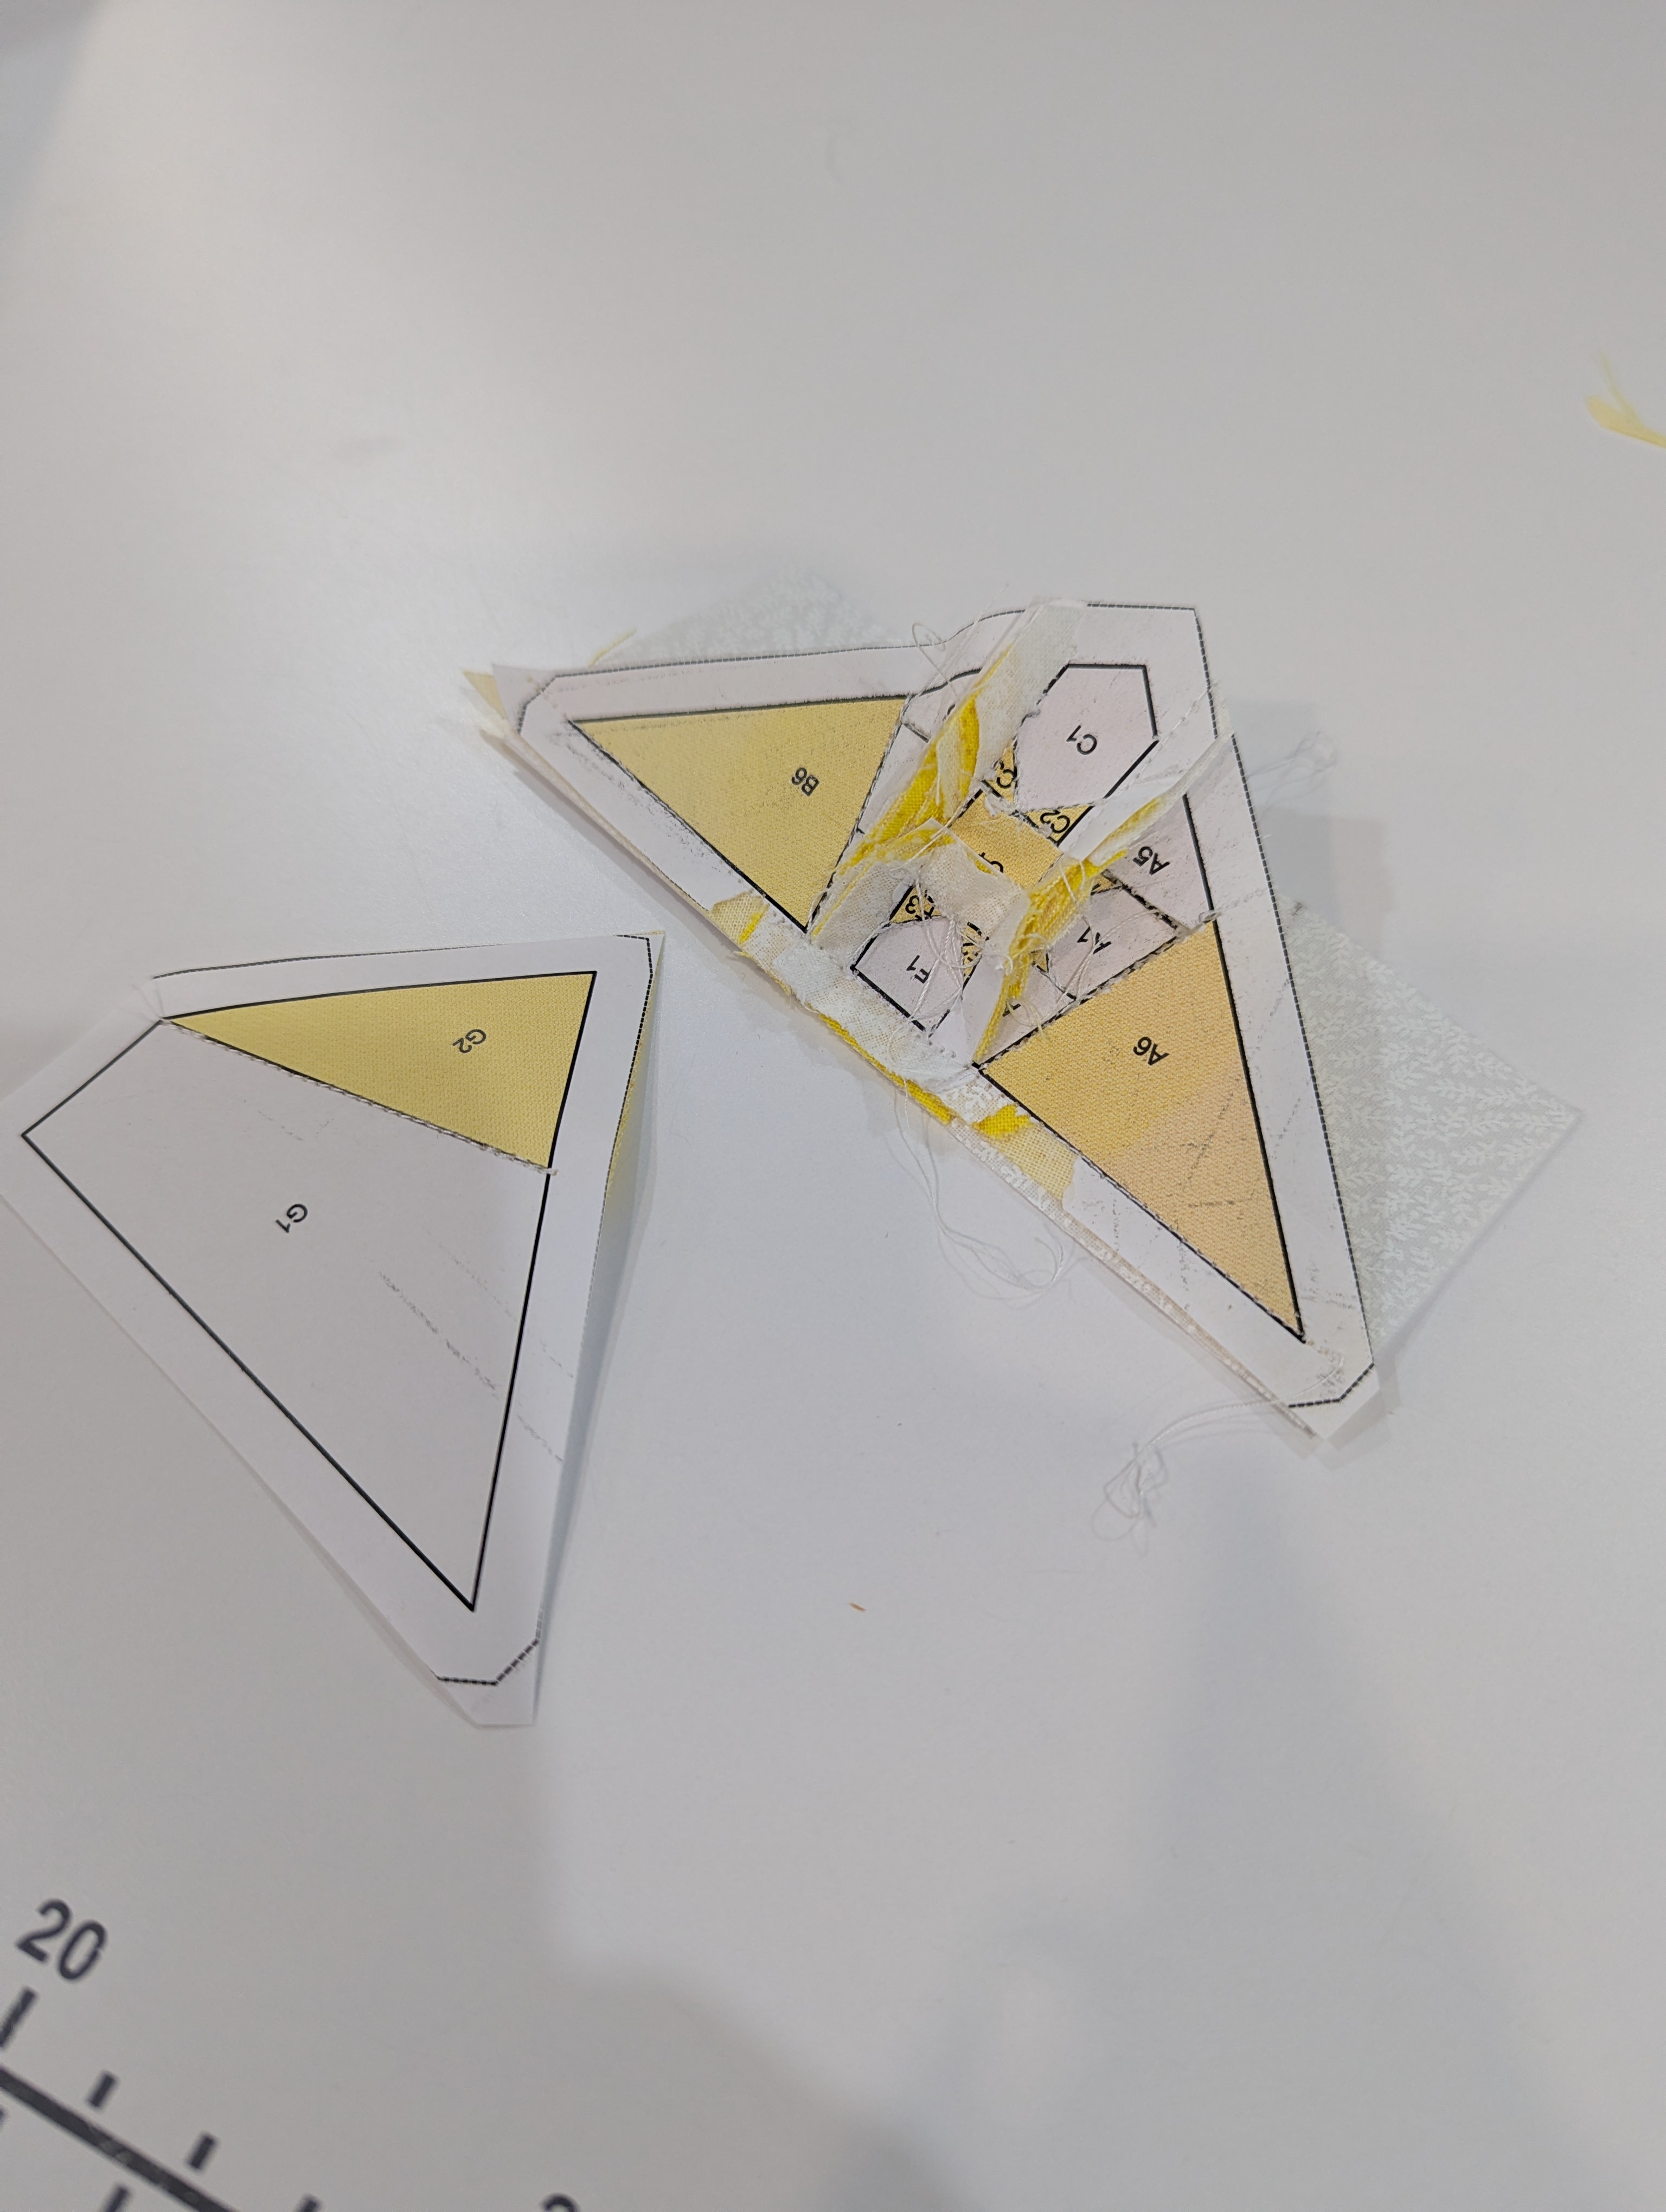
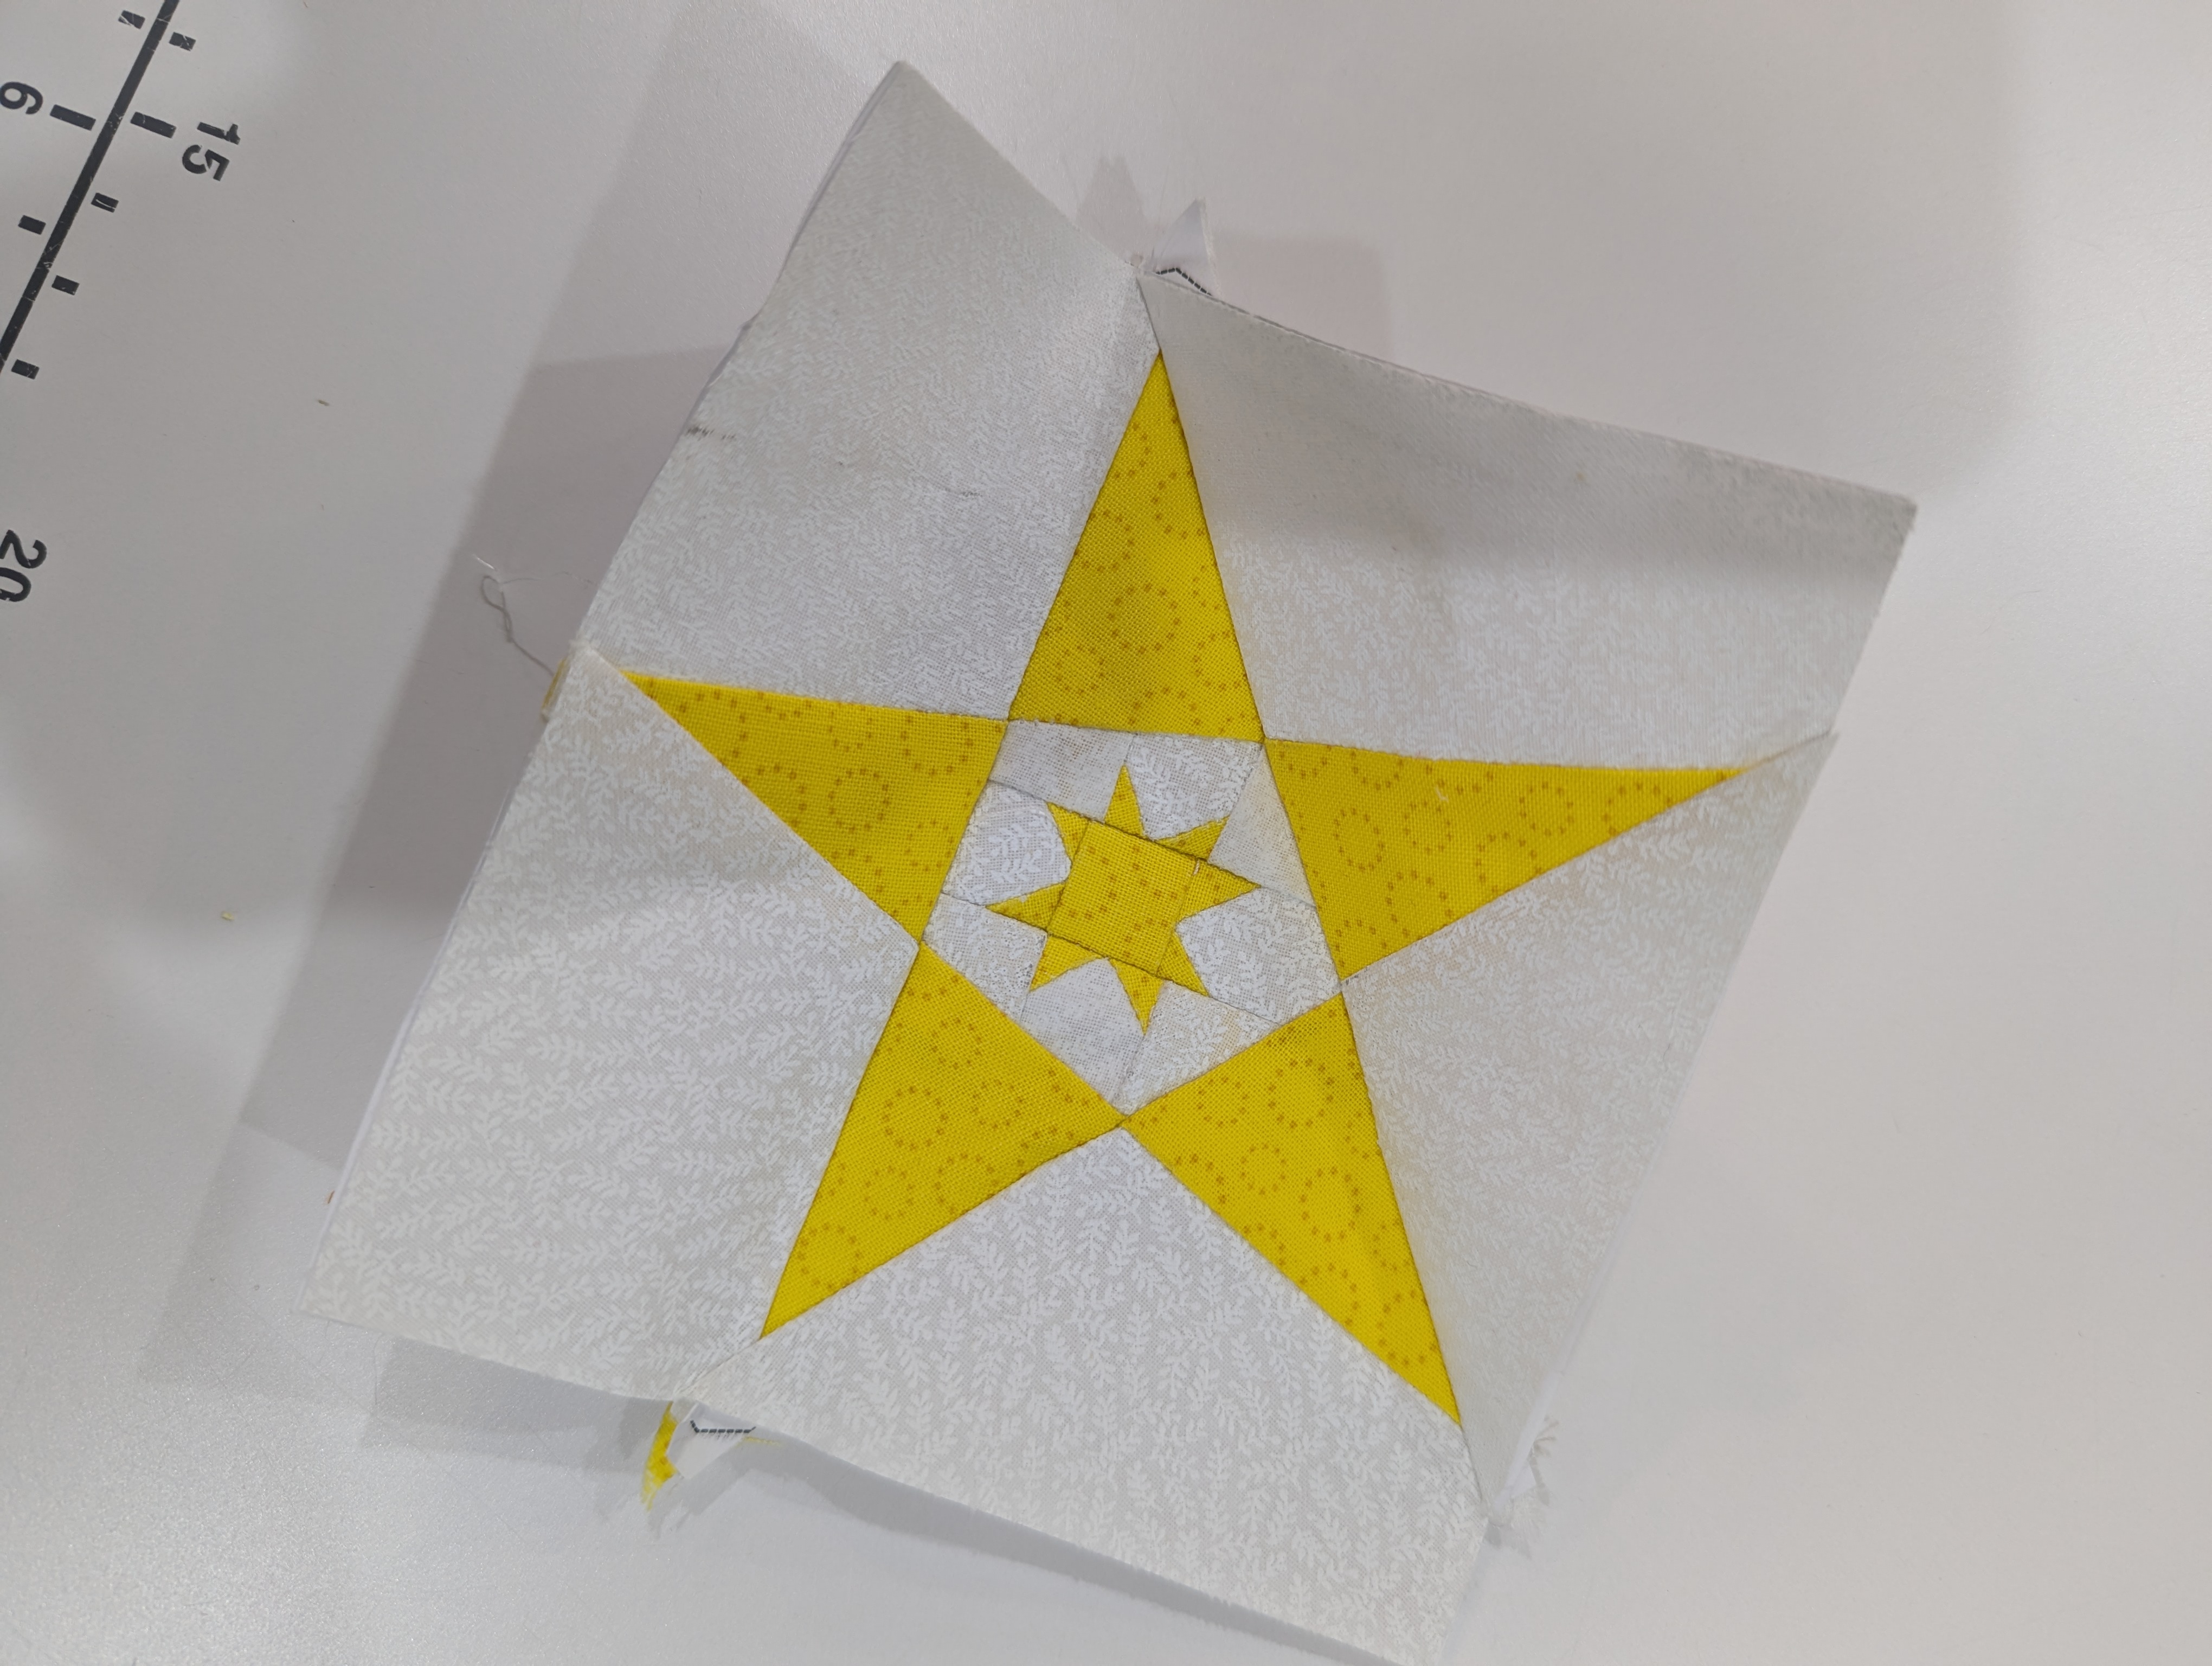
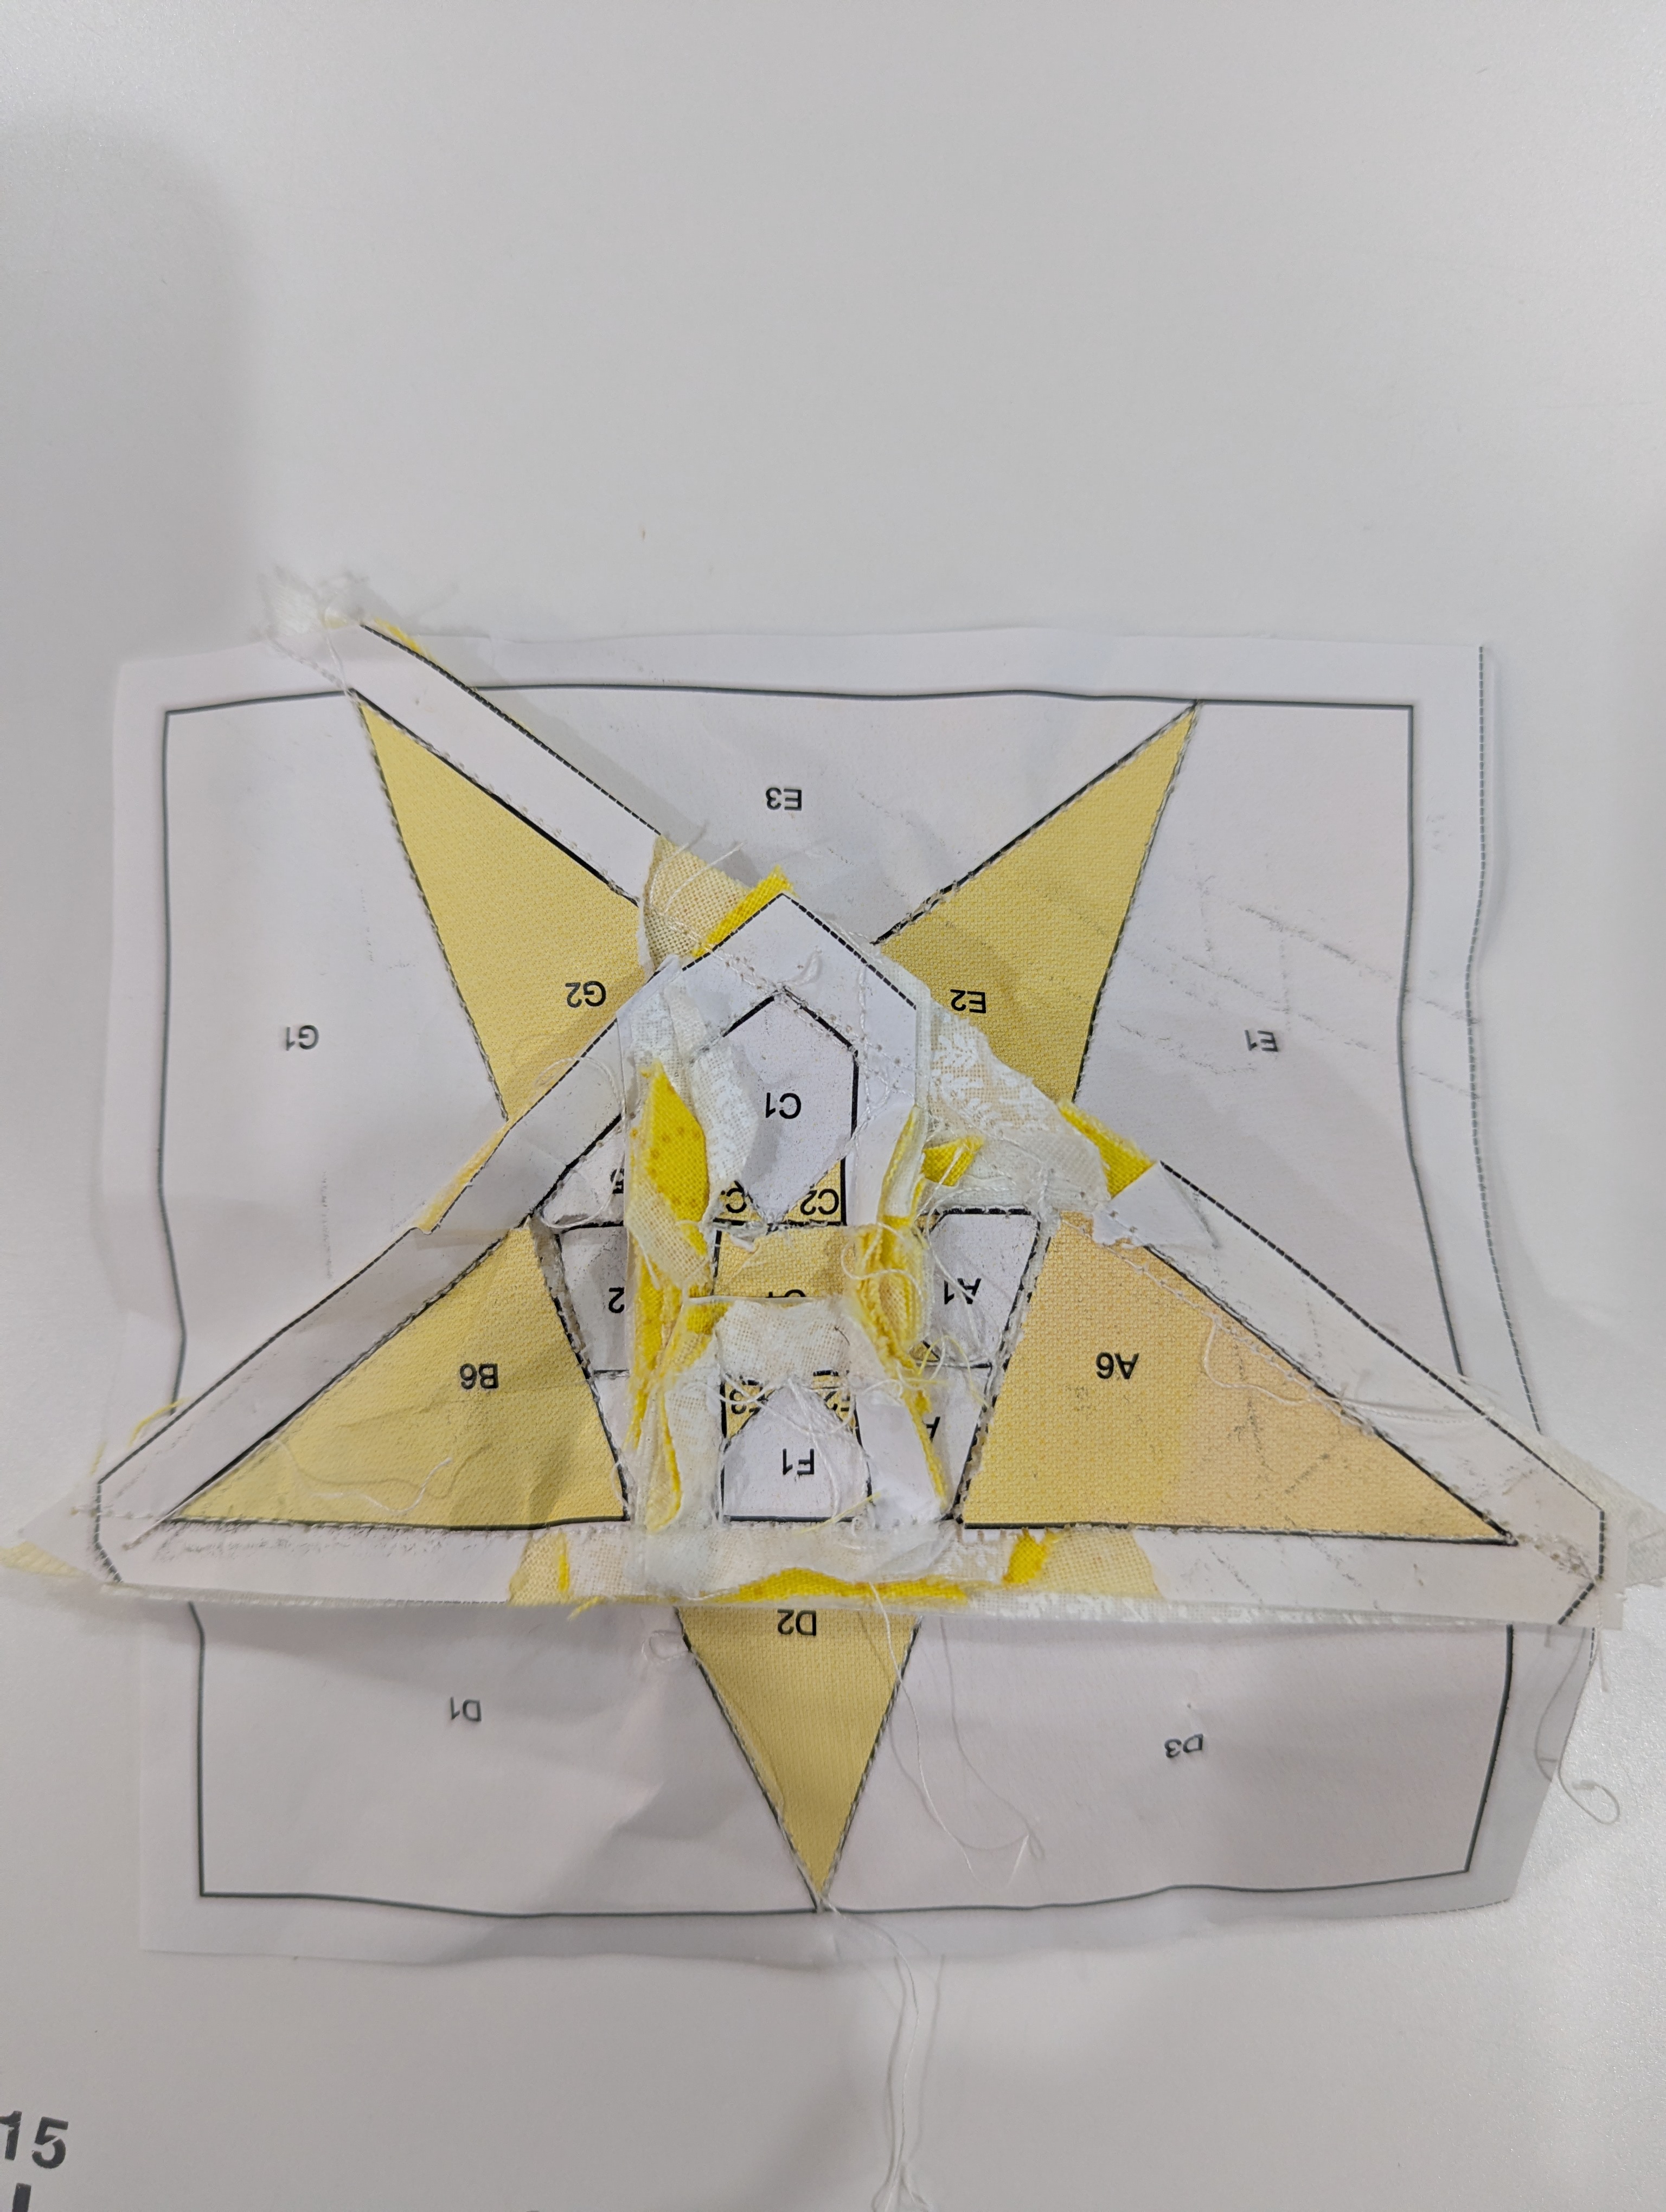
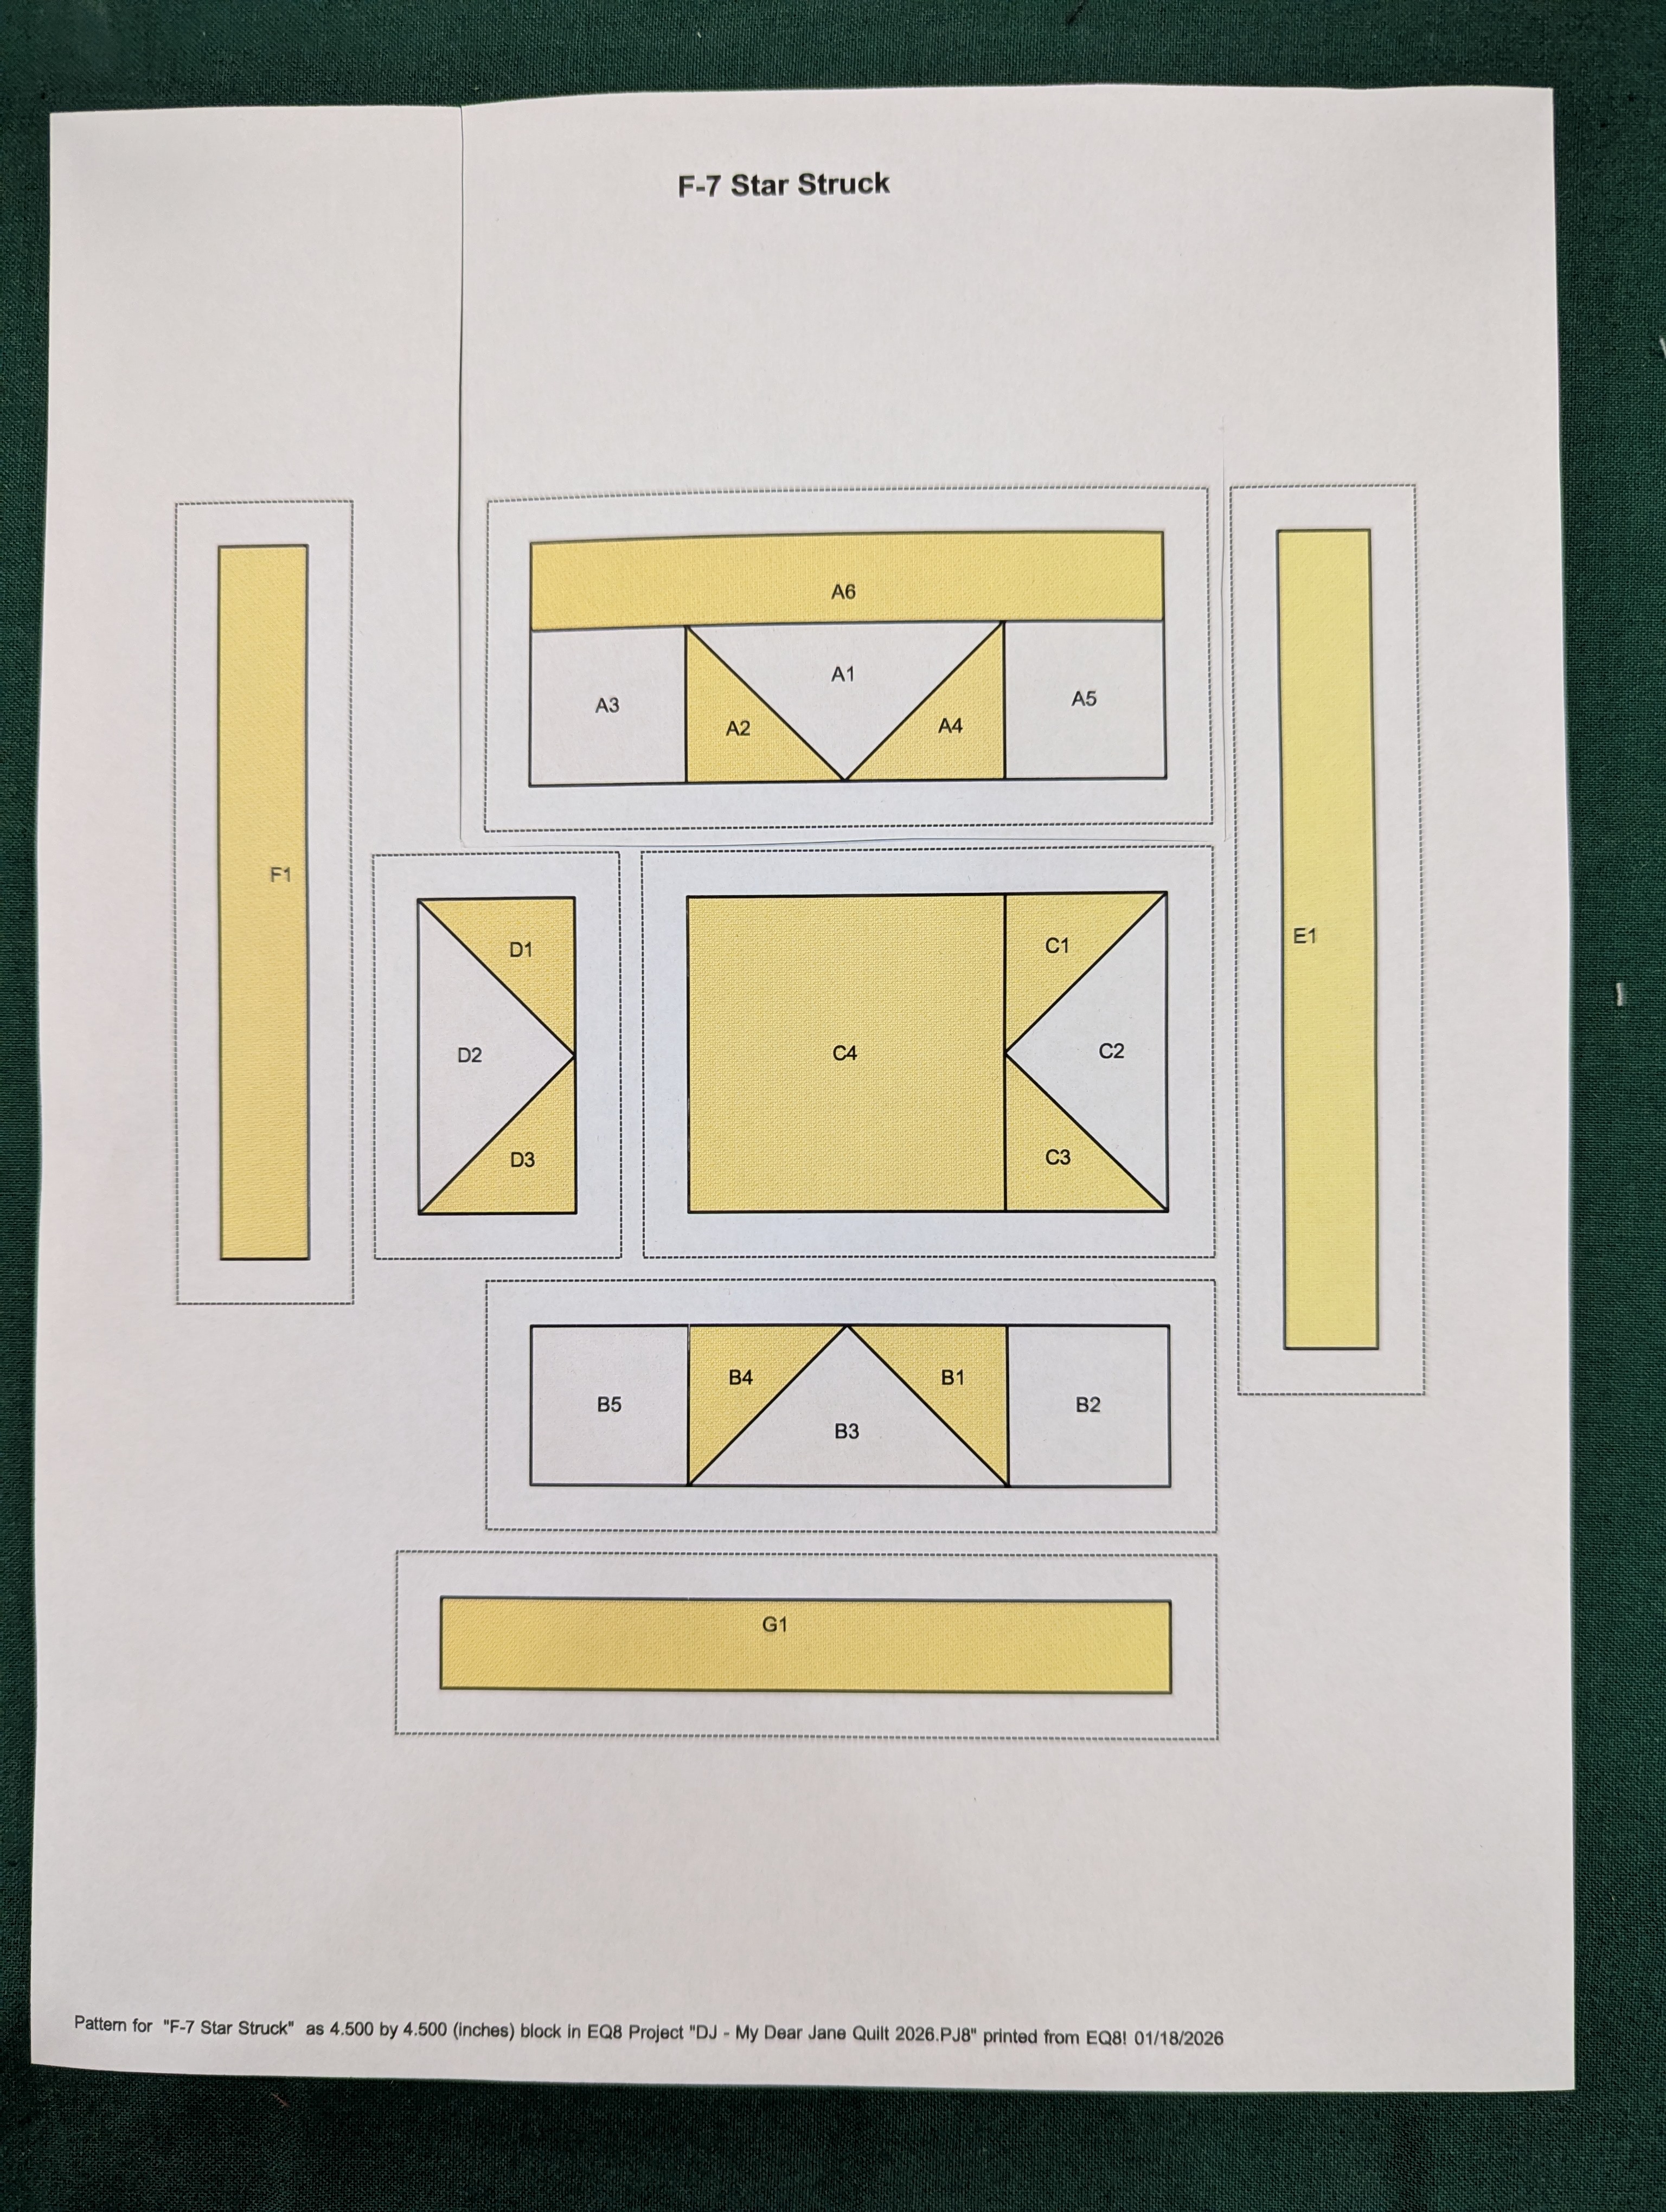
  • I played the puzzle game well, figuring out the order in which to connect the many pieces of this FPP block. Several were only one piece, but fit together in a similar manner to hand piecing using templates.
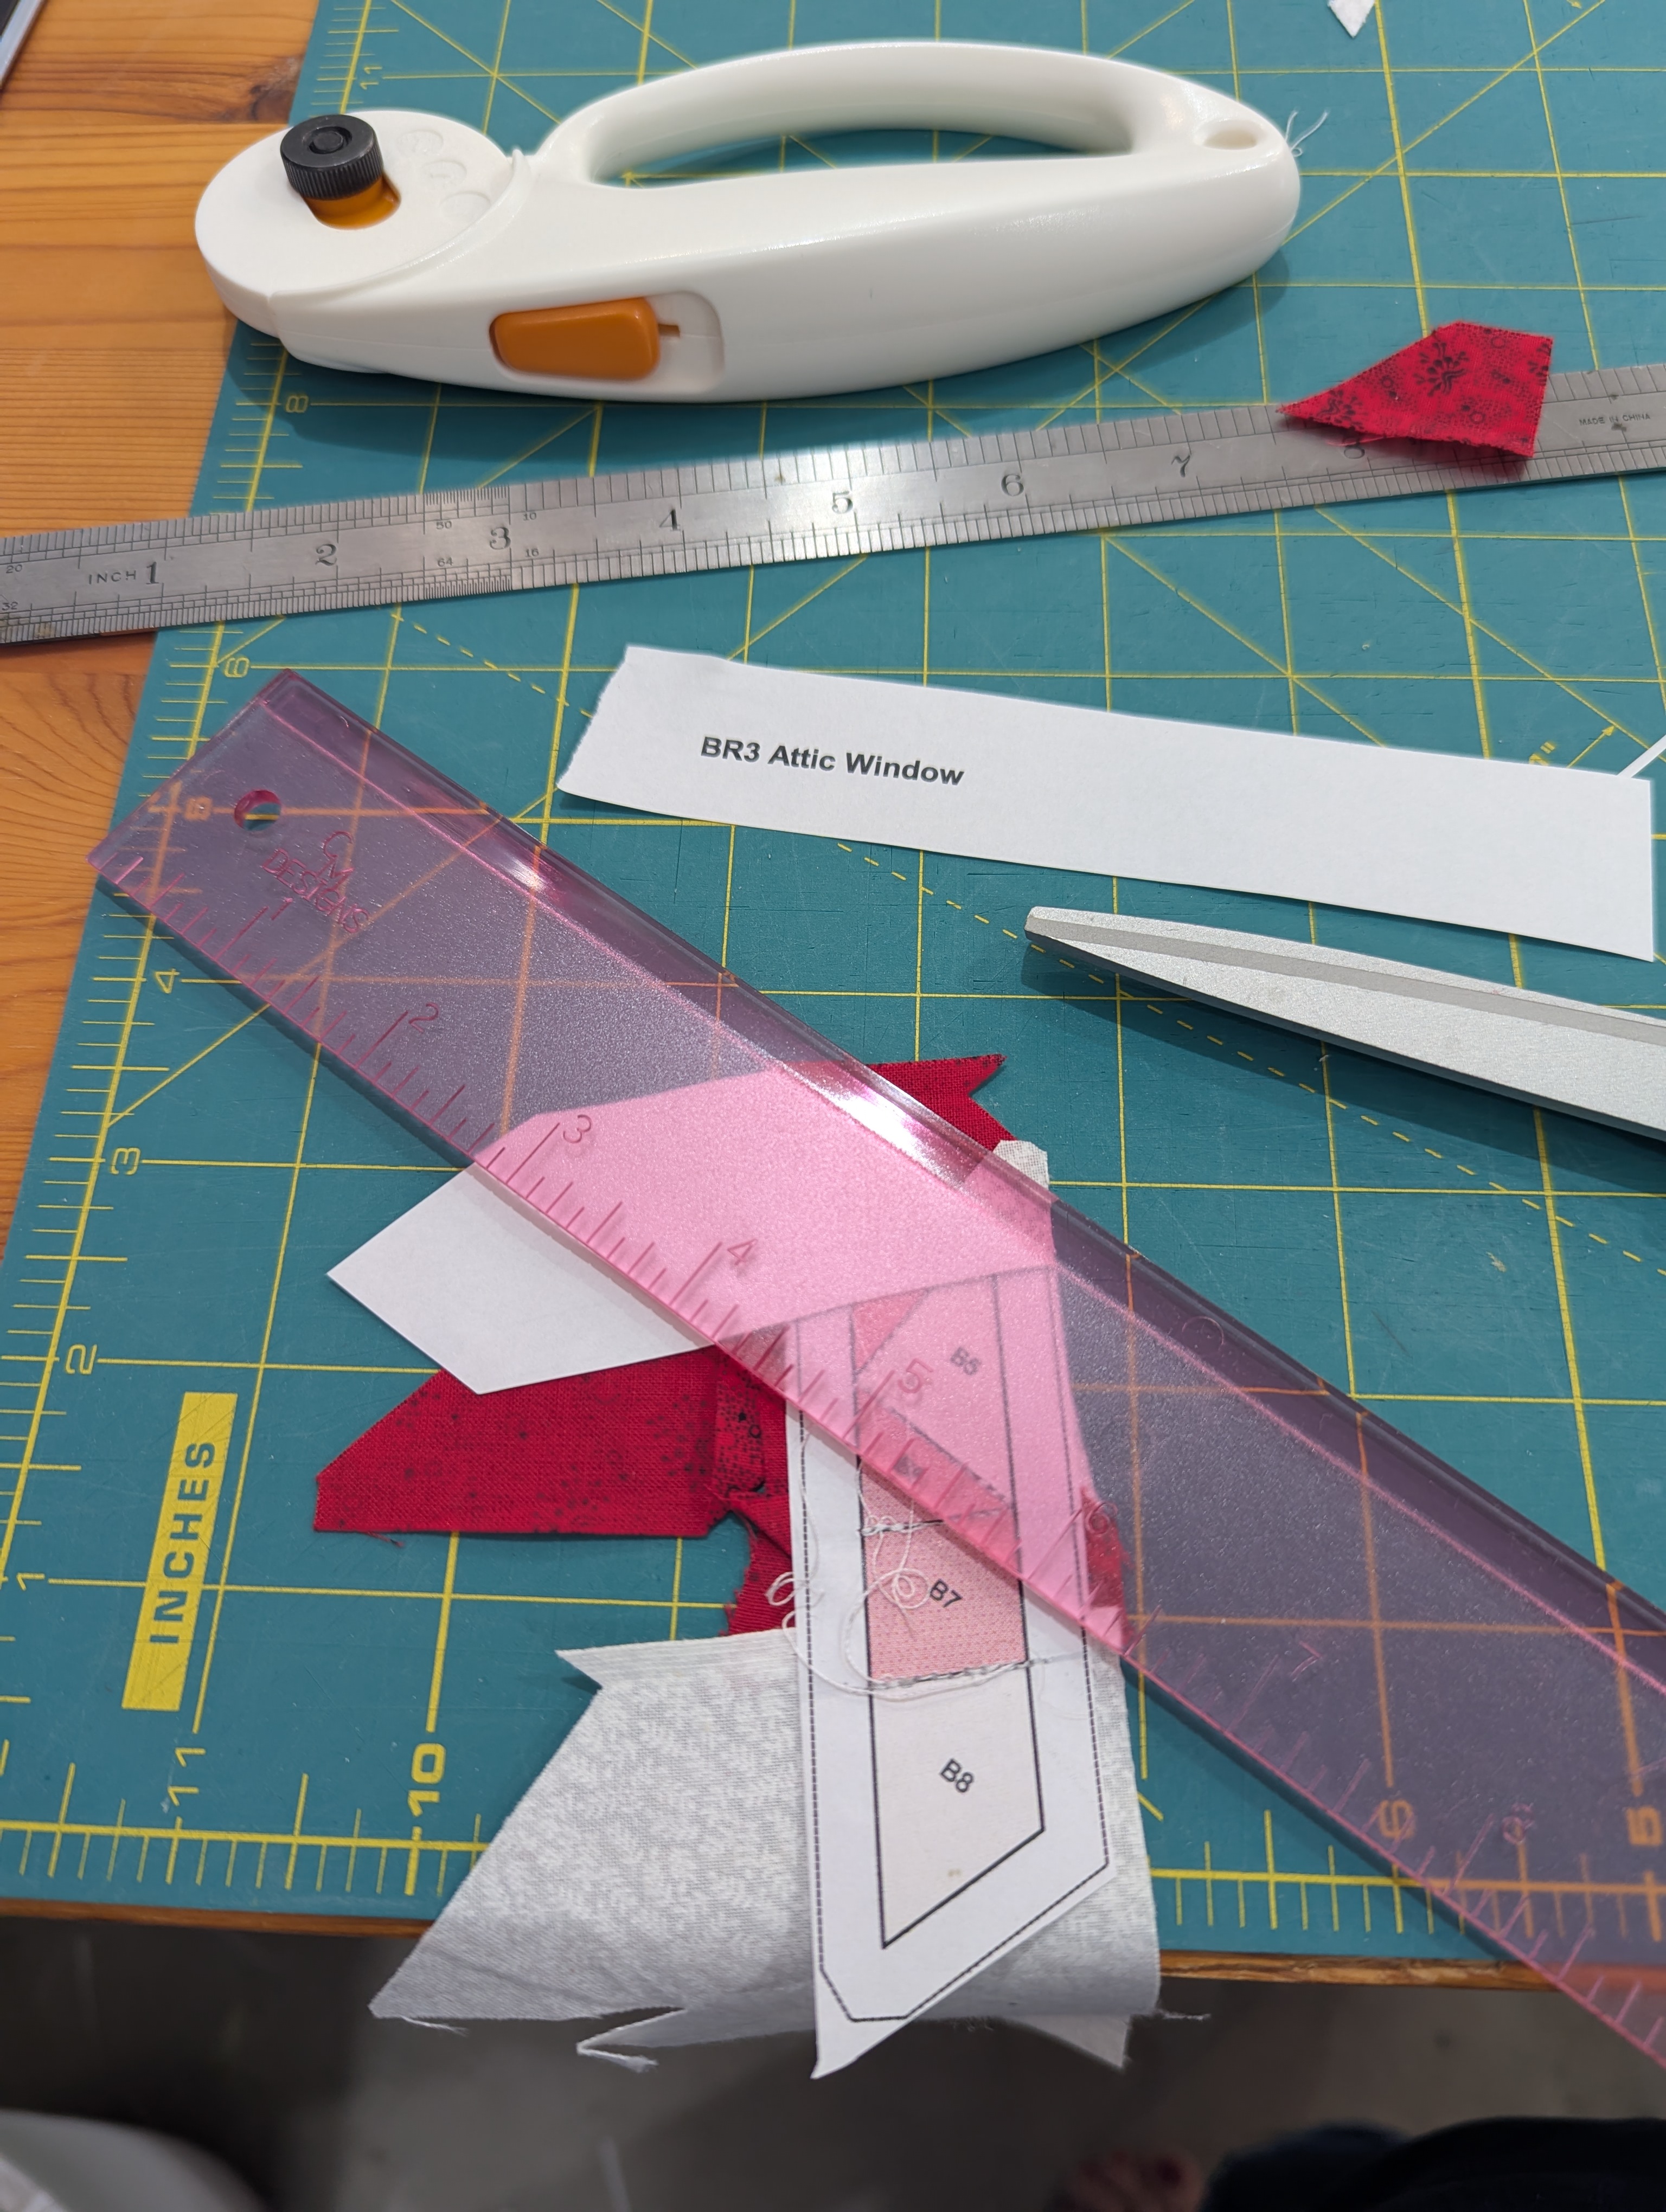
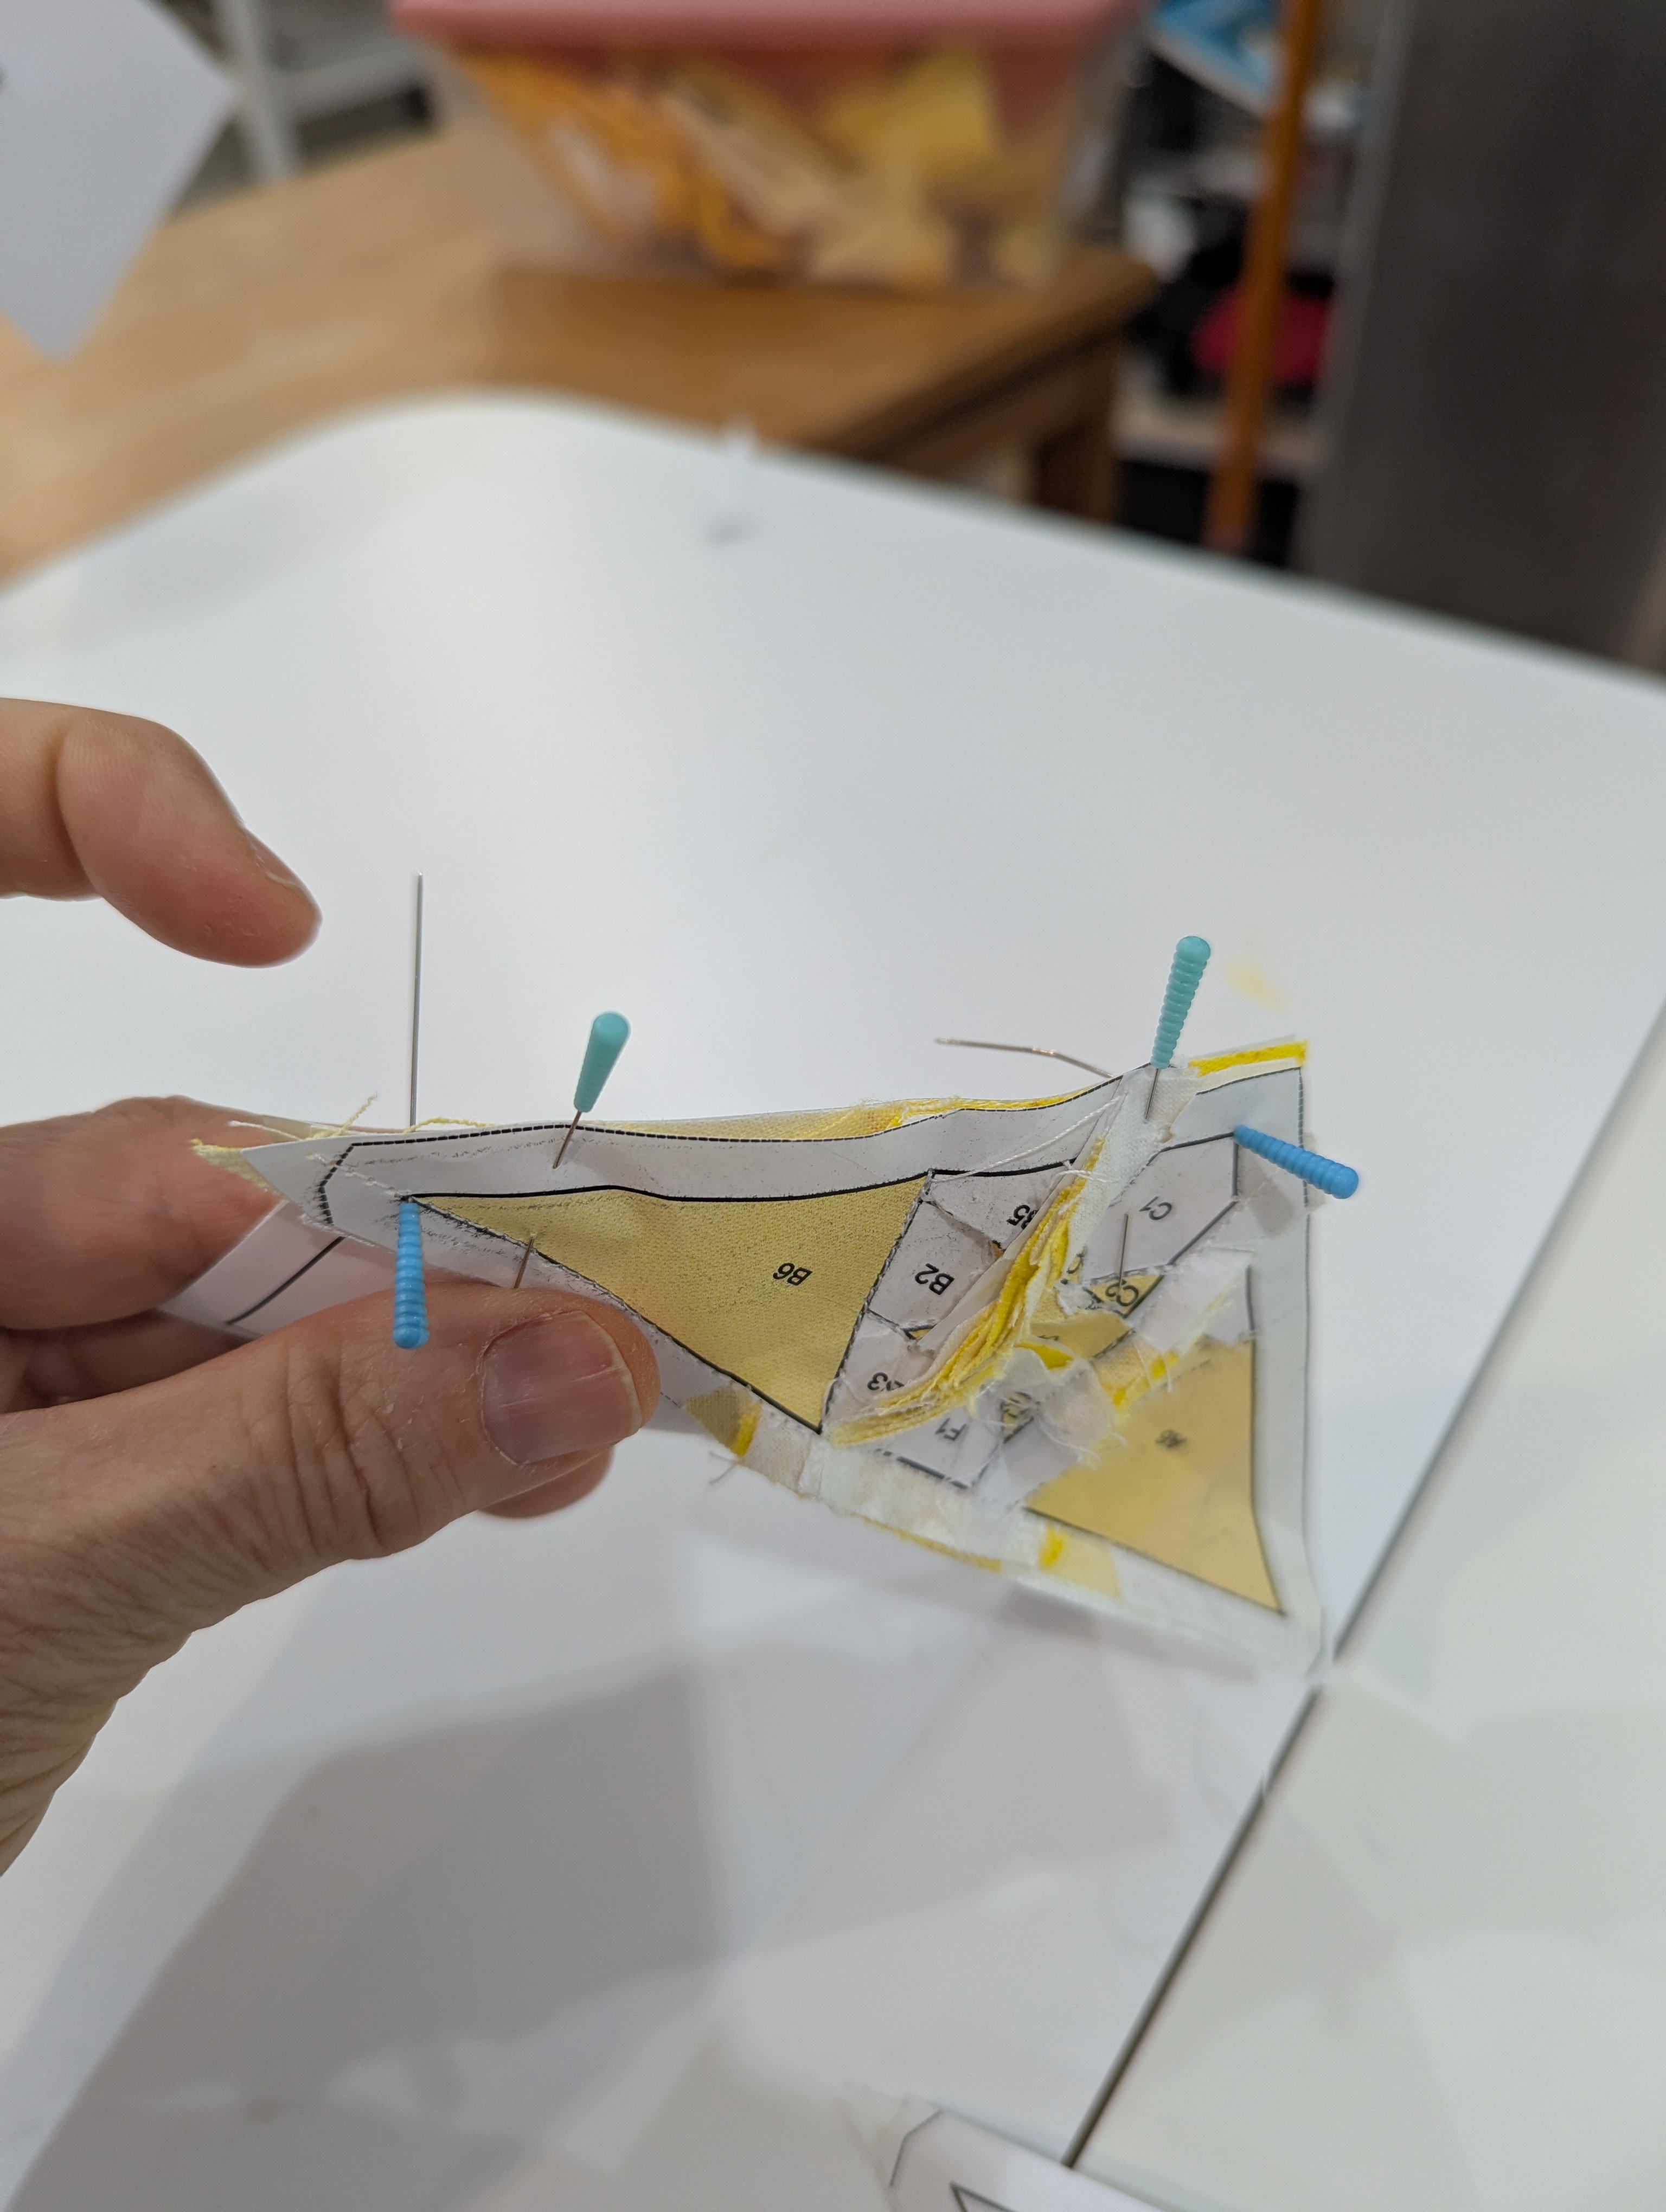
  • I finally received my Add-a-quarter-plus ruler. It is 6″ long, and has a tapered edge that is perfect for folding back the paper each time.
  • The light board has really helped placing small pieces.
  • I love the joyous colour, on this snow day!

Challenges:

  • I wish that EQ8 did a layout for FPP that showed which edge of each piece joined to the next. The only clue is the orientation of the letters on the printed paper. So there was a lot of trial-and-error to ensure I sewed the correct seams.
  • I’m now inspired to read the background on these blocks, but The Dear Jane book is VERY expensive on Amazon. The only reasonably-priced second-hand copy is sitting in India, and they won’t ship to Canada.
  • Brenda Manges Papadakis, the author, has copies on her website: http://dearjane.com/shop/, but they won’t ship to Canada either. So I’ve contacted a “snowbird” friend, and asked if she will order it for me,. She could then bring it home in the spring! Fingers crossed!

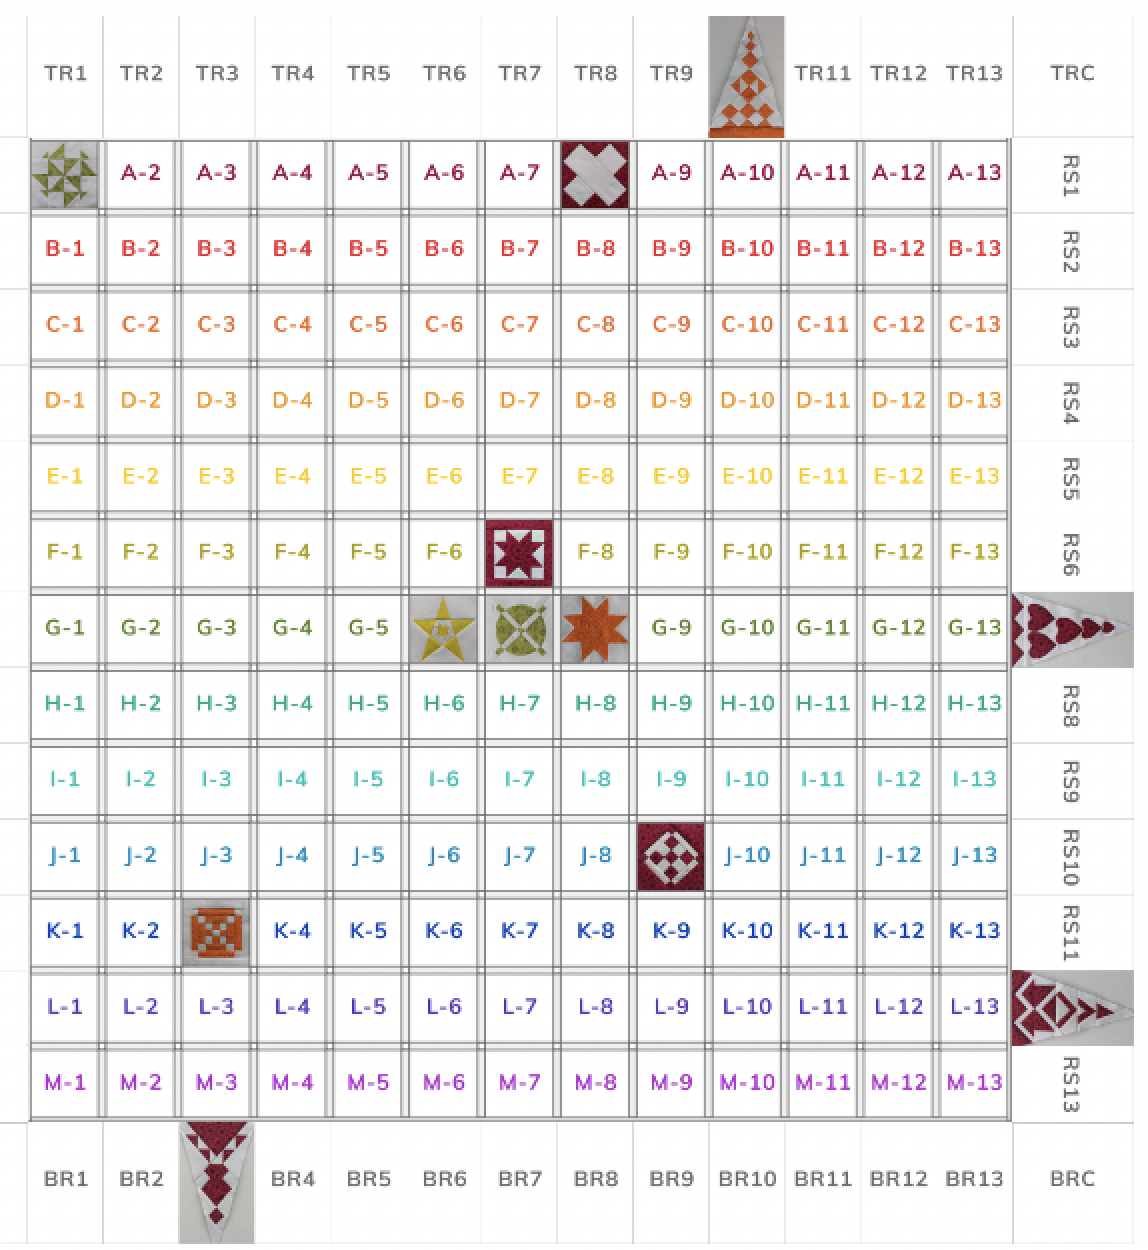
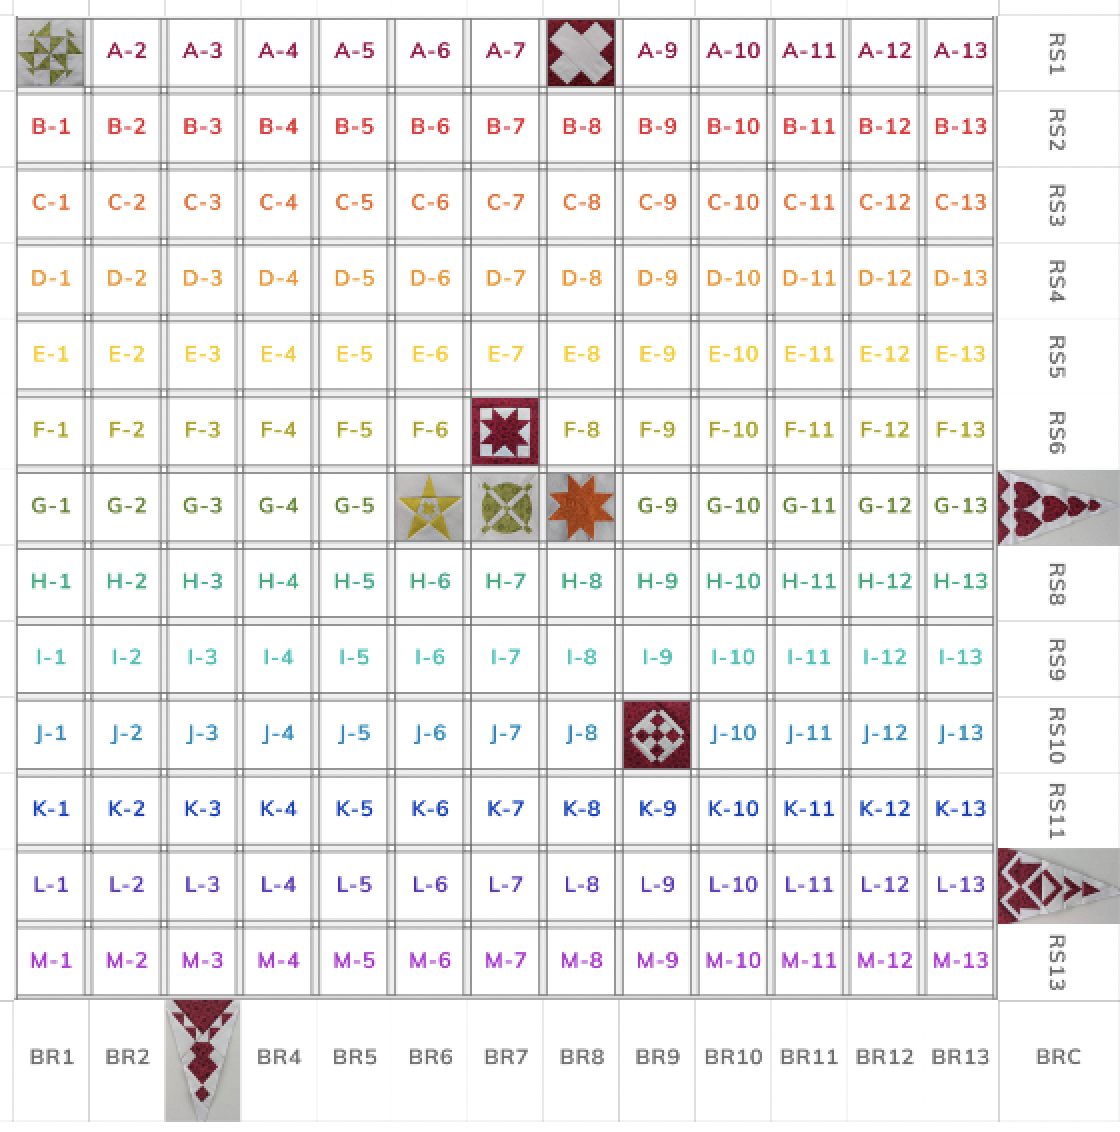
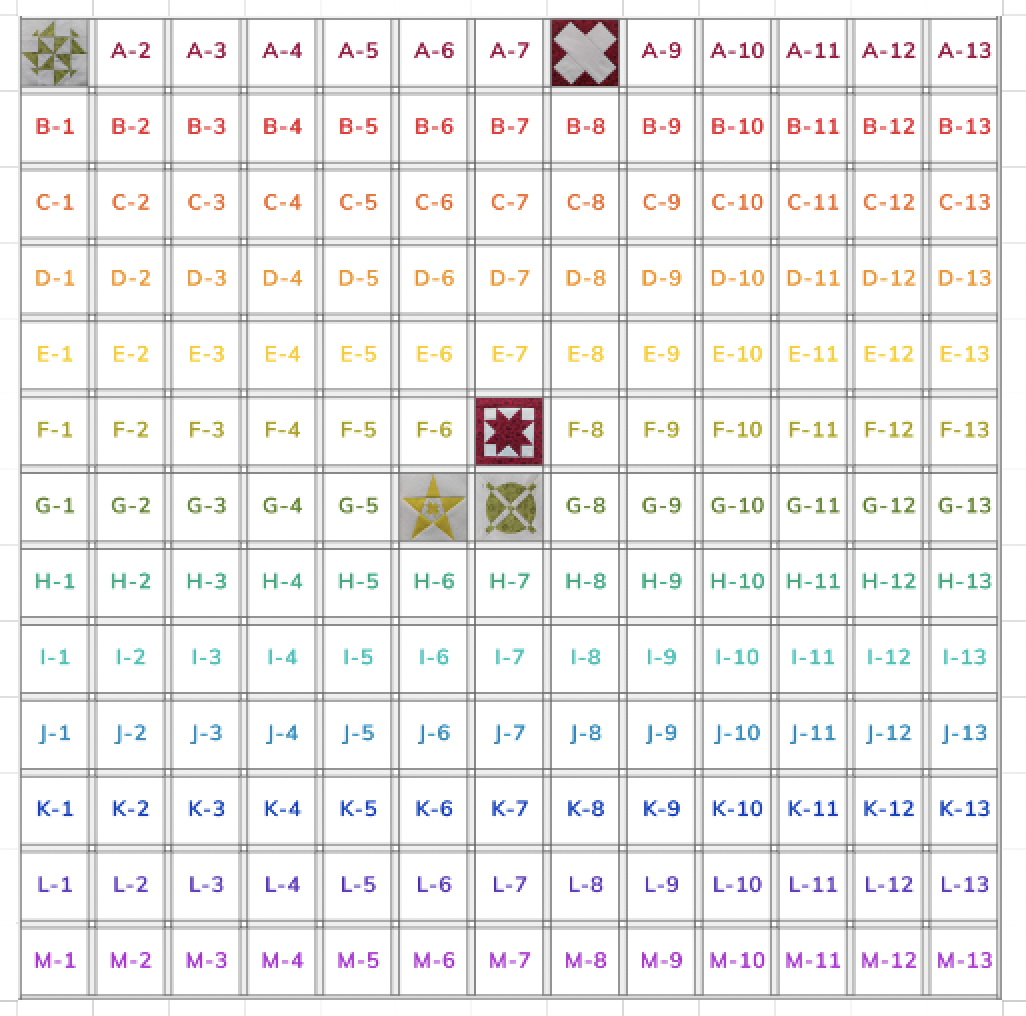
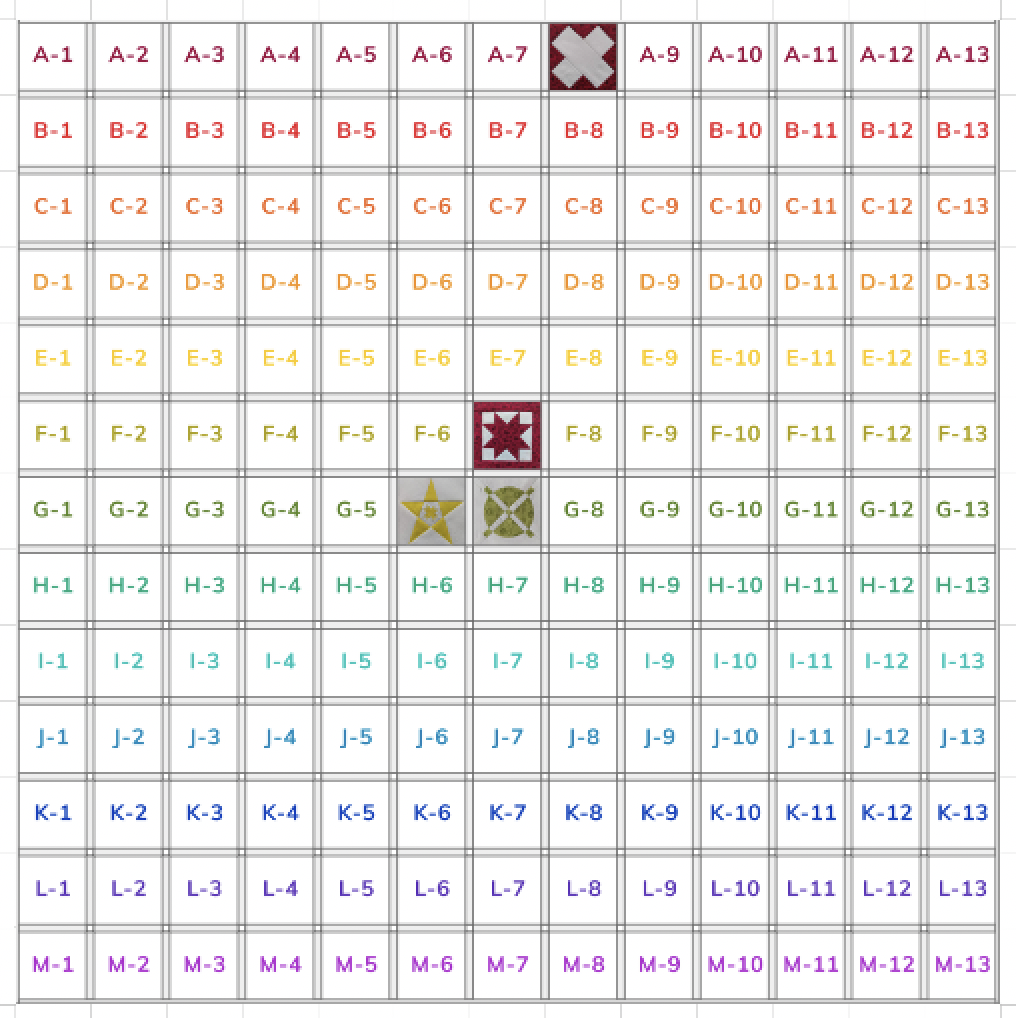
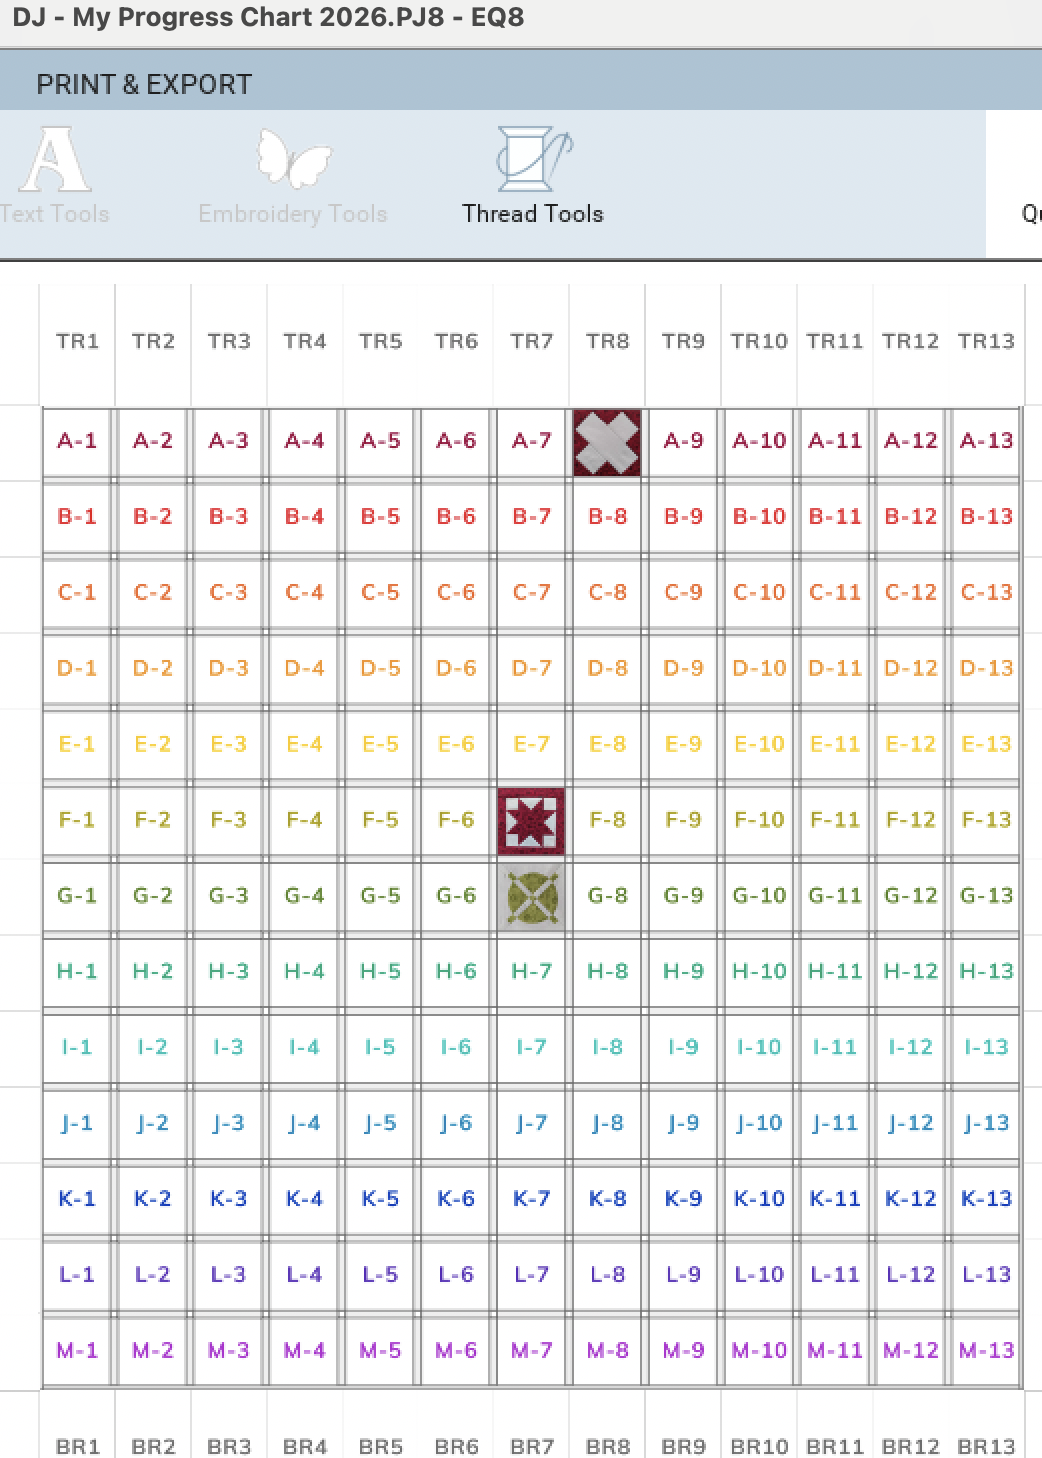
Here’s what the quilt now looks like with a dozen blocks:

Dear Jane: G-8 – Justin’s Comet

Successes:

  • I pressed the star seams “open”, so that I had a clean corner into which I could set the white triangles and squares.
  • I made a conversion chart for all the measurements from 1/16″ to 15/16″, so that I could estimate the cutting size when using my rotary cutter and ruler.
  • I pressed the all the perimeter triangles and squares towards the “dark” star, so there is only a tiny bit at the end of the point where the orange might shadow through the white.

Challenges:

  • The star points are all on the bias, so they have a tendency to stretch. When first pieced together, they made a “cup”, and required pressing to lay flat.
  • There are many seams coming together in the middle, but with all seams pressed open, it helped even out the thickness
  • This is a very strong colour, sitting to the right of the centre block. I will have to plan to balance this out as I construct the other blocks near the centre.

Here’s what the quilt looks like so far:

This traditional block features Y-seams, the bane of many quilters. I watched a few YouTube videos, but they didn’t really add anything that I hadn’t already tried.

Dear Jane: RS – 7 – Fedelia’s Hearts

I’m not yet tired of red, so here’s another interesting border block.

This is needle-turn applique, using Wonderfil’s Invisifil thread in grey.

Successes:

  • It is done

Challenges:

  • I have not much experience with needle-turn applique, and it shows.
  • I first attempted it “naked”, just turning the fabric edge under. And it ended by with very jagged curves.
  • So I reprinted my templates on card stock, and tried two more techniques:
    • I first tried a technique with aluminum foil, and could not secure the template, fabric, and foil without sliding
    • I then used just the cardstock template, and carefully ironed the edges over
  • You can see that the hearts are a little better as they increase in size, but they are still not what I would like to see
  • So, my next applique will use a technique I learned from Liz Thompson at Quilt Canada 2024 in Edmonton:
    • Using water-soluble thread, sew your applique piece to a scrap of fabric or interfacing
    • Trim edges, and then cut a slit in the waste fabric
    • Turn inside out, and carefully press
    • Gently place your piece in water, and separate your applique piece from the waste fabric
    • Press to dry
    • Hand-stitch

Here’s the quilt, with nine blocks:

Dear Jane: RS – 12 – Linda’s Church in the Valley

So I’m on a roll with border blocks, FPP and the colour red. I suppose I will want to make a few of the solid triangles as well. I don’t want to exhaust my supply of this red print before I set aside some to help with balance. These solid triangles will sit between these lovely border blocks around the perimeter.

Successes:

  • Again, I love the precision of the Foundation Paper Piecing
  • I am using a lot of tiny scraps, and keeping my background consistent

Challenges:

  • I don’t know how to predict how much fabric I might use. So I’m researching, and may consider pre-cutting oversized blocks prior to doing the FPP. There are great videos by Canary Quilts, that helped me get started with EQ8 and the Dear Jane quilt. She measures each area, and pre-cuts, so I might give that a go next time.

Here’s the quilt with eight blocks so far:

Dear Jane: BR3 – Attic Window

Just to shake things up, I was inspired to begin one of the border blocks. These triangle blocks will alternate with solid blocks, to create a border around the entire quilt. The solid triangle blocks will have a shallow semi-circle on the outer edge, creating the signature “ice cream cone” look. 

This design lent itself to Foundation Paper Piecing, so I printed the pattern, and started in this morning. I guess I wasn’t awake yet, because the first five or six seams each had to be ripped out and redone. I didn’t tear any of the paper, thankfully, so I was able to cleanly resew each seam. I’m not yet in the rhythm of placing the first piece good-side-down, and all the rest good-side-up.  Of perhaps it’s the fascinating audiobook I’m listening to that has me distracted!

My latest purchase is an “add-a-quarter” ruler, and this one is 12″ long. Unlike the 6″ “add-a-quarter-plus” ruler, which I have misplaced, this one is full thickness and much heavier. It’s great for cutting the quarter-inch seam allowance, but useless to fold back the paper. I’m finding my metal ruler works well for this, though I dislike having to change tools. I have a replacement 6″ ruler on order, and look forward to its arrival.

Successes:

  • I love the precision of the FPP technique
  • I am getting better at fabric placement, so my waste is getting to be less
  • My tiny tweezers (or forceps) that I purchased from Lee Valley are perfect for removing the tiny bits of paper. At $7.50 CAD for a set of three, they are an inexpensive addition to my toolkit.
  • I am going to completely use up a colour, before moving on to the next. So expect at least two more red and white blocks

Challenges:

  • I need a mnemonic or a song to remind me that the first piece of fabric faces down, and the next and following pieces ALL need to be “pretty side up”
  • The tiny stitches that make paper removal so much easier, make seam-ripping much more difficult.

Here’s the new look of the quilt, with one border triangle added:

Dear Jane: K-9 – Scout’s Honor

This looked like a block that would lend itself to traditional piecing, and it did!

Successes:

  • Straightforward sewing, with seams that nested beautifully
  • Finished just a few threads smaller than 5″, so will sit nicely with the sashing in the final quilt

Challenges:

  • All the measurements in EQ8 are in inches with decimals. I think I need to print myself a table of measurement equivalents down to 1/16″, so that I can more accurately cut.
  • I think I need to look for my next red block to be placed in the lower left quadrant, to balance this strong colour.
  • A friend who visited today said “You really aren’t going to make much of an impact on your stash with such tiny blocks!”

Here’s the quilt with six blocks placed:

Dear Jane: A-1 – Pinwheel Gone Awry

Pinwheel Gone Awry is the first block I looked at in EQ8, and it is the one that wavered between choosing the rotary cutting option and the Foundation Paper Piecing option. I chose FPP, but now I wonder if I perhaps should have done the other.


I thought that I could pre-cut over-sized blocks to save fabric. I could then position them to stitch as usual in the Foundation Paper Piecing process. It didn’t really work well, and I don’t have the match I had hoped for on the corners. I think that this was mostly due to the thickness of seams and paper when sewing.

Successes:

  • I am getting faster at the FPP process, with cutting station, sewing machine, and pressing station all in a “U” shape, minimizing movement.

Challenges:

  • The thickness of intersecting seams and paper are causing my presser foot to slide, and making my seams inaccurate
  • I struggled to position the triangles. Often I had to tear out to ensure that I had a seam allowance. I really shouldn’t have worried, since all the triangles are eventually within seams, so the quarter-inch isn’t crucial.

Next Steps:

  • I am going to try one of the future blocks by rotary cutting oversized pieces, then sewing and cutting down to size. I think that it would have been much better for this block in particular.

Here’s the quilt, with five squares placed:

Dear Jane: G-6 – Papa’s Star

So much fun completing this block! It’s the third week of the Dear Jane Stitch Along group on Facebook, and there is so much variety in the blocks posted by the members. Very inspiring!

This is a perfect block for FPP. But I recognize that I am possibly breaking copyright by posting images of the pages from EQ8, so you won’t see any from this point forward. Here’s a gallery of some of the process:


FPP generates a lot of paper bits, and small scraps of fabric. My vacuum cleaner is going to get a workout!

You can see where I use two pins in the same location. One pin stabs through the intersections of both pieces. The second pin then secures it. I find if I stab, then secure with the same pin, it shifts. So this process gets a better match. I also find that my Magic Pins (Fine) work well for the stabbing process. But I need the Extra Fine size to slide easily and lay flat for sewing.

Successes:

  • This is as precise as I think I could get with those tiny quarter-inch triangles
  • I was able to use fine tweezers to get most of the paper out. And then I used “The World’s Kindest Nail Brush” from Lee Valley to remove the last bits.
  • My investment in the EQ8 software has already paid off with these four blocks completed. I believe I will be returning to this add-on to make larger versions of this block for other quilts.

Challenges:

  • I am using regular printer paper, so sometimes I stretch the seams as I remove this thicker paper. (I need to find my stack of Carol Doak’s Foundation paper to print the next blocks….. or order more!)
  • With the tiny pieces, there are a huge number of seam allowances on the back, necessitating some careful grading and trimming
  • Also due to the thickness, it is challenging to keep the presser foot in line. I had to re-sew a couple of seams where the line was off.
  • I chose my strongest “yellow” for this block, but wish I had selected one with even more contrast, to show off that tiny Ohio Star.

Here’s what the quilt looks like now, with G-6 added:

Dear Jane: F-7 – Star Struck

This block confirmed my decision to favour Foundation Paper Piecing. Except for the last three borders, it was all constructed using a printout from EQ8. 

I chose to repeat the use of red, since one of my goals is to use up my stash of fabric. And I like a quilt where the eye can jump from one focus colour to the next.

In the Dear Jane Stitch Along, the YouTube video by @JayneStitches, she handpieces this block. I think it would be a perfect block for this technique as well. If I were travelling, I would certainly consider hand-piecing while on a plane or bus.

Successes:

  • Nice crisp points due to the FPP technique
  • Lovely contrast of the red against the white background

Challenges:

  • Again, not many challenges on this one

And here’s what it looks like in my quilt so far:

Dear Jane: Block G-7 – Indianapolis

Block #2 for me is the first block in the Dear Jane Stitch Along, in Facebook. The plan in this group is to do one block per week, for three years. I plan to catch up with the group, and follow along, while completing other blocks to fill out my weeks. This is the centre block of the quilt, and anchors a nineteenth-century version of “Trip Around the World”. I don’t know if I will stick to this colour plan, but I found this lovely green, to remind me of spring!

The videos created by @JayneStitches are detailed and easy-to-follow, and allowed me to confidently tackle this complex block. And the printed instructions were a perfect complement to the files from EQ8. Here are the instructions with my centre circle in process:

I followed the Facebook group instructions for the first two steps, but then used the Foundation Paper Piecing page from EQ8 to do the cross strips:

I had a lot of fun with this one!

Successes:

  • Combining applique with FPP worked very well
  • Use of Best Press to fix edges made the needle-turn applique easy and precise
  • I can put my blocks away, and still see how the quilt is going, through the use of the Progress Chart in EQ8

Challenges:

  • There were remarkably few challenges with this block, despite my trepidation!

And here’s what the quilt looks like so far: